VEHICLE DOSSIER
DESIGNATION: PACHYDERM
| BASE: | 2017 GMC Canyon |
| OPERATORS: | Craig & Teryn Whitton |
| STATUS: | Active (2017-2025) |
KEY SPECS
| Protection: | ARB Summit Bar, Warn VR8000 |
| Rack: | Custom aluminum (~90 lbs) |
| Canopy: | Aluminum extrusion frame |
| Power: | Dual battery, 600W inverter |
| Storage: | Drawer unit, fridge slide |
Introduction
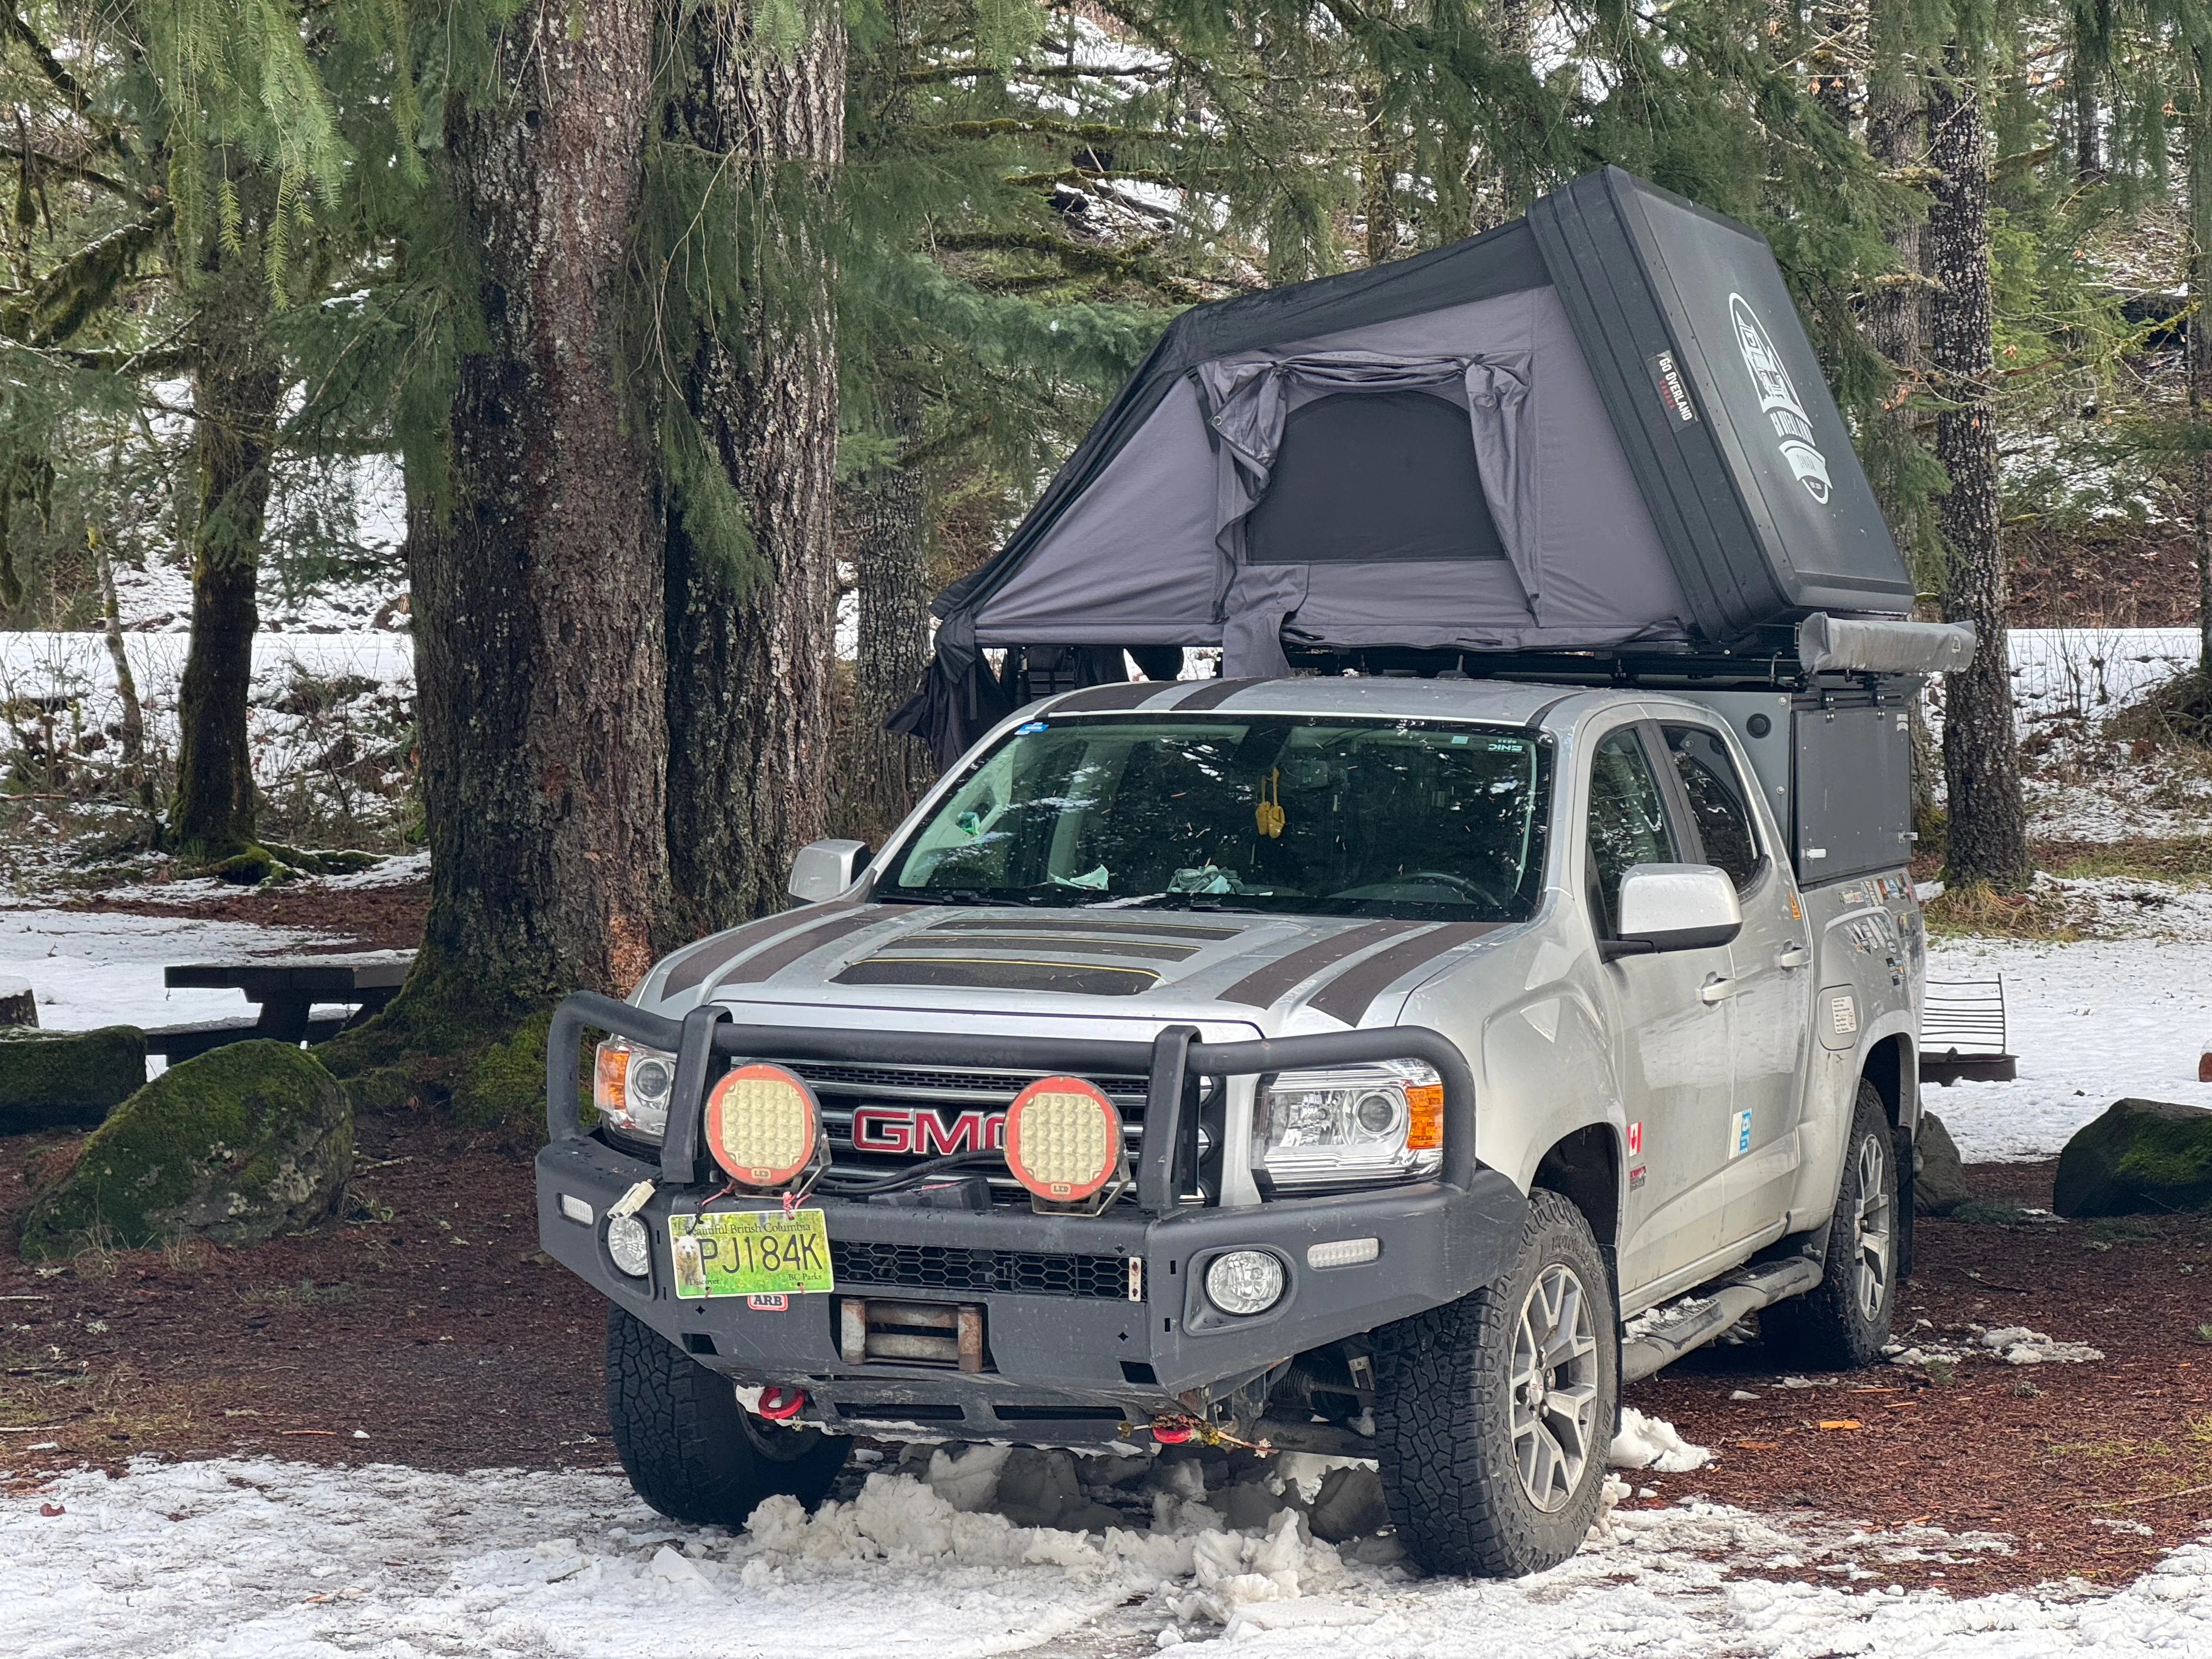
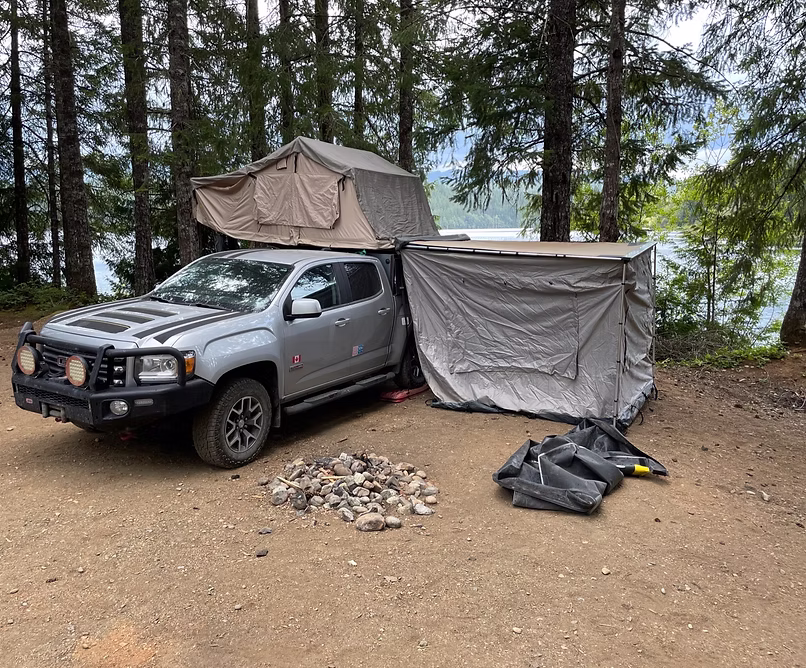
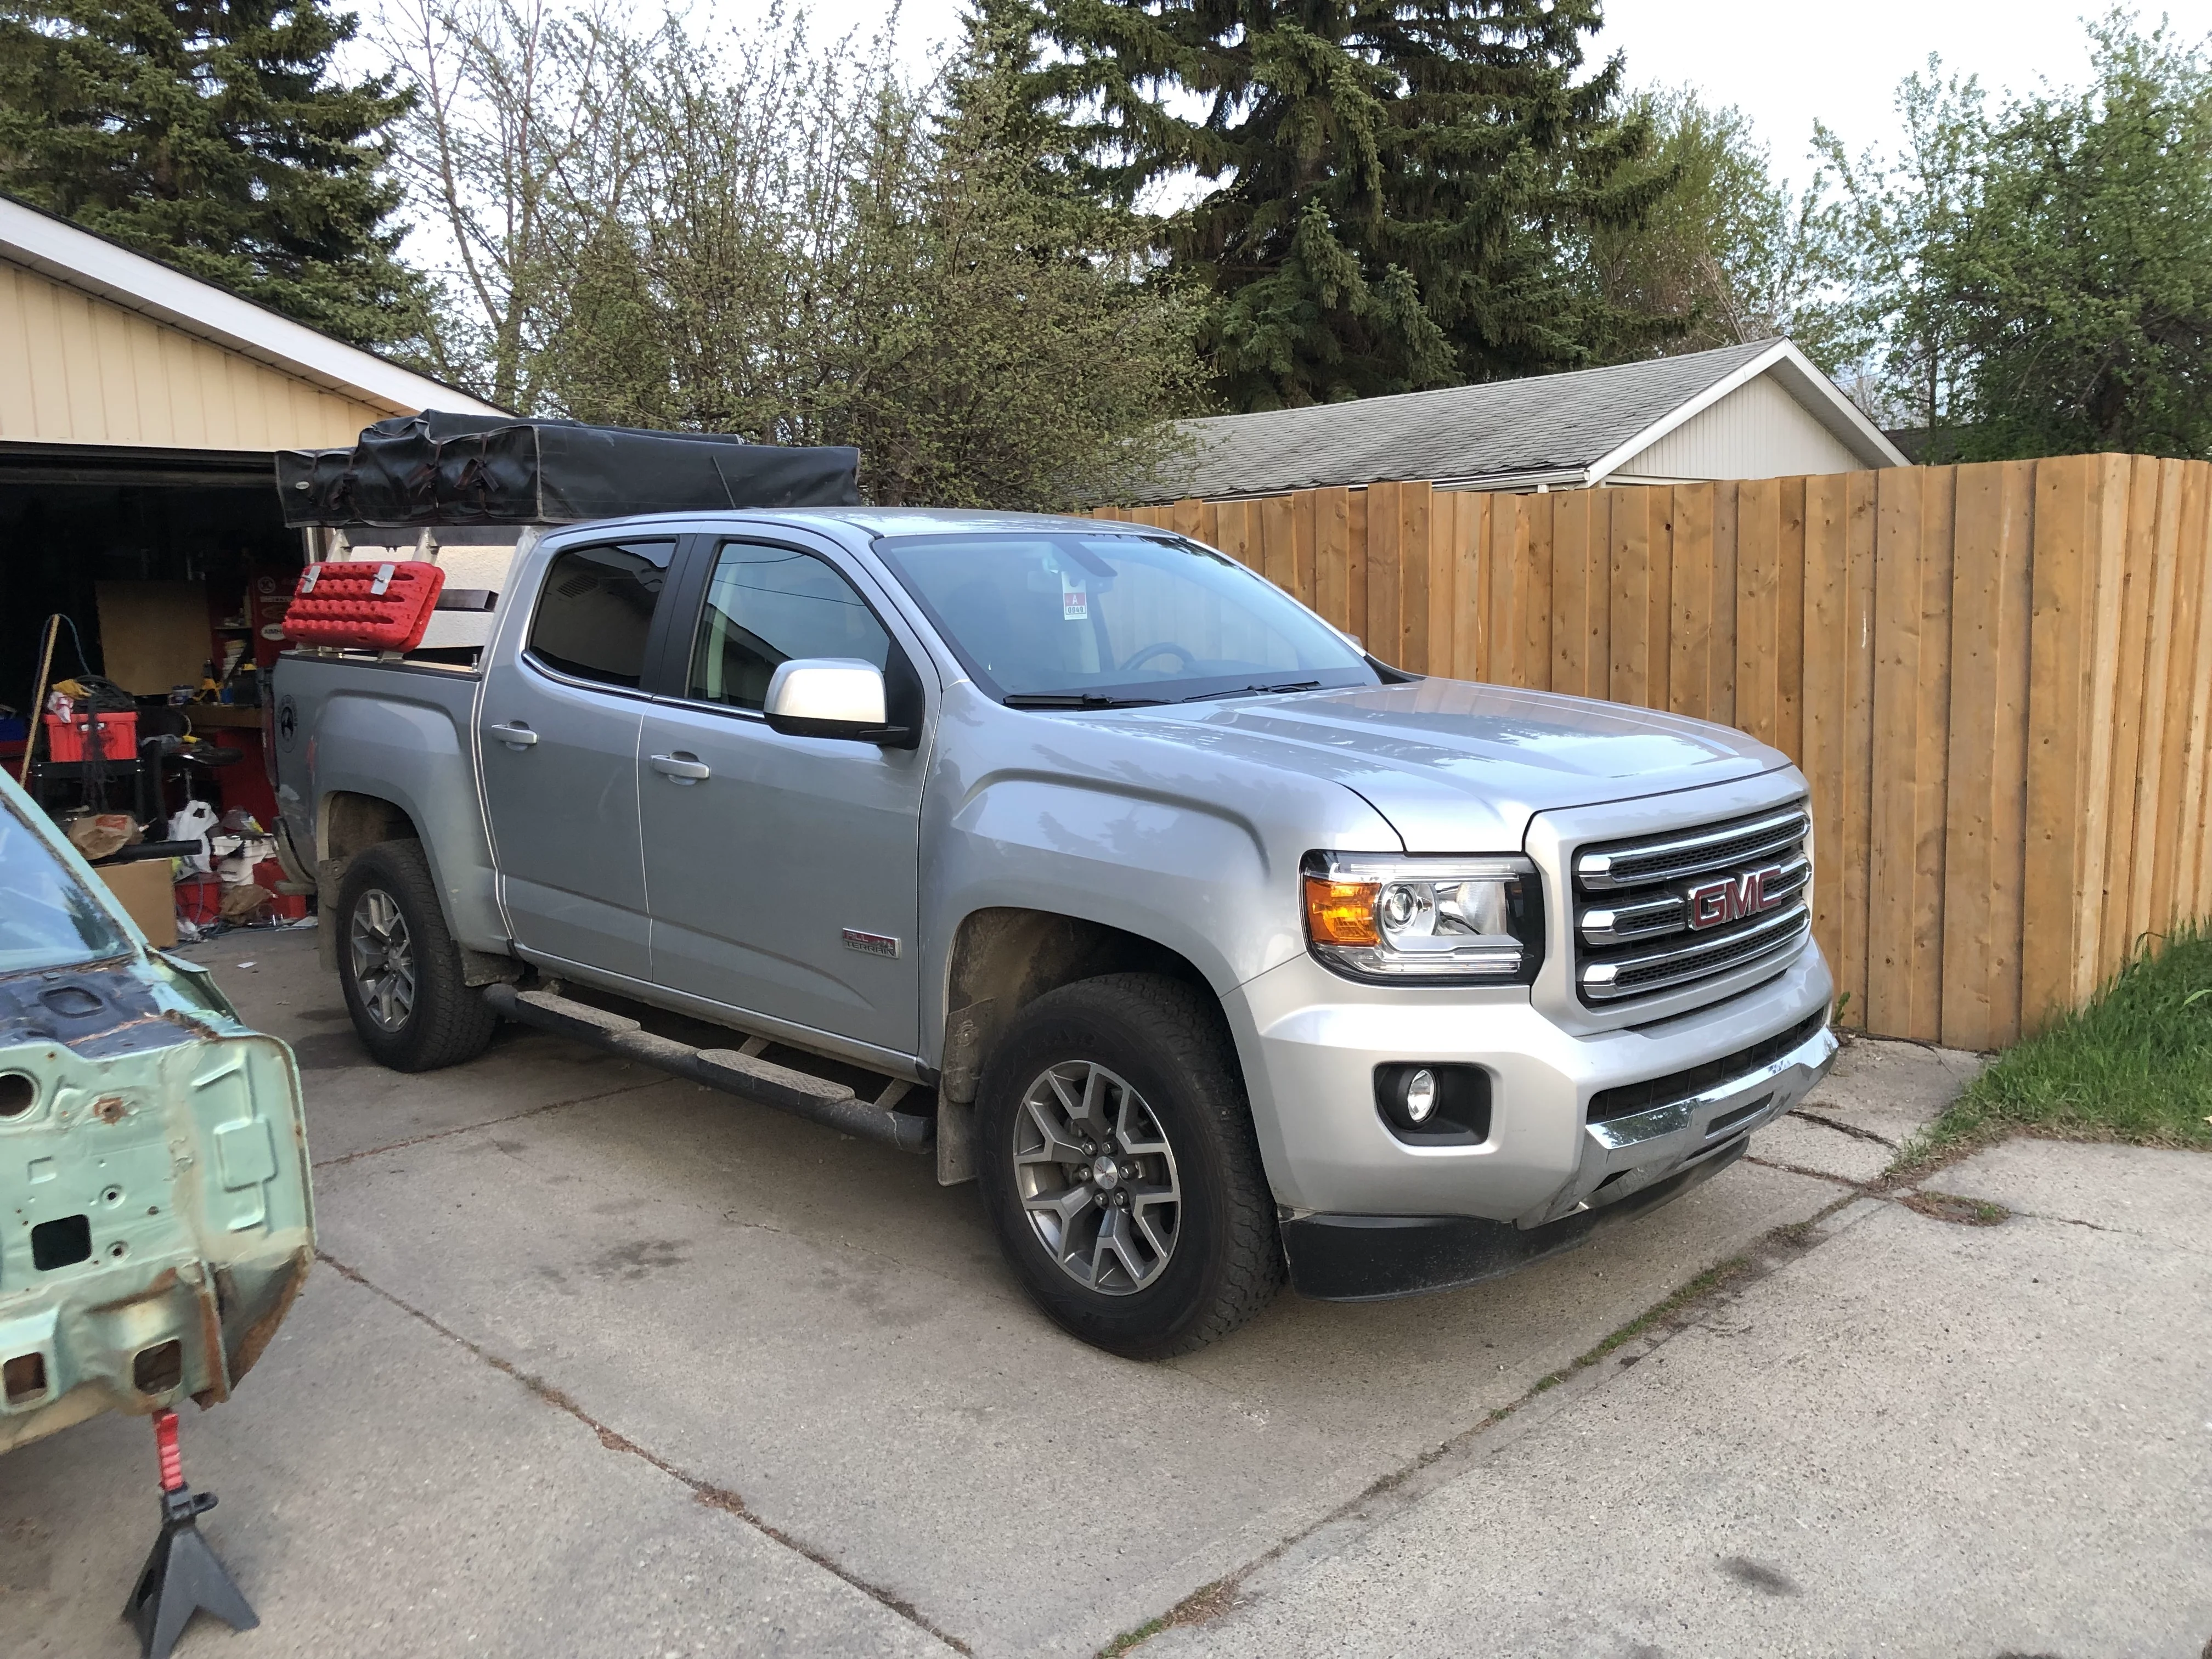
Meet Pachyderm—affectionately known as "Pac"—our 2017 GMC Canyon transformed into a fully self-contained overland adventure vehicle. This build thread documents our journey from stock to expedition-ready.
The Story Behind the Build
Beyond overlanding, my wife and I like to document our adventures, and I enjoy working with video as a hobby. We are not and have no plans of doing the overland YouTube thing as a way of making money—we make these for three reasons:
- It's a way of bringing two hobbies together.
- It's a way of making a record so that future generations of our family can see what we got up to first-hand.
- It's a way of letting those we have a meaningful connection with (friends, family, and overland communities) know what our latest adventures are in a medium that's a bit more interesting than text.
Basically, if you remember being subjected to your family friend's vacation slide shows or handycam movies as a kid, this is the same thing except we won't be inviting you over for dinner first, and you aren't going to be a captive in our living room so you can shut it off anytime! Jokes aside, we aren't full-timers and we have no desire to be asking for Patreon contributions or anything of the sort. There is nothing wrong with folks who do that—more power to them—but if my video hobby ever came to that it would feel more like a job, and I have a few of those already so I don't want more! We also always self-fund our adventures and appreciate the freedom that gives us.
With the caveat that you are not going to be getting professional level videos out of the way, we put together a little tribute to our beloved Jeep. It more or less says the same stuff as what follows in terms of our history with our JK and our switch to Pac:
Part 1: Our Rig History
We've been travelling this way my whole life; I grew up in a tiny Canadian town that was 6 hours drive from the nearest decent movie theatre or international airport. Basically, whenever my family wanted to go for anything beyond what the local IGA stocked, we'd be "Overlanding" into the big city—of course, back then we just called it "Shopping".
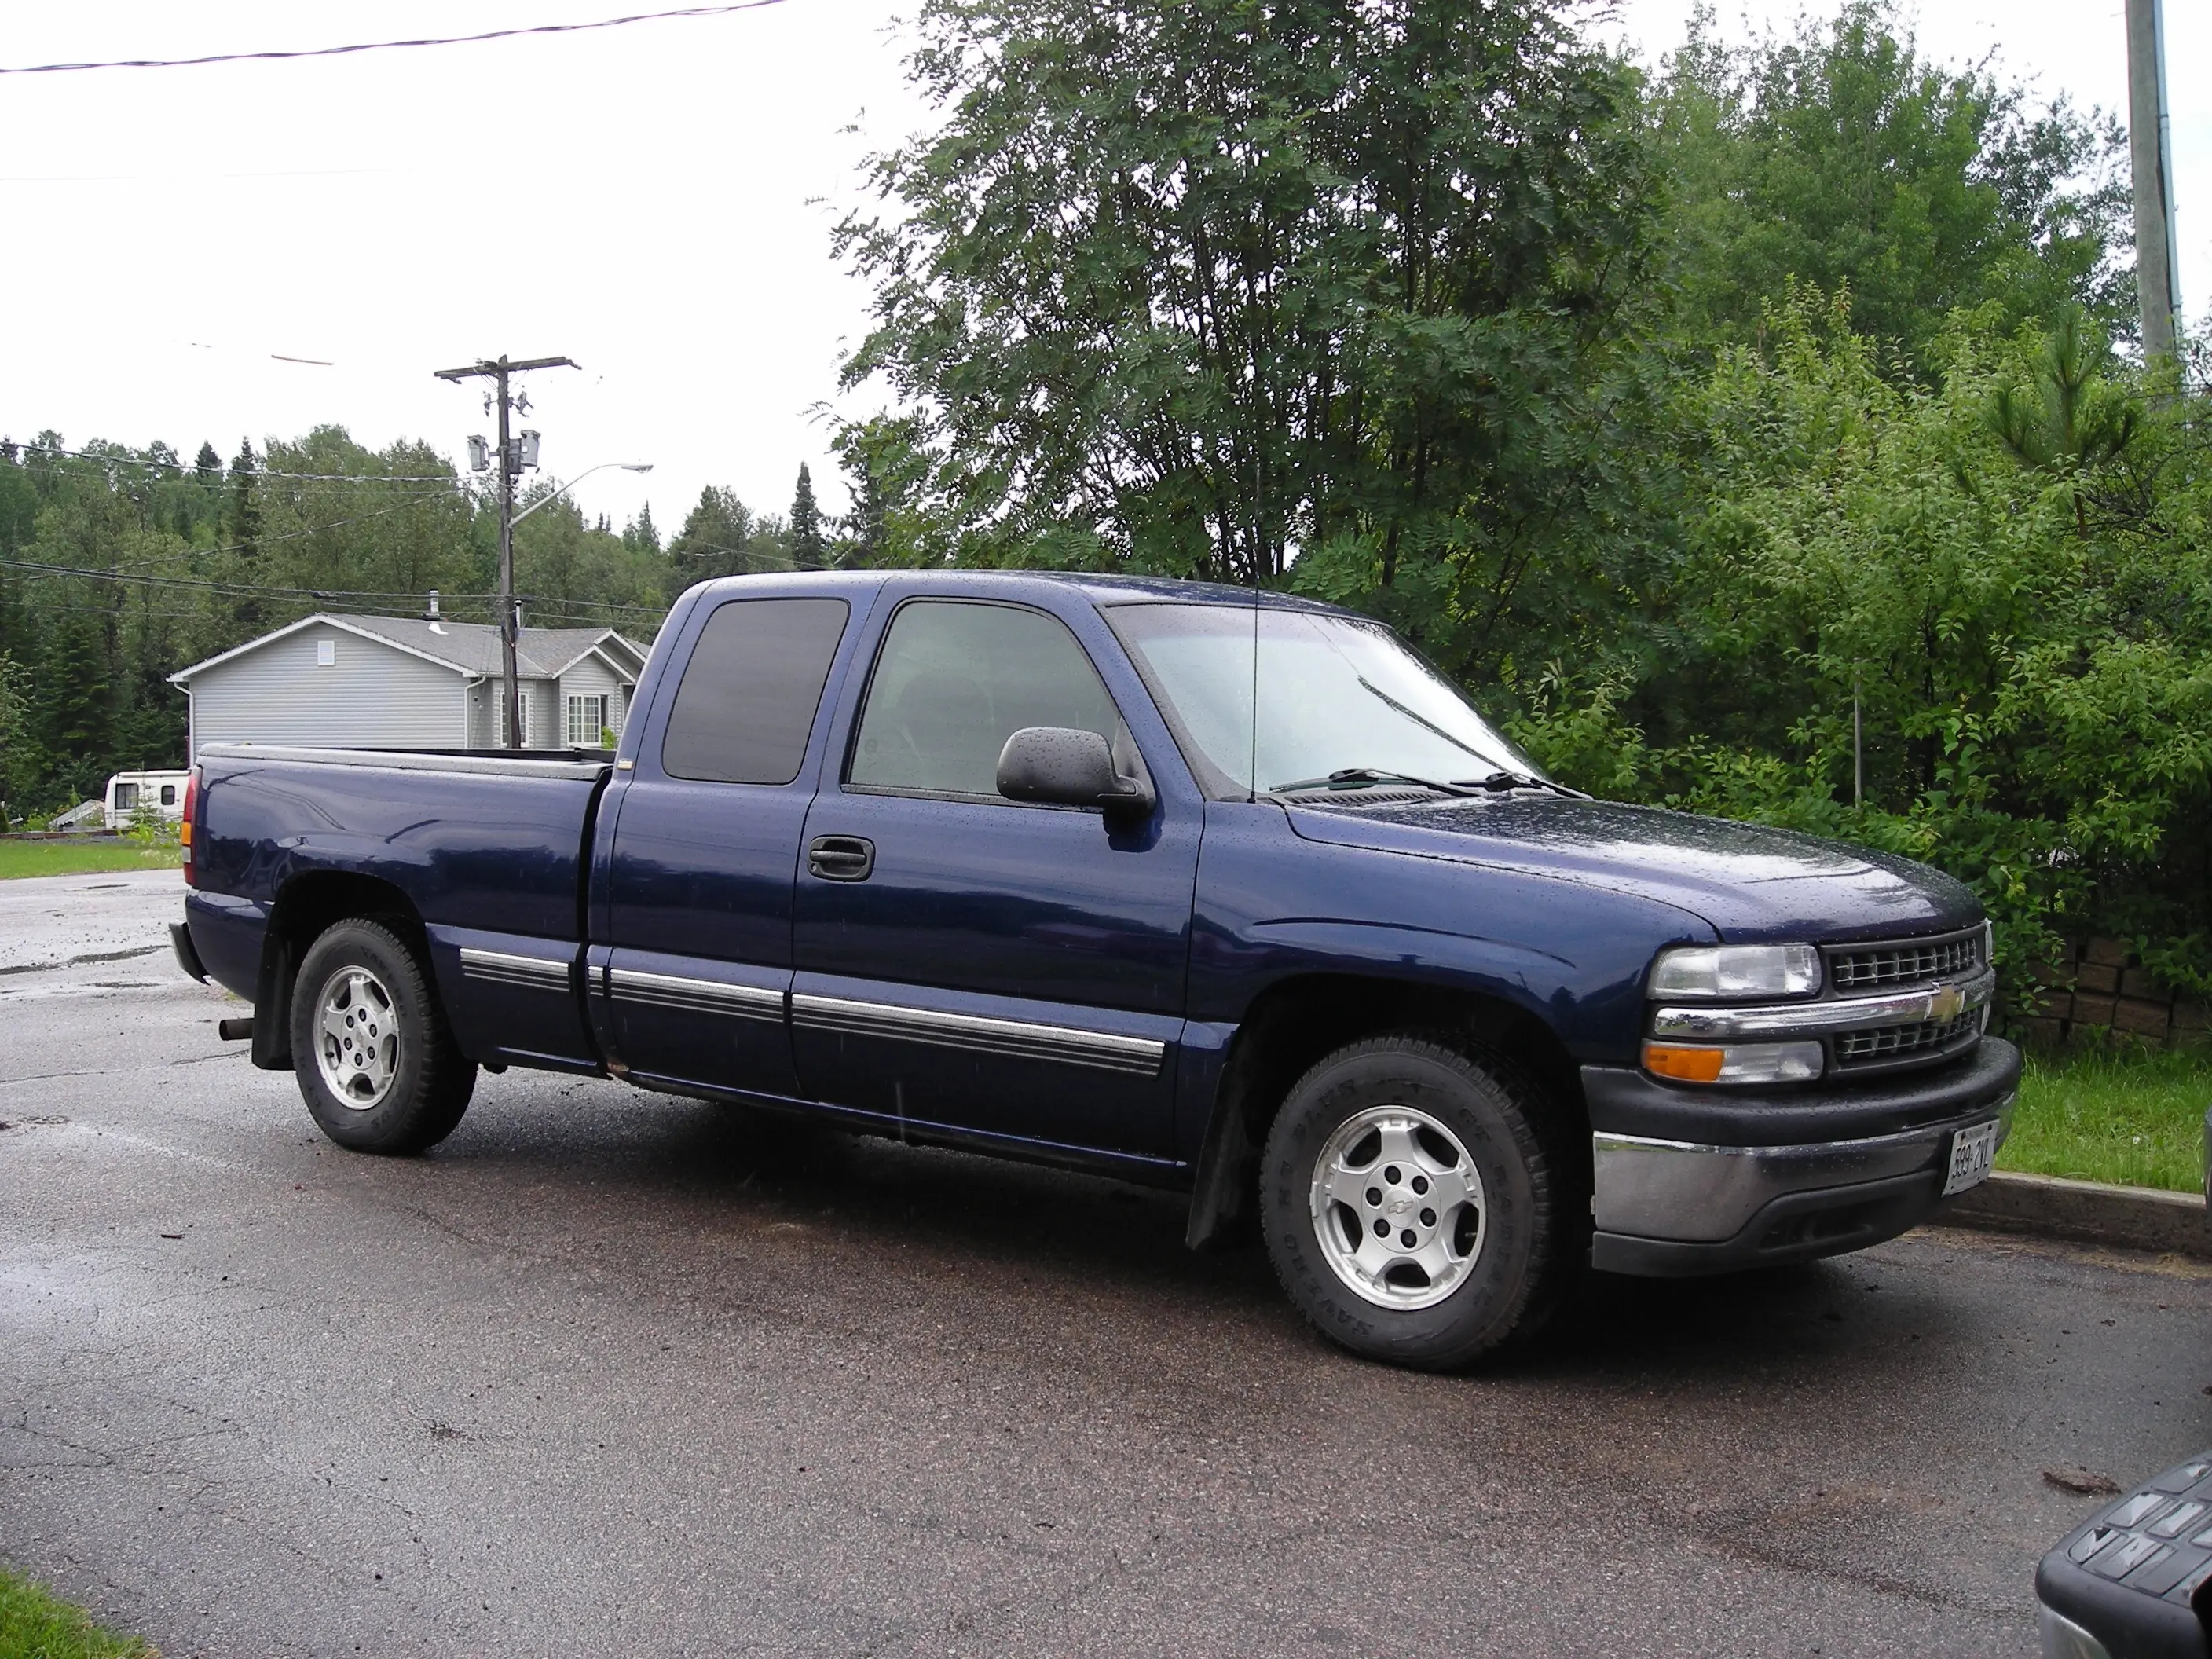
Prometheus: The 2WD Silverado
Fast forward to my independence, and my first Overland vehicle was a 2WD Chevrolet Silverado, which I dubbed "Prometheus" after the fable of stealing fire from the gods; that is what that rig felt like to me—like I had stolen a treasure from the gods, and that treasure was the freedom to go wherever I wanted, with everything I needed to eat, sleep, and live situated on those 4 wheels. That truck served me well for over 360,000 trouble-free kilometres, camping all over Ontario, Quebec, and the Northeastern USA. We had many adventures with my trusty German Shepherd Addi playing co-pilot, however Prometheus was a bit limited; 2WD and poor ground clearance meant that it wasn't an ideal backcountry explorer.
The First Jeep: 2011 2-Door JK
Fast forward to 2010, when the most amazing person in the world and I decided to go in a different direction with our overlanding vehicles. And I'm not kidding when I describe her as amazing—Teryn would later say "yes" to a phone call from Costa Rica attending the wedding of a friend where I asked "will you marry me?", and despite the countless faux pas that occurred during this proposal, we've been happily married since. We kept with the Silverado for a few years, but eventually upgraded to a 2011 2-Door Jeep JK. We had this vehicle for 9 months and put over 70,000 kms in that time, but we were always feeling cramped for space.
So, we built a roof rack, but soon that was taken over by a new Rooftop Tent.
As you can see, GVWR was not high on our priority list of things to worry about, and that little JK was WAY overloaded—in fact, the idea behind "weight of the car" hadn't even occurred to us. It was never a concern in the Chevy, after all.
Anyway, the space limitations meant it wasn't long before we settled on upgrading—we didn't even have the two door long enough to settle on a decent name before upgrading to a 2013 Jeep Wrangler Rubicon, which we dubbed "Ruby".
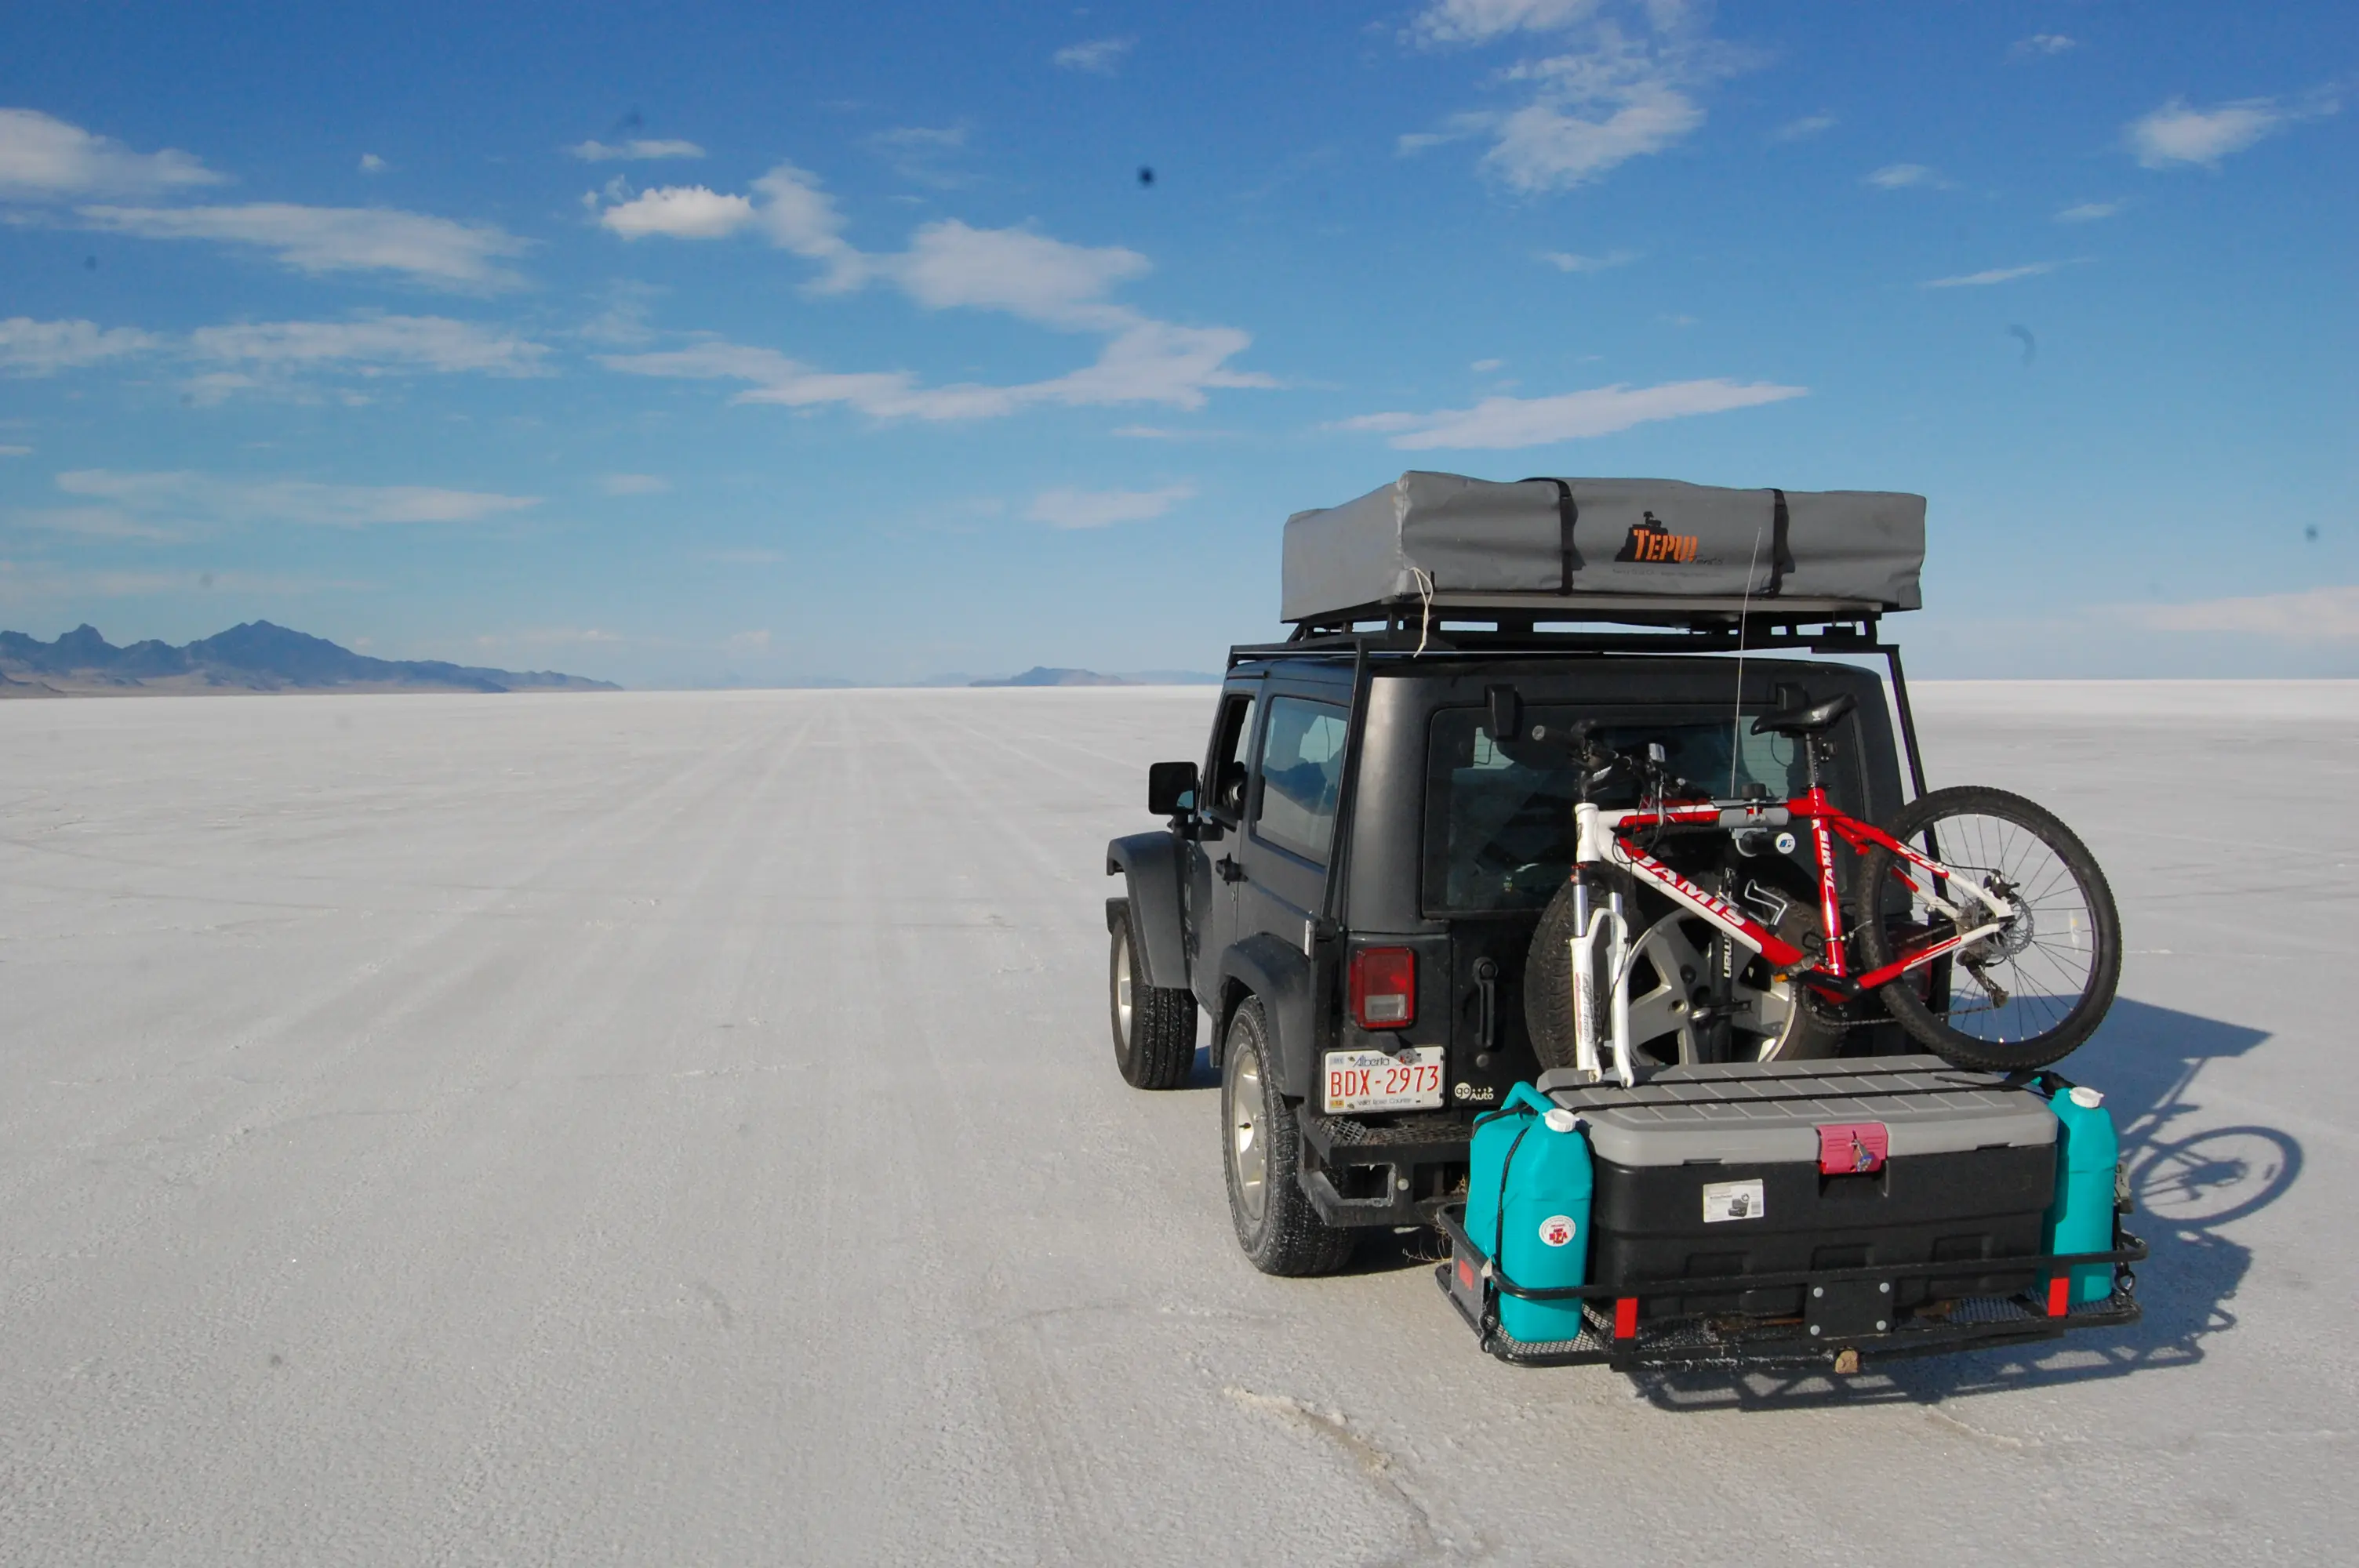
Enter Ruby: Our 2013 Jeep Wrangler Rubicon
Ruby was built with more Overlanding in mind, but was also our daily driver. We added a Roof rack from Gobi, and some cheap Smittybilt front and rear bumpers which we modified heavily to save some weight and add capacity. We added an onboard water pump, relocated the subwoofer (which took up a huge chunk of the cargo space on the 2013 model year), and made our own rear tire carrier/jerry can.

Around the same time though, we realized that having only one vehicle was a disadvantage in todays' world, so we sprung for Hobbes, a 2011 Triumph Tiger. Not only would it be my daily commuter from March to November (we live in Edmonton, so some of that was quite chilly), but it was also set up for adventures.

Our DIY Approach and Video Adventures
Our desire to make things work for our needs meant that both Hobbes and Ruby were heavily modified to suit us, usually with whatever bits and pieces we could find at Home Depot, MEC, and Princess Auto (Think REI and Harbour Freight, respectively, if you speak in Freedom Eagle dialect). Around this time we started making videos of our trips.
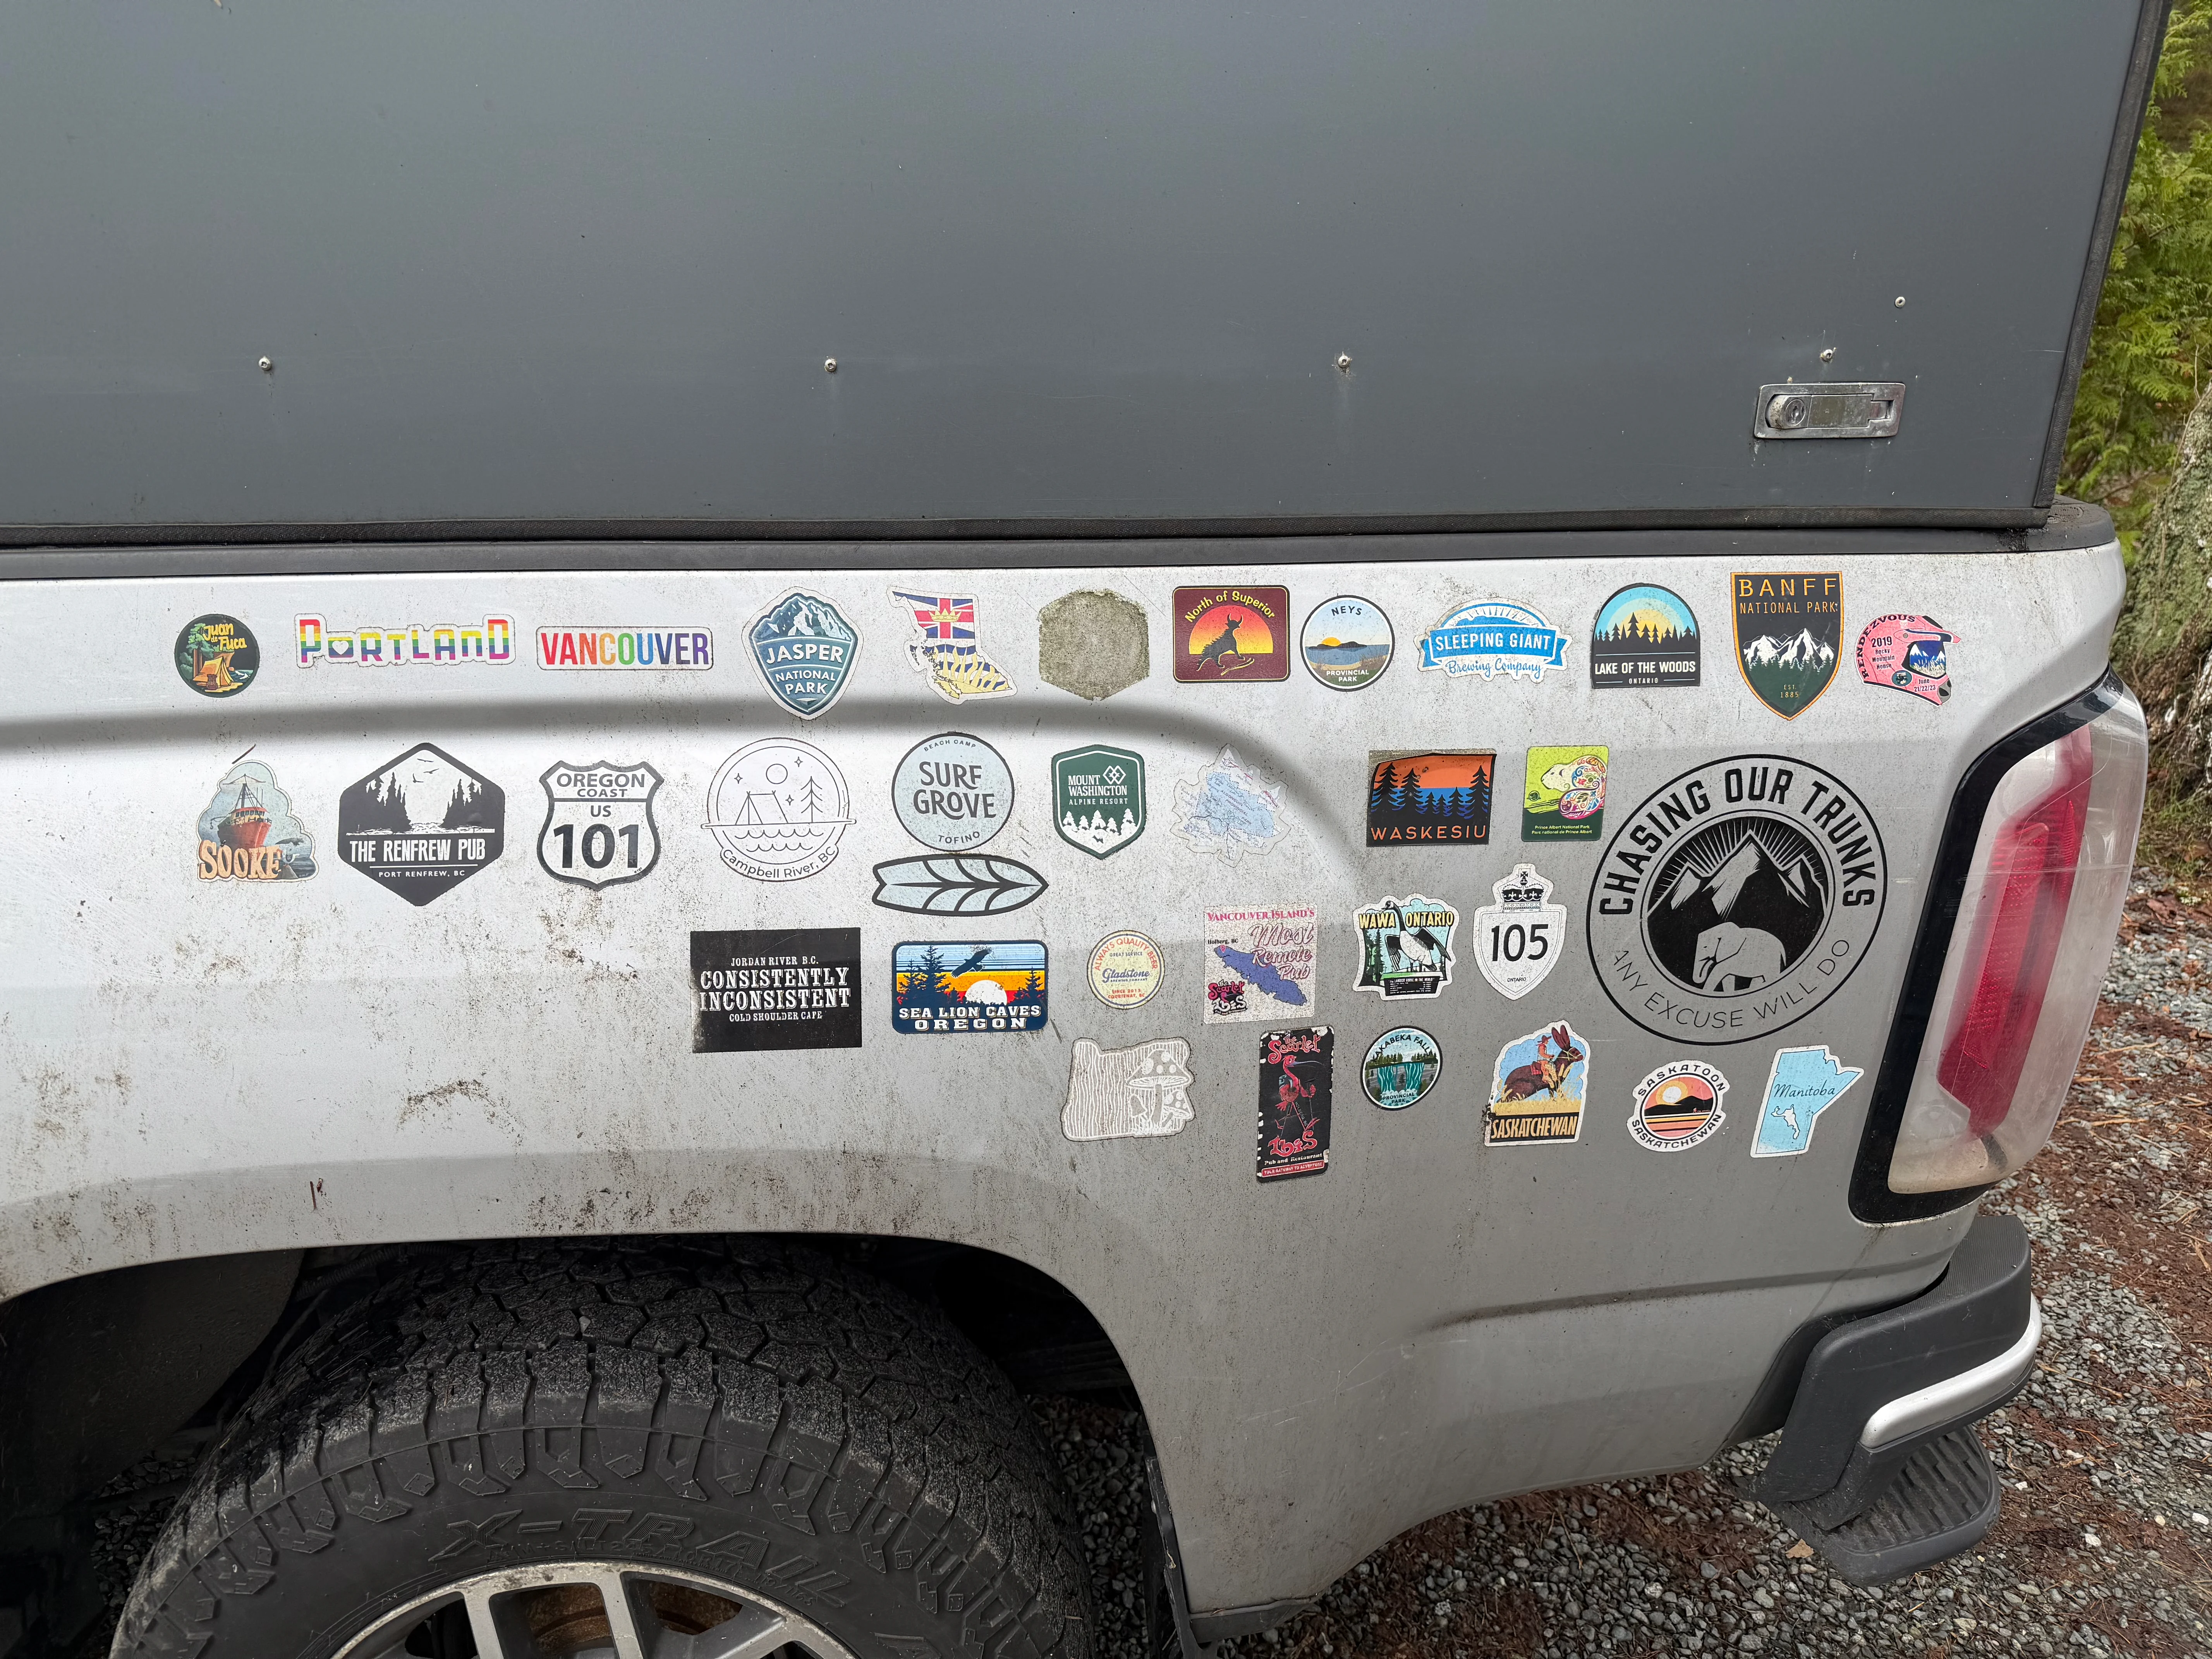
Full disclosure, the videos are bad. We aren't good at cinematography or editing, and we'll never challenge the throne occupied by X-Overland or Andrew St-Pierre White—but we don't really make 'em for everyone else. We make them for us, as a nice memory of our adventures. If you like them too, we are honoured, but we firmly believe in the ethos of "write something worth reading or do something worth writing about"—these videos are our attempt at both. We've branded them as "Chasing our Trunks"; as a child, the Kipling story of the elephant who crosses Africa to learn what the Crocodile had for Dinner was one of my favourites, and the story really represents how we travel—it's not about the destination, it's about the people you meet and things you see along the way. We come back a little bit wiser, having seen a bit of the world, and any excuse will do—even if it is just finding out what the crocodile had for supper.
Again, our videos aren't great, but that's OK—what is really neat is they are getting better! Like everything else, the more you do, the better you get. The proper attitude will account for significant gaps in aptitude, and we try to bring that same attitude to our vehicles.
Ruby's Reliability Issues
However, a positive attitude still couldn't get around the fundamental limitations of Ruby. Her payload was only 800 lbs, which disappears rapidly once you start turning the JK into a camper. You can do a lot with suspension upgrades but you can never get around the GVWR from the manufacturer, which has some significant insurance and legal implications in some jurisdictions. It was getting time to invest heavily in Ruby on worn out components, but that weight limit was a hard one to deal with, and we were hesitant to spend big bucks on her. And frankly, Ruby just wasn't very reliable. A running list of the work we had to do on her just to keep her running:
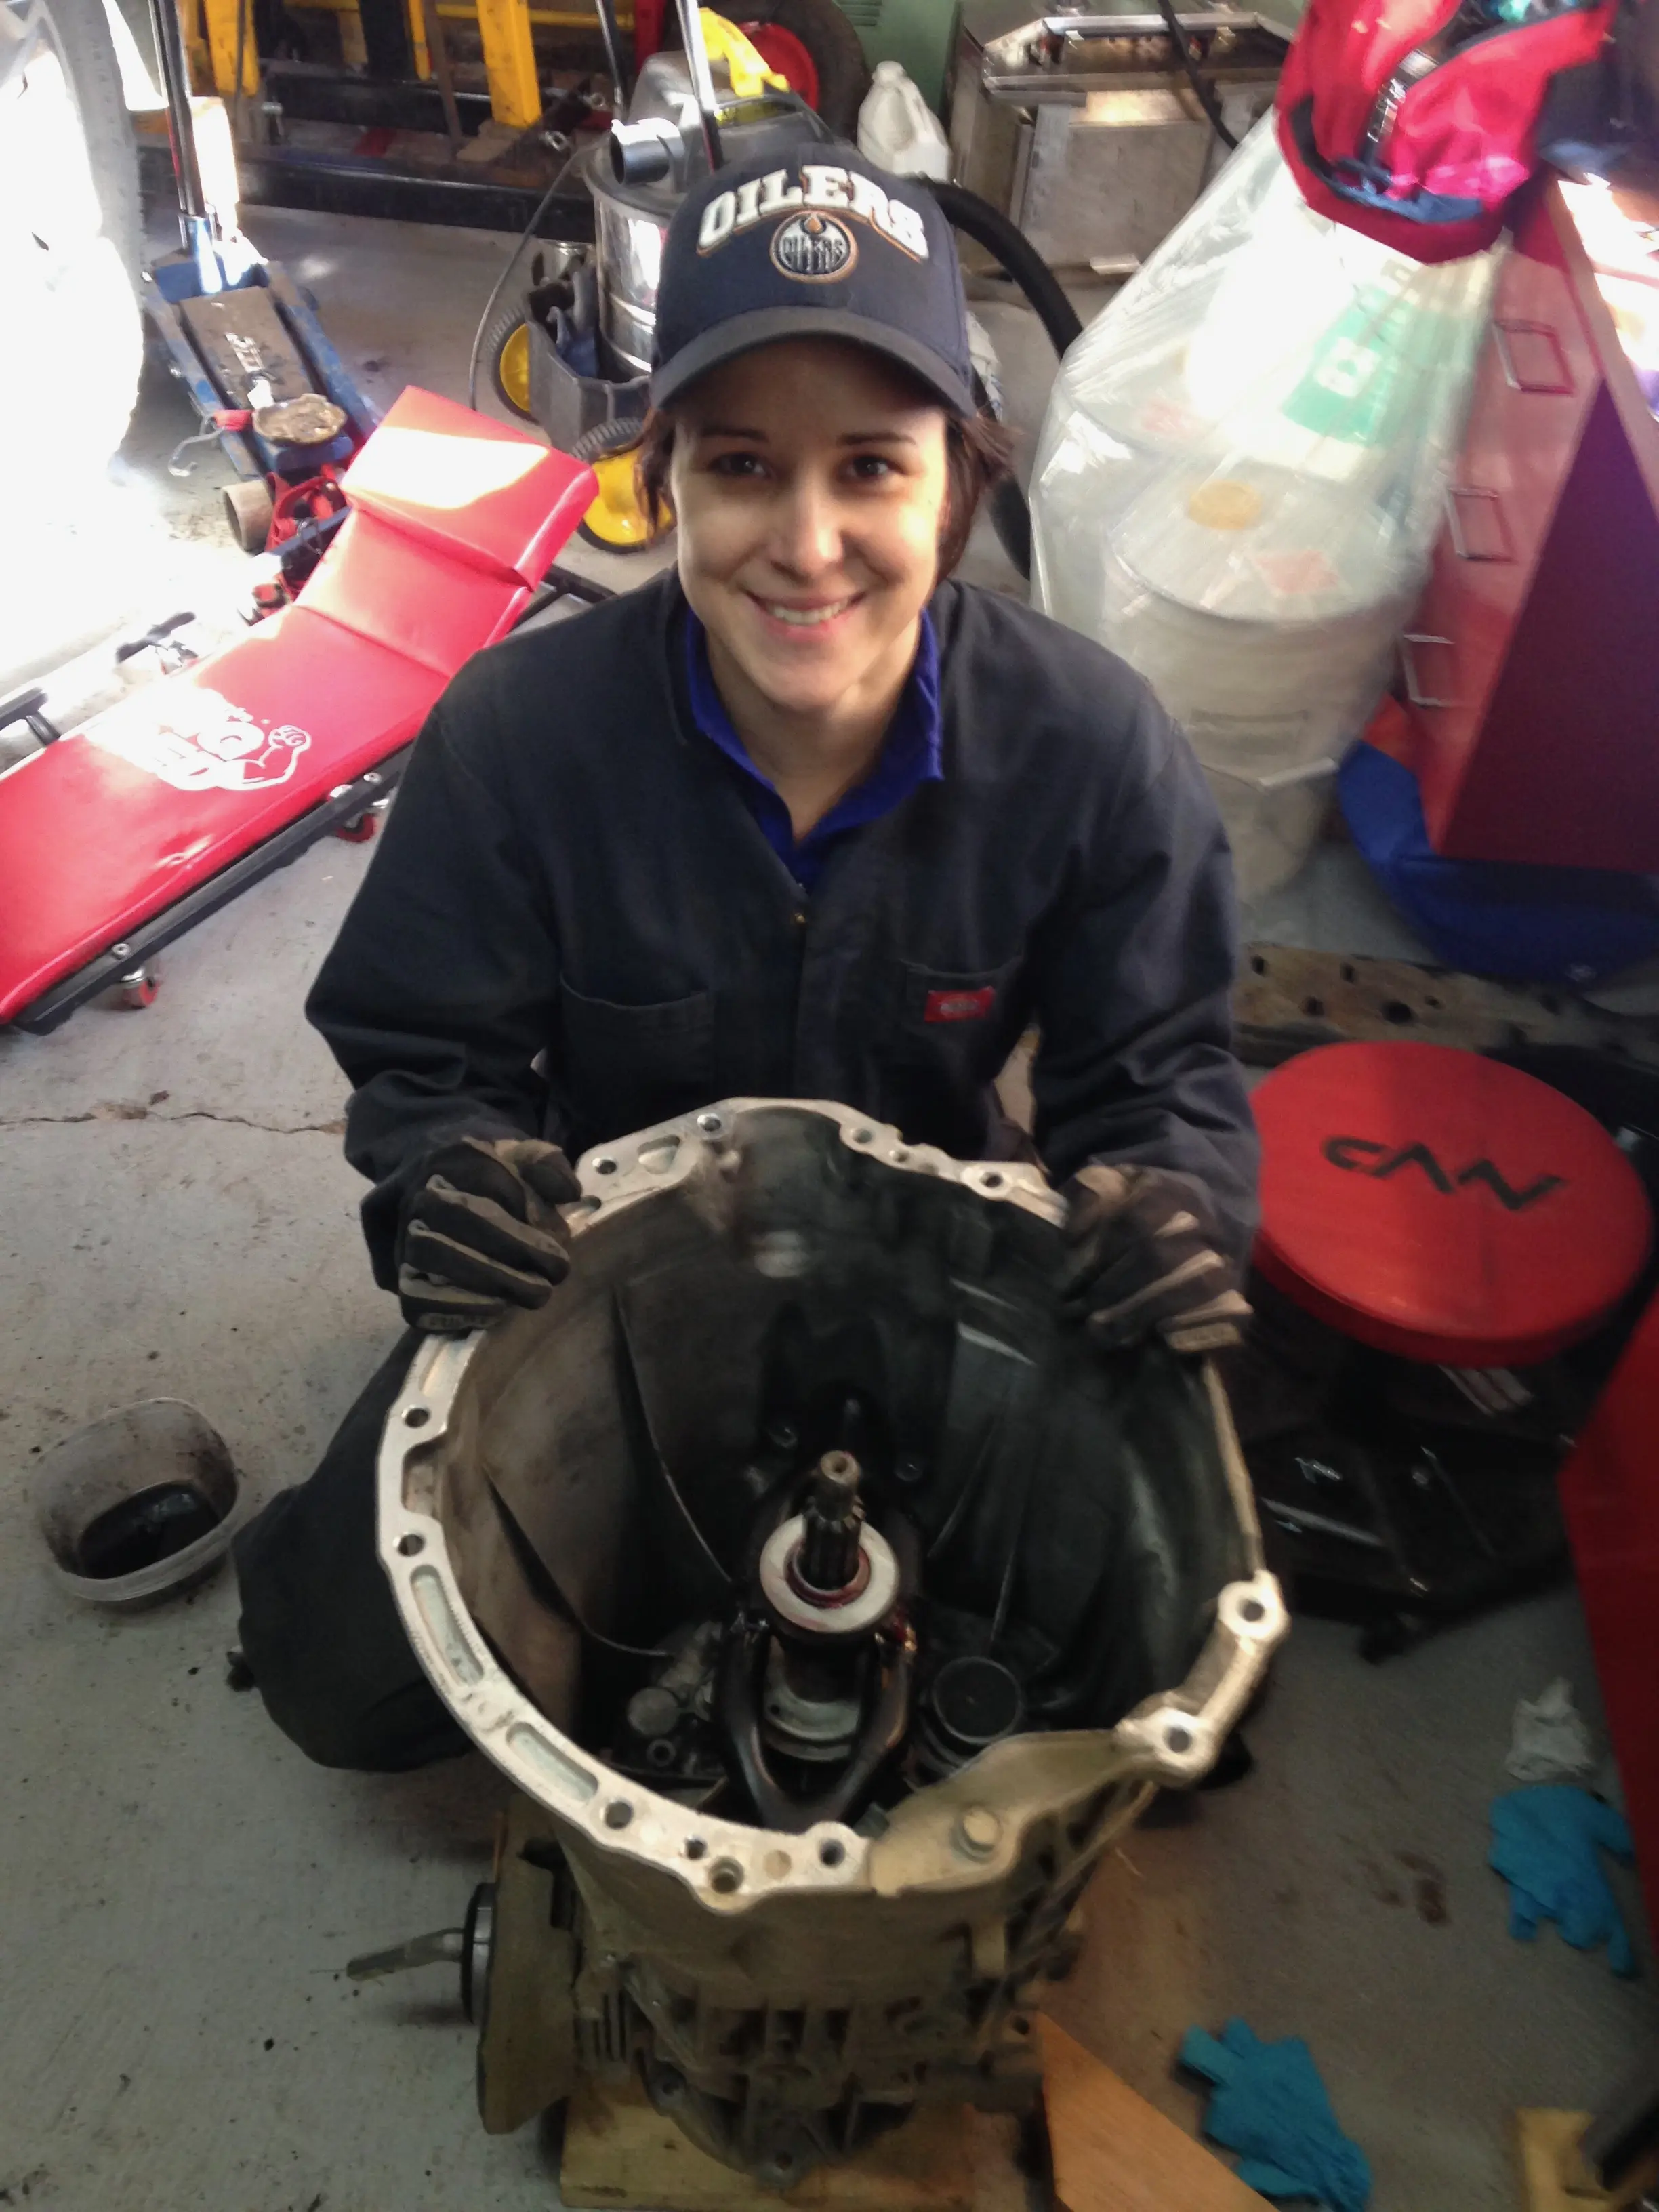
- Throwout Bearing - full trans drop. Didn't do the clutch at this stage as the T.O.B failed with very low kms on the clock; we had to do this ourselves as the Dealer(s) (we spoke to two) refused to warranty it because "it could have been used off road". This was an early lesson that Chrysler Corporate was more interested in producing neat advertisements than supporting folks who use their products like the advertisements show!
- Oil Pressure Sensor - top of the engine off.
- Start Motor failed - easy fix, once we managed to bump-start it and get home.
- Oil Pressure Sensor...again. Top of the engine off. Again.
- Clutch - Full trans drop, again.
- Intermittent fault claiming a leak in the fuel system -- no leak found. Would come back everytime the seasons changed.
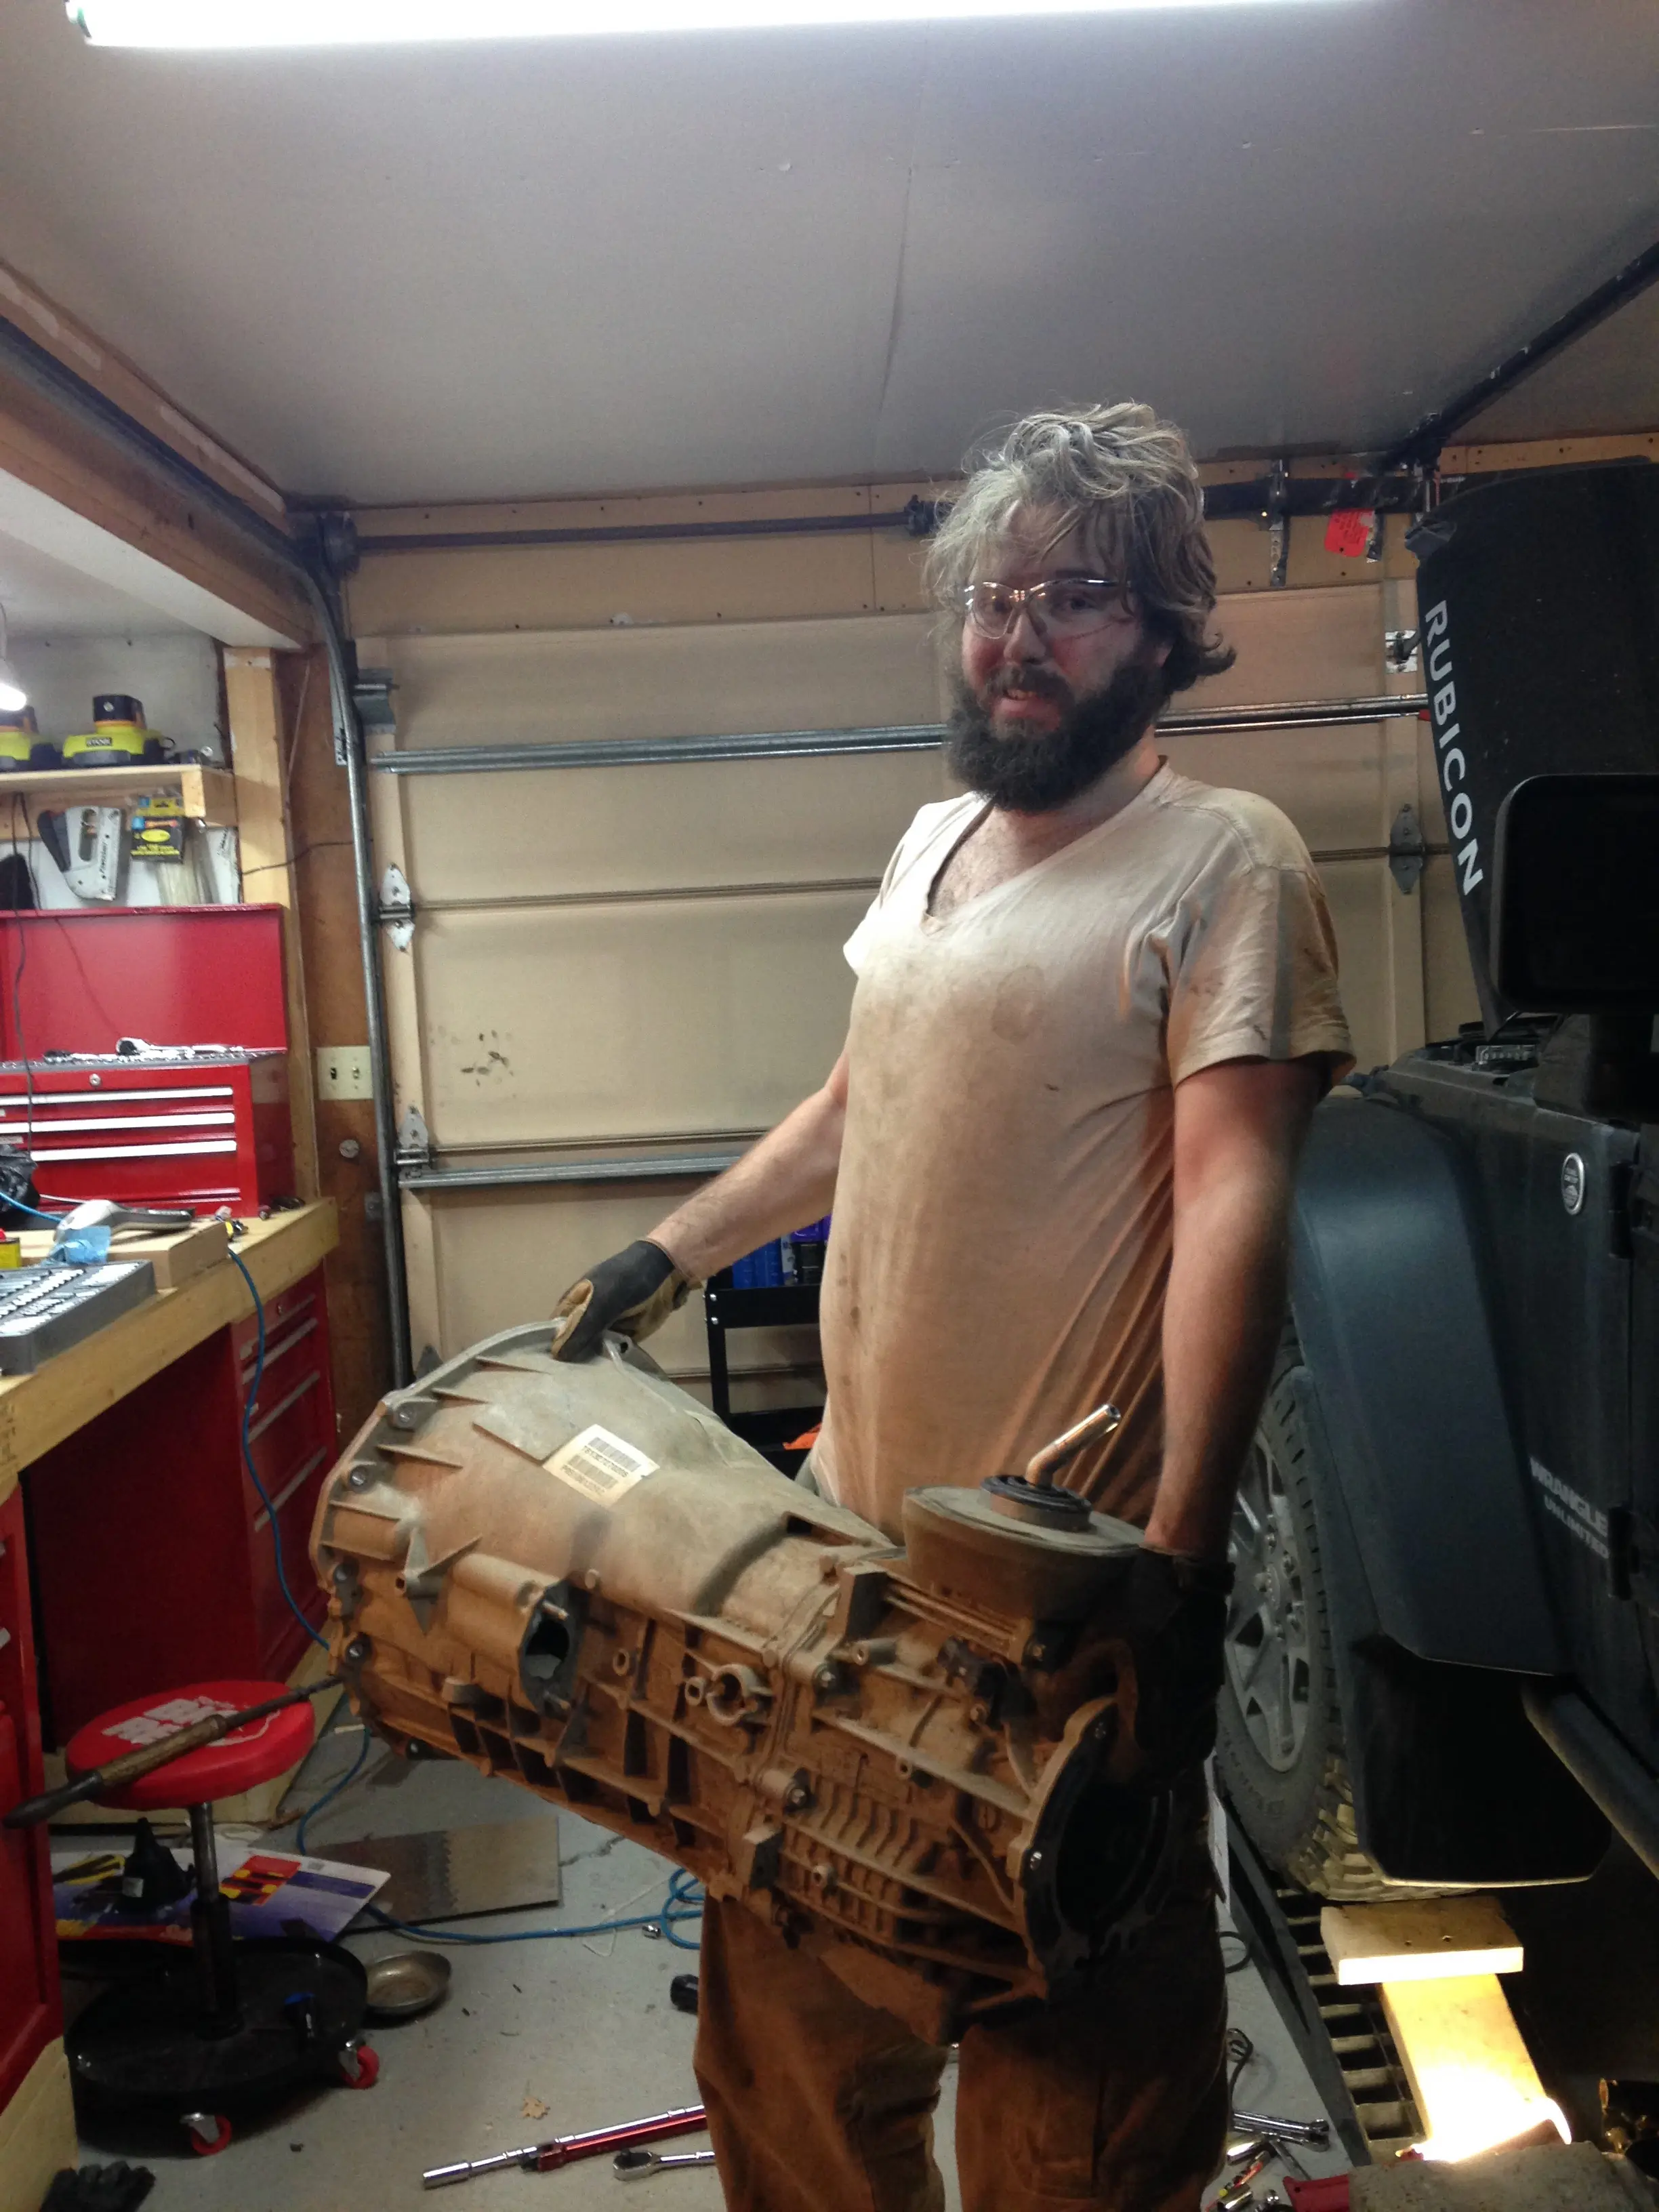
- Pilot Bearing failed spectacularly. Full trans drop.
Now, before the above issues, the only vehicle maintenance I had ever done was the usual "Watch Dad do it from the other side of the garage" stuff, the occasional oil change, and on one occasion I had replaced Prometheus's brake callipers and pads. We had some other experience taking an old car apart, but the above jobs were all done with very limited tools and experience. We learned as we went along. All of this stuff was done in our tiny garage, with our ability to lift the jeep up limited to only getting it about 5 extra inches off the ground.
Thankfully, Ruby never died on the trail or on an adventure, but that was mostly a timing issue. It sat down on us a few times, but every time was close enough to what we needed to limp it home.
Still, Ruby served us well and we put more than 280,000 Overlanding kilometres with her (and often with Hobbes). And we loved Ruby with all our hearts. In fact, in many ways she was our first home—my job provided accommodations, but it was always 'temporary', never 'ours', and Ruby was our ticket to get away from work and live our lives on our terms. We were more at home on Ruby's roof than we ever were or are in our brick-and-mortar lodging. She was ours, and we loved her.
We travelled from the Arctic Ocean to the border with Mexico with Ruby, and many places in between. But with our plans for the future, Ruby was not going to be a good option.
After many hours of discussion and deliberation, we decided it was time to say a tearful goodby to Ruby. Literally tearful—the dealership guys were understanding but I don't blame them for their bemusement. We were very, very fond of Ruby and if we could financially afford it, we would have kept her.
Alas, as the popular '90s tune said: Every new beginning comes from some other beginnings end.

Part 2: Why a GMC Canyon?
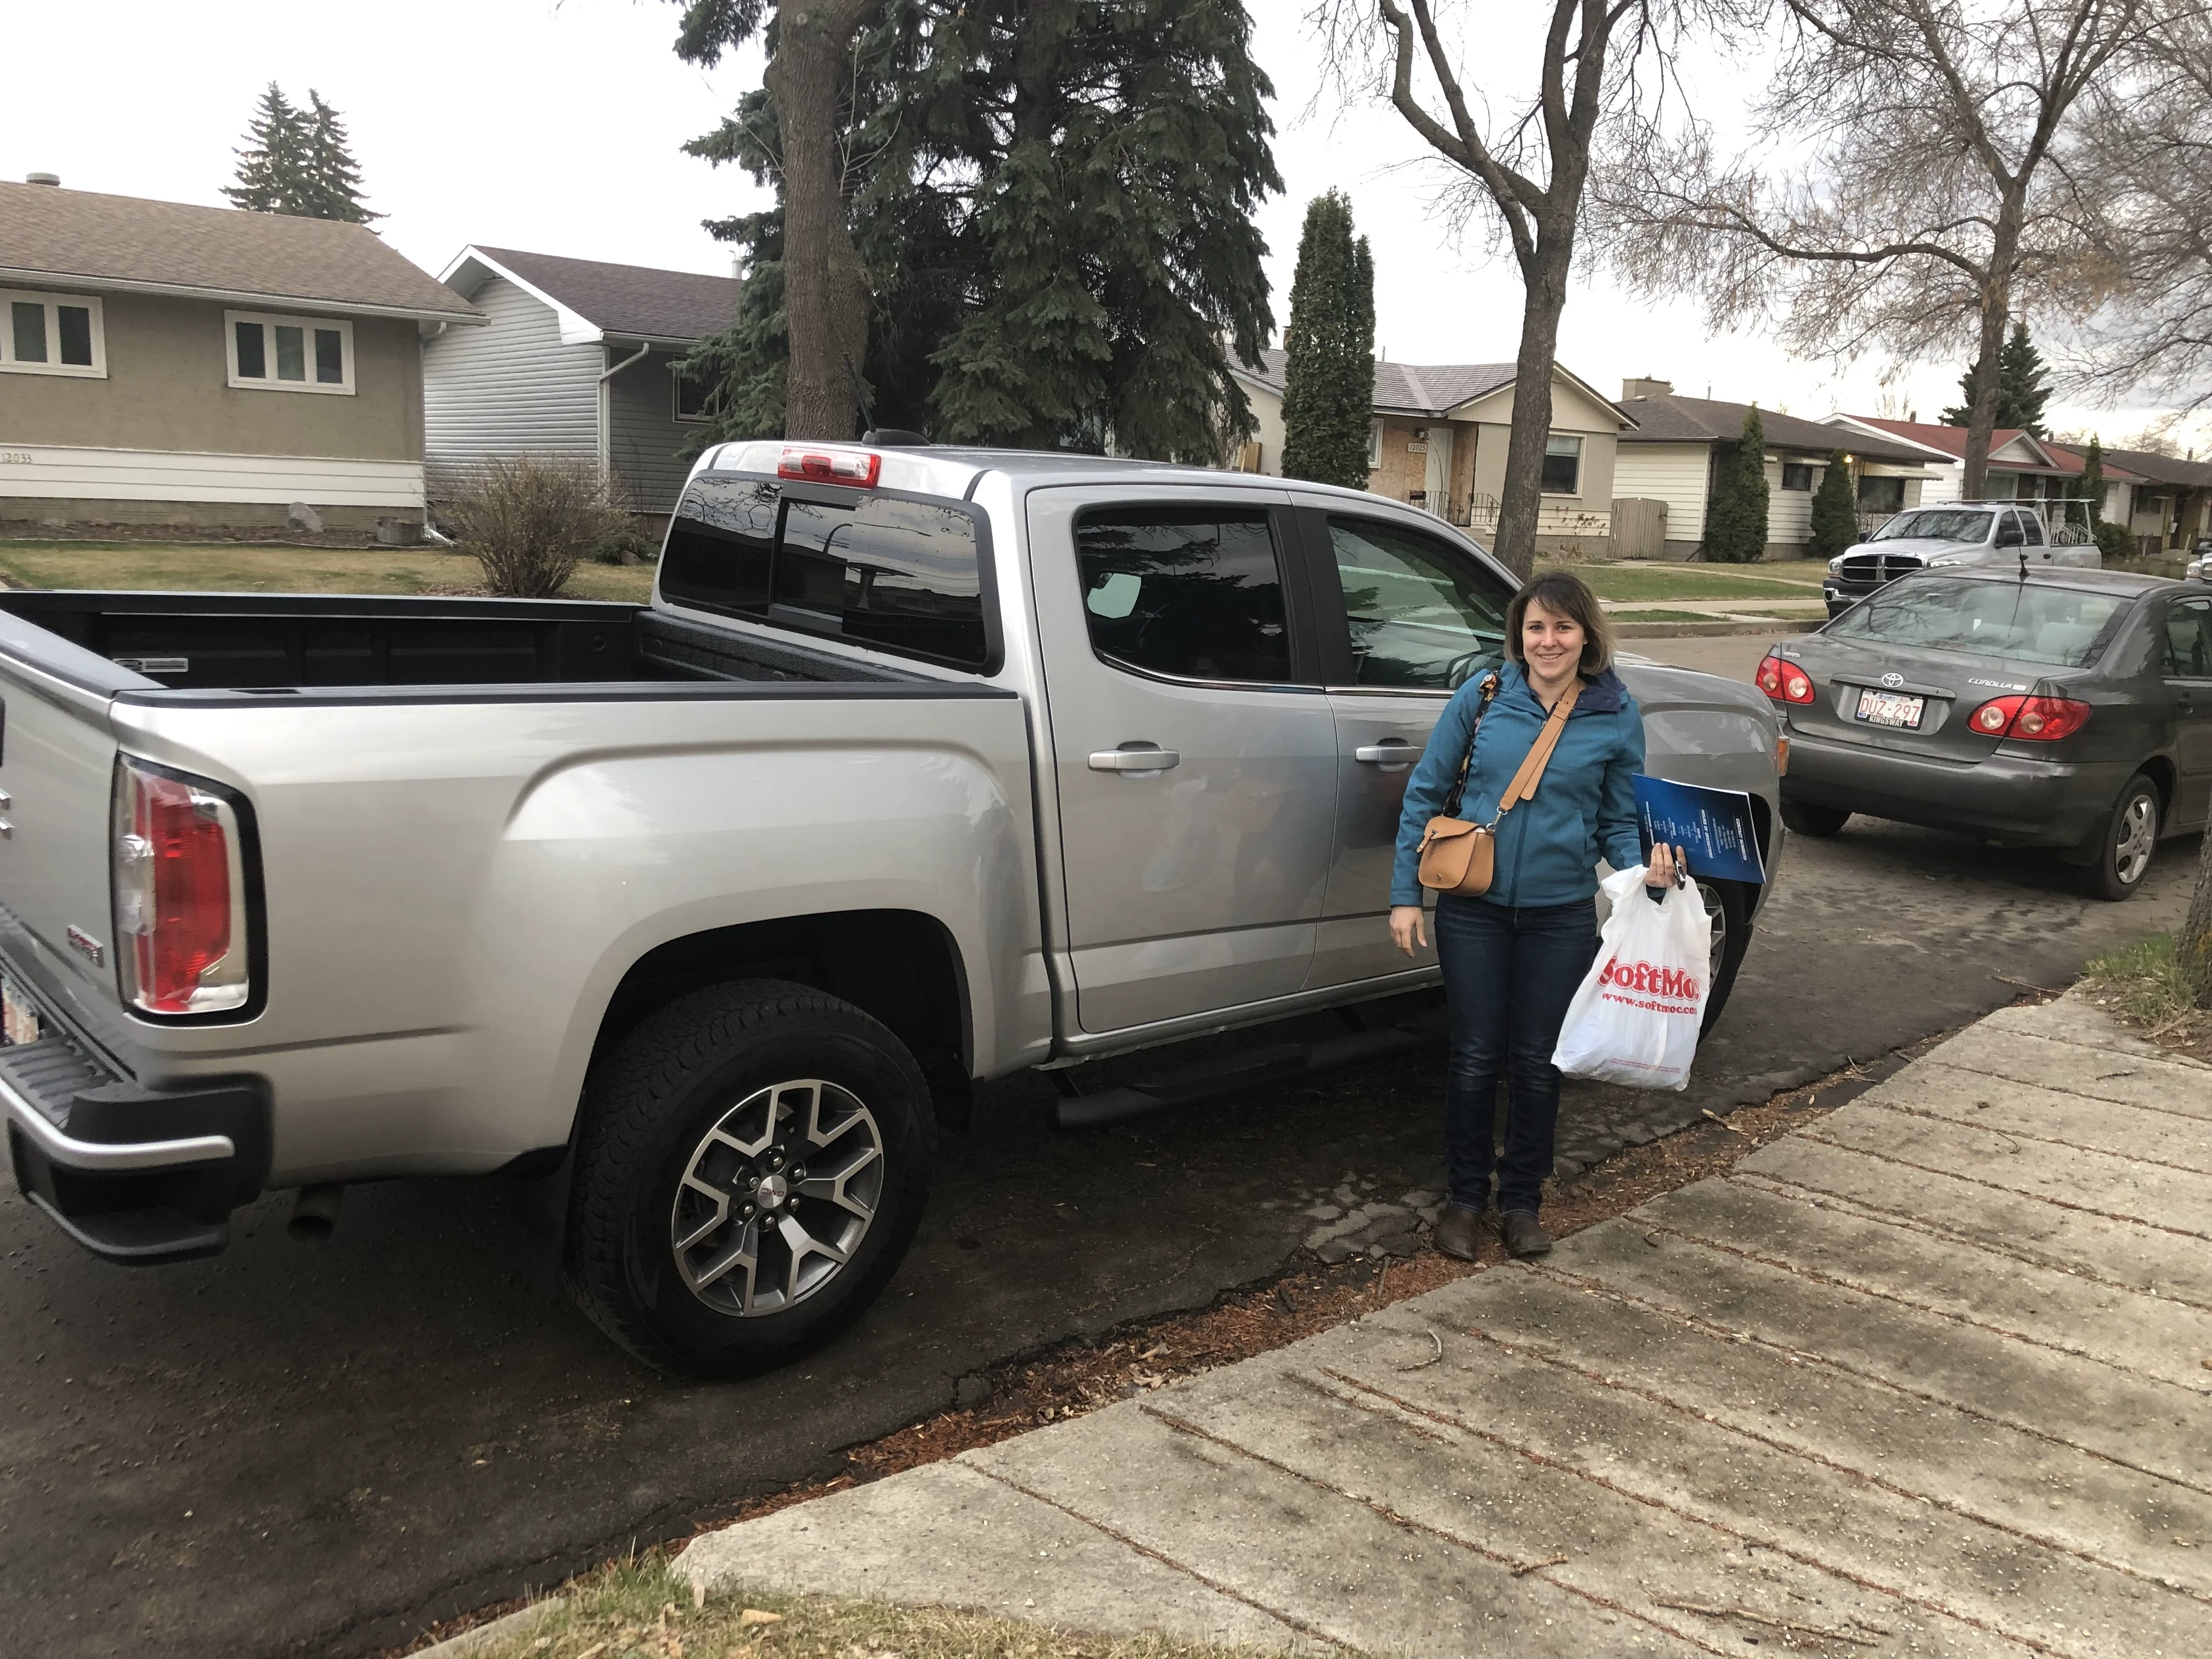
With that, we'd like to introduce the world to our vehicle that will take us around it. World, meet Pachyderm (Fits the "Chasing our Trunks" theme, no?), aka Pac.
So why a Canyon? Great question, and an easy one to answer. In my opinion, the Canyon/Colorado is the best Overlanding platform on the Canadian market. Let me explain why I hold that opinion, which is just that, an opinion, and worth every penny of the price you are paying for it.
The GMC Canyon is the cousin to the Chevrolet Colorado—apart from some interior badging/features and the front fenders and grille, it is exactly the same in every way as the Canyon. The Colorado is the same that was recently reworked by our dear friends over at AEV into the Bison. And this generation of Canyon/Colorado is coming from a very different pedigree than its predecessor or its full-sized cousins. The Gen Two Canyon/Colorado was only released in North America in 2015/2016, but the platform saw substantial field testing in Australia as the Holden Colorado in 2012. The platform has had several years of real-world testing in some of the toughest Overlanding environments on earth, and performed admirably, before migrating to North America. And, the entire thing was a joint venture between Isuzu and General Motors, meaning that the Isuzu D-Max was based on more or less the same platform. Lots of parts and lots of familiar mechanics in every far flung corner of the world.
Also, it's available in a small Turbo diesel, which performs amazingly well - we opted for the V-6 Gasser to keep fuel consistent (way easier to carry one kind of fuel for driving both vehicles and cooking than it is to mix it all up).
Key Features That Attracted Us to the Canyon/Colorado
Payload: The payload of our Canyon is 1500 lbs. That almost double what we had in Ruby - though in the fulness of time we learned that wasn't the buffer we thought it was!.
Off Road Performance: Our Canyon has the All Terrain Package, which includes an automatic rear locker, upgraded suspension, and a low range gearbox. The 4WD system in Auto mode is spectacular, but also gives you control to fine tune what mode you are in. The same system has been used on GM trucks for many years and is a proven switching mechanism. After testing the Canyon, its current limitations are approach angles and that would be fixed in short order, but in terms of the kind of off roading we do, it's just as capable as the JK ever was off road. Caveat: We never used the JK for rock crawling, so this comparison is more about how we used our jeep rather than how comparable they are in all terrains.
Comfort: This is a big one for us. Our first test trip of the Canyon had so many eye opening moments:
- We weren't cold. The Jeep's doors, being paper-thin, always made one leg slightly cold on highways. "It's a jeep thing", I guess. Also, due to the uninsulated hard top, there were some winter adventures where we were in parkas the entire time because at highway speeds the stock JK heater cannot keep up with the windchill.
- We could talk to each other. I'll usually be on the bike so this isn't a common thing, but wind noise from the JK, especially with a rack and such, was bad. However, that paled in comparison to the noise from the stock mud-terrain tires that shipped with Ruby. Brutally loud all the time, but in the Canyon we can hear our conversations.
- We can pass people. The only thing our Jeep passed was fence posts, and sometimes uphill even that would be a struggle. There were times in a stiff breeze where the jeep didn't have the power to maintain top gear even on the flat. However, the Canyon with its V6 and 8 speed automatic transmission absolutely purrs past all other vehicles on the highway, even when pulling a load. This makes for a more comfortable tourer rig, and in my opinion is safer too for those times when you need to accelerate past the wibbly-wobbly 40-foot caravans that are swaying all over the road.
Cost: Some of you are probably saying "Shoulda gone for the Jeep Gladiator if you like your Jeep so much!", and I would say that you have a point, but so does the Bank. The GMC Canyon, brand new, is $51,635 when spec'd the same as our 2017 model. The Jeep Gladiator would be $74,000 CAD when similarly configured based on the Jeep USA website (I cannot build and price the Gladiator yet on the Canadian website). And, the real benefit to this is the Canyon we got was very lightly used—less than 7000 kms on the clock, so not even broken in. But, because it was now a 3 year old model, we got it for only $36k. In other words, we could nearly get two Canyons like ours for the price of one Gladiator. That isn't to slight the Gladiator—it's a great platform, but it's way too expensive right now.
Fit: We tried the Tacos, but I just didn't fit right in them. The seat did not seem to go low enough and my head was brushing the headliner. We also tried the other Overlander favourite, the 4-runner, but the price was out of line and when comparing cargo space, it was pretty limited for two adults, two dogs, and maybe kids.
So, when we found the Canyon on Auto Trader at a local dealership who took it on trade, we test drove it, liked it, and pulled the trigger.
The Downsides
That being said, no platform is "perfect" and it really is all about compromise. The most significant downsides to the Canyon are as follows:
- Approach/Breakover Angle -- these are far worse than the Jeep, but can be made very good with aftermarket bumpers. Except that brings me to point 2...
- Aftermarket is a desert -- Most of the aftermarket bits available for the Canyon are from the Colorado—not many are Canyon specific. And while the reputation of the Colorado is growing, with the aftermarket following along, due to the different front end on the Canyon, many aftermarket parts like snorkels and bumpers won't fit.
- Dust and Debris -- The nature of a pickup truck means that dust and debris will get into your gear in a way we never had to worry about with the fully enclosed SUV. We're working on a solution for that now.
- Range -- The range in stock form is limited to about 550 kilometres in real world driving. We need to double that for it to be a decent Overlander, which means taking an additional 80 litres of gasoline with us just for Pac, and an additional 40 litres for the Bike for the same range.
Overall, for the price we paid and the package we got, we are very happy with our purchase. But it will take time to turn this "City Person who wants a truck but doesn't need a REAL truck" rig into an Overlander, so let's get started!
Part 3: The Build List
Here is our plan for building out Pac; All of this was originally published on Expedition Portal under our Chasing our Trunks Username and converted into a blog post, and the original build evolved over several years..
Objective: Build a vehicle capable of driving around the world and sustaining two people (plus possible children) and two dogs indefinitely.
Modification list:
- Rack for accommodations, either Clamshell or RTT. We currently own an RTT so we are going to stick with that for a little while.
- Auxiliary Electrical system for accessories and "house power" around camp.
- Awning providing coverage on at least one side of the rig and around the back.
- Drawer system with integrated pantry/cooking.
- On board water, running hot and cold (We had a version of this in our JK and it was divine on long trips)
- Fridge/Freezer
- Front winch bumper w/ improved approach angles
- Rear bumper with swing-outs for tires.
- Skid plates over critical areas.
- Suspension upgrades to better handle loaded weight.
General Priorities:
- Keep total weight to 80% of Payload or less.
- Preserve integrity of factory systems
- Speedy setup/teardown so we can be ready for sleep in less than 5 minutes, and on the road in less than 10.
- "Live-able" layout—stuff we use a lot needs to be accessible, stuff we use rarely can be tucked away.
Part 4: The Rack
Now is a good time to mention that we'd only owned Pac for 12 days as of the start of this build, so this was a "learn as you go" experience.
Our first priority was to get a bed rack built for Pac. The bed rack would serve as a main mounting for many other things that would come after—tent, awning, dual batteries, etc. all depended on a rack. Our first bet was to turn to the aftermarket, as there are a few available for the Colorado that will fit fine in the Canyon as the boxes are the same.
589Fabrications make two kinds of bed rack; a flush mount and a raised mount. CBI Offroad Fabrication makes one too, which looks slick. And the "Big Brother" of the group, Leitner, has been making racks for years and has the reputation (and price!) to match.
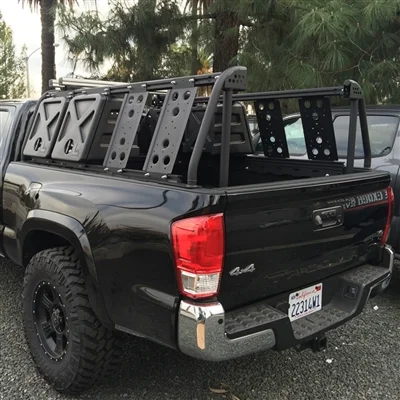
All of the above racks had the same problem—they were open racks, which means we'd have to find a different solution for dust and debris. Most of the options we found (Except the Leitner) were made of heavy steel. And finally, most were either too short, too tall, or made of tubing which limited our ability to box them in later on.
Our experience with Ruby was such that weight is the enemy of an Overlanding rig, so we wanted to avoid steel wherever possible. In South Africa and to a lesser extent, Australia, aluminum truck canopies are very common, whereas in North America, fibreglass is the preferred material. We didn't like fibreglass for a host of reasons—cost, durability, repairability—so we turned to Aluminum. The biggest canopy makers that we found that would fit our rig were Alu-Cab, but at $4300 CAD plus shipping and taxes to get one from the US, it was cost prohibitive. And as nice as the Alu-cab option was, it wasn't going to be customized to meet our needs. It does look good, though!

Part 5: The Rack Continued - Building Our Own
Ruling out the above left us with only one option—custom build one. But do we do it ourselves, or pay someone to do it for us?
A custom rack commissioned by a builder was quickly ruled out due to cost. Aluminum—our desired material—commands a premium over steel of nearly 3x the price at retail, and because it requires special skills and tools to weld, hiring a welder to build this one-off rack would have been VERY expensive. So we turned to our own hands and gumption, and got to work.
Learning to TIG Weld Aluminum
I have limited experience with MIG welding steel, but knew nothing of how to weld aluminum. To YouTube, weld.com, and various other resources I went to learn as much as I could. The experts all said that TIG welding was the way to go for aluminum; the control over the heat was critical and a good TIG setup with a foot pedal allowed the welder to dial in exactly what temperature or amperage was needed.
After many hours, I pulled the trigger on an Everlast TIG welder. It was expensive—about $1600 by the time I got set up with the welder, gas, filler rods, etc.—but the limited availability of aftermarket parts and pieces made the investment make sense.
The plan was to build a three-arched bed rack out of 2x2 square aluminum tubing, 1/8th inch wall, mounted to 1/4 inch angle iron that would sit flush with the bed rails. When I got to the metal shop, I modified that plan a bit to use 1.5 x 2 inch rectangular tubing. This was slightly more expensive, but I could use it in such a way to maximize the strength of the structure by turning the tubing accordingly, while shaving a bit of weight off the total setup. I also found 1/4 offset angle, so I purchased what I needed and got to welding.
Working with Aluminum vs. Steel
Working with aluminum is VERY different from steel. For starters, it tends to gum up traditional abrasive cutters, so I used carbide-tipped wood tools instead for cutting and shaping. It is far, far lighter, but also not as strong as Steel by a factor of about 3x. So, if in the past I would use 1/8 steel on something, I would need to go up to 3/8 aluminum to get the same strength. Thankfully, with careful gussets and triangles, strength can be maintained while further shedding weight. TIG welding is actually a lot of fun; it's as much art as it is science. I won't be getting a job making custom choppers on a reality TV show anytime soon, but after several hours of practice, both welding and cutting those welds to check penetration, I was satisfied that my TIG welds were plenty strong and 'pretty enough'—just like me!
First came welding up the base. The material I used was kind of like Angle Iron, but one angle was 2 inches and the other was 4 inches. It was all 1/4 inch aluminum. I contoured the ends a bit to blend them with the body lines using a jig saw and smoothed it out with a grinder.
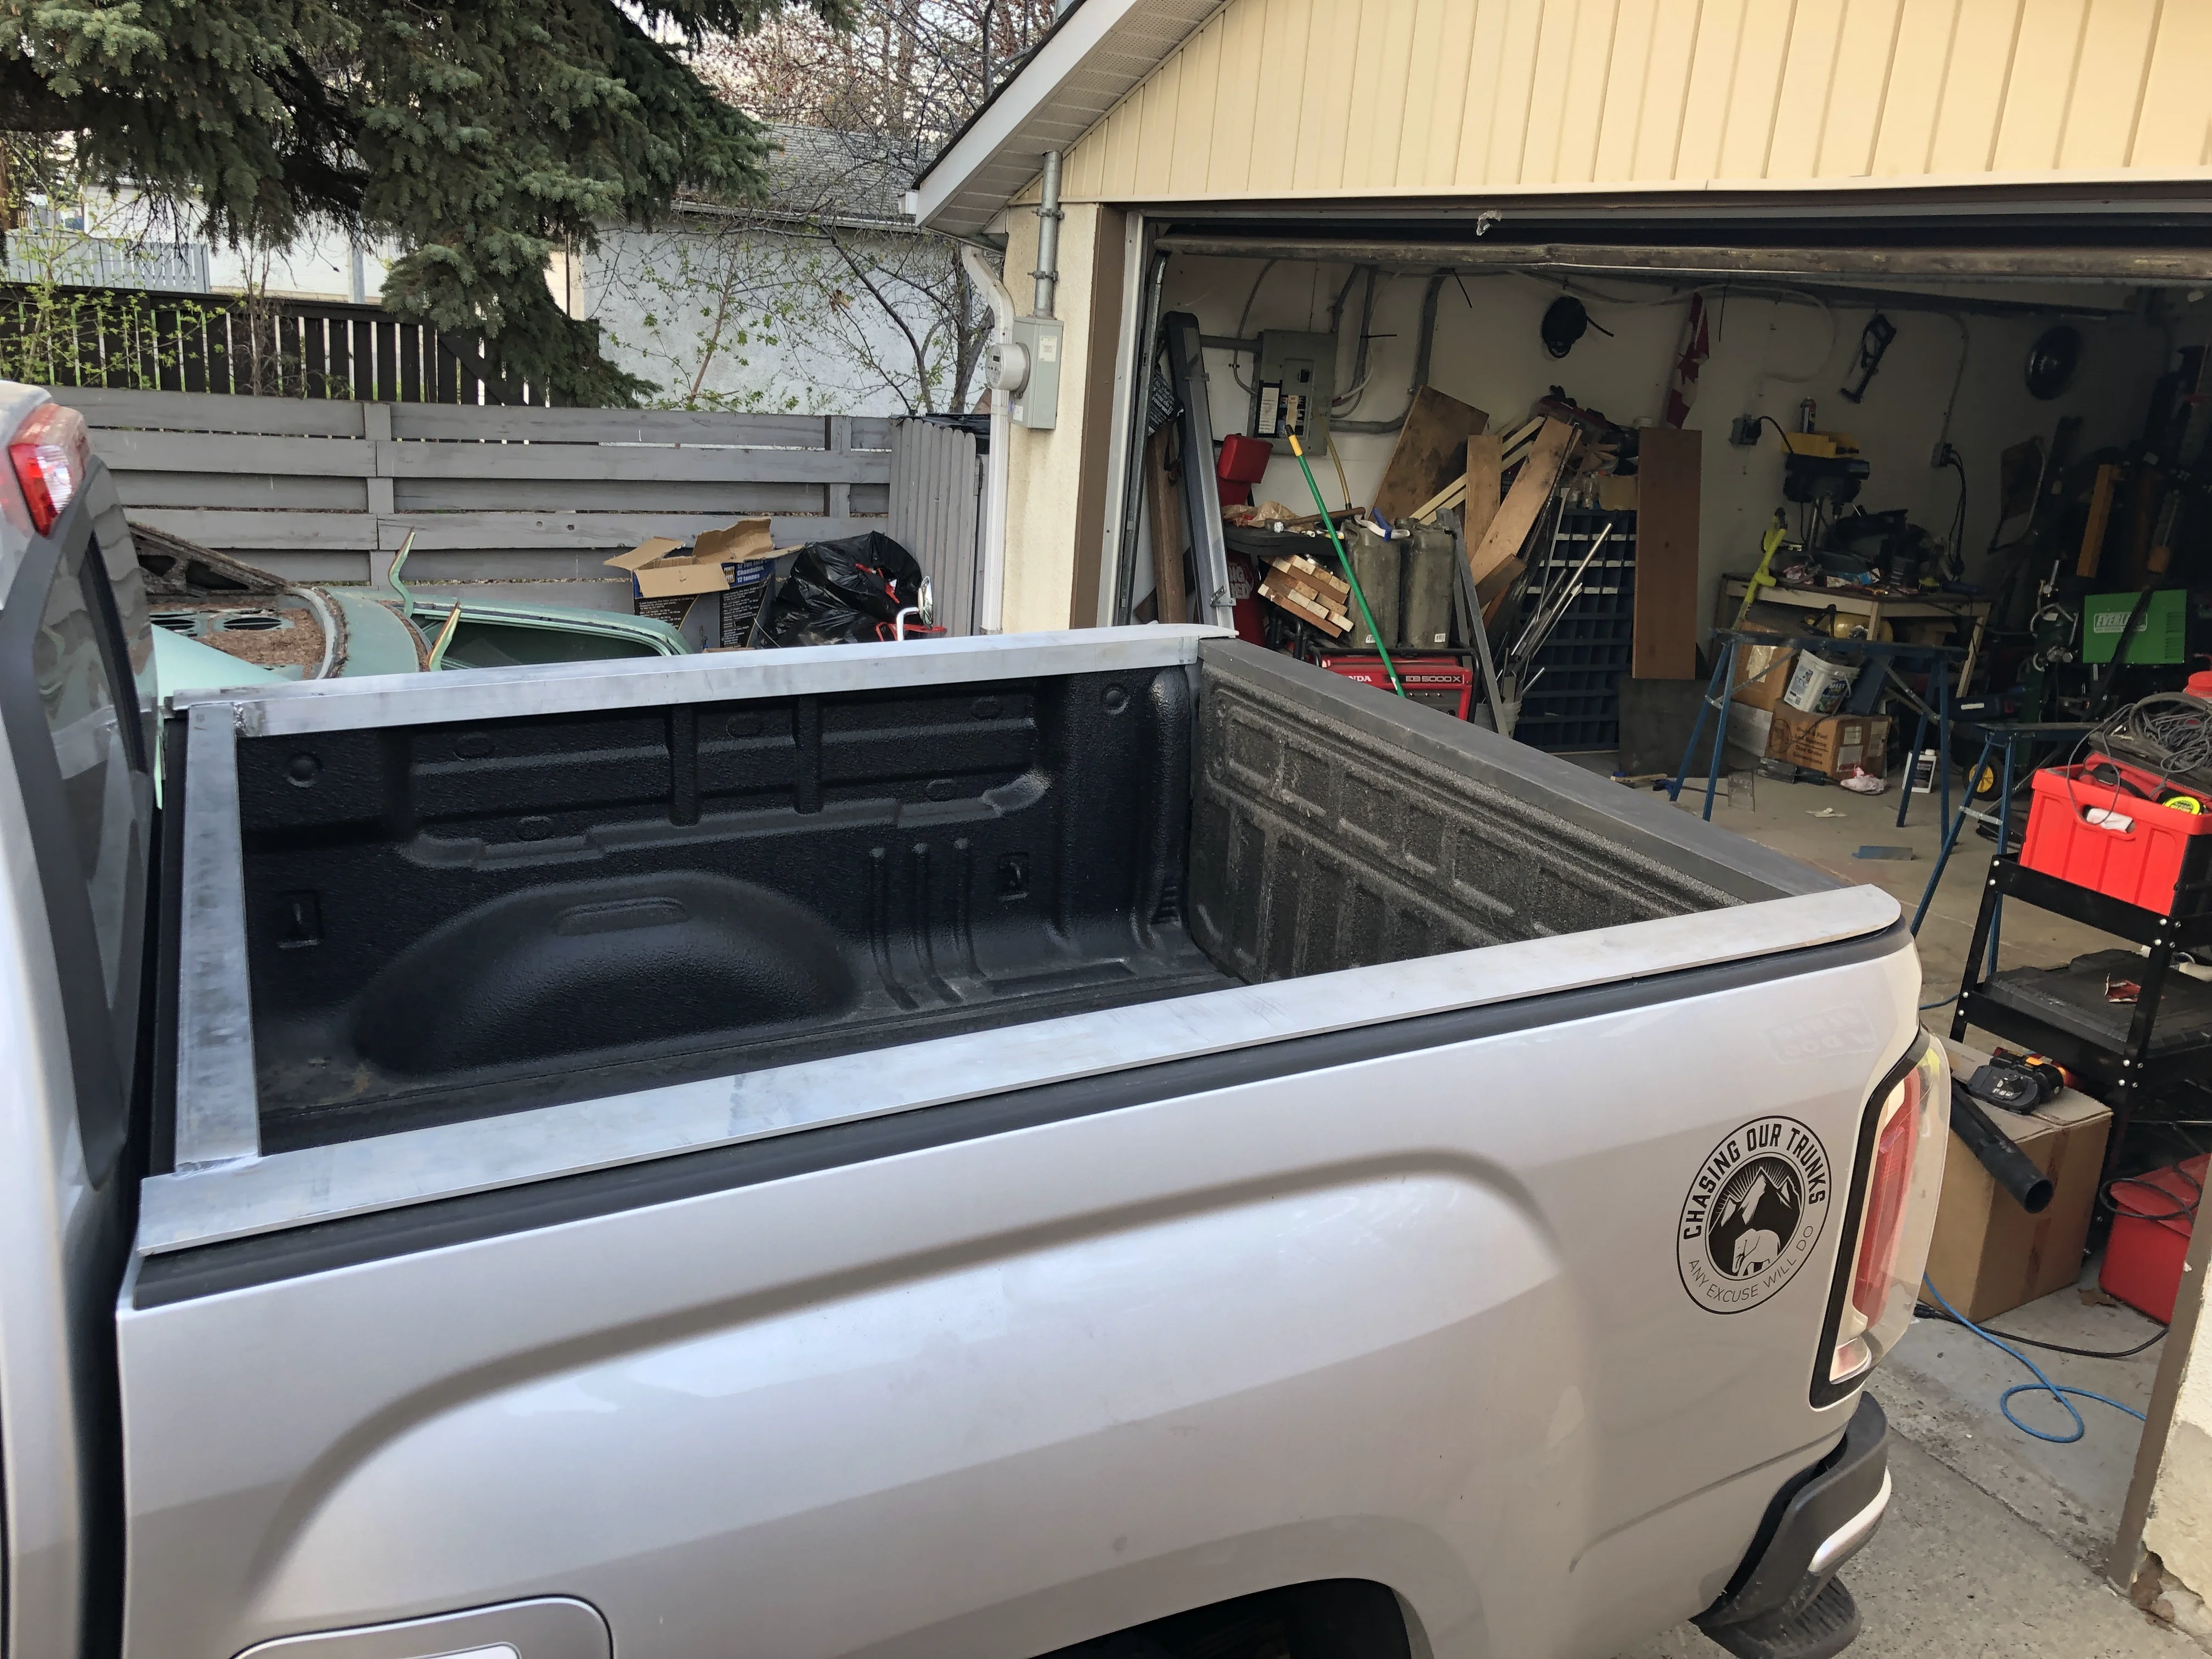
After that, I set to work on the arches. My plan was to use three arches to guarantee strength, and tie them together. The flat edges on the arches will help make it easy to box things in later on, with a box forward and to the rear of the centre arch. The forward boxes (ones nearest the cab) will be for Electrical on the driver's side and Water on the passengers side. The rear compartments will be for recovery gear and other "quick access" items.
Making Mistakes and Learning
Alas, it just didn't look right. It was too tall. This was not a measurement error, just one of taste—I thought I'd want the taller cap on the back, but after it was built Teryn and I discussed it and decided to shorten the arches a bit. This made for quite a bit more work. The arches are angled to match the lines of the cab. If they were perpendicular to the ground, it'd be a simple matter of cutting a few inches off each leg. However, since these arches were angled, shortening the legs would mean the arches would not properly bridge the gap of the box. So, to shorten them, I also had to extend the middle bit (which you can see evidence of in the photo). Thankfully, this was giving me lots of TIG practice!
Unfortunately, before making the decision to shorten the arches, I had welded them to the aluminum base. The heat involved caused an unanticipated problem where the aluminum base warped a bit.
.webp)
Thankfully, we were able to rectify that when we re-welded the shortened arches. But, my inexperience with aluminum fabrication shone through in other ways—I don't mind being transparent about my lack of skill. I know a lot of pro welders would look at my work with disdain, and some on this very forum are going to cite this post as "See that's why you gotta buy ARB everything. I've been chewing an ARB toothpick since 1975 and it's still good".
(I have nothing against ARB, but I don't spend a lot of time worrying about bad attitudes!)
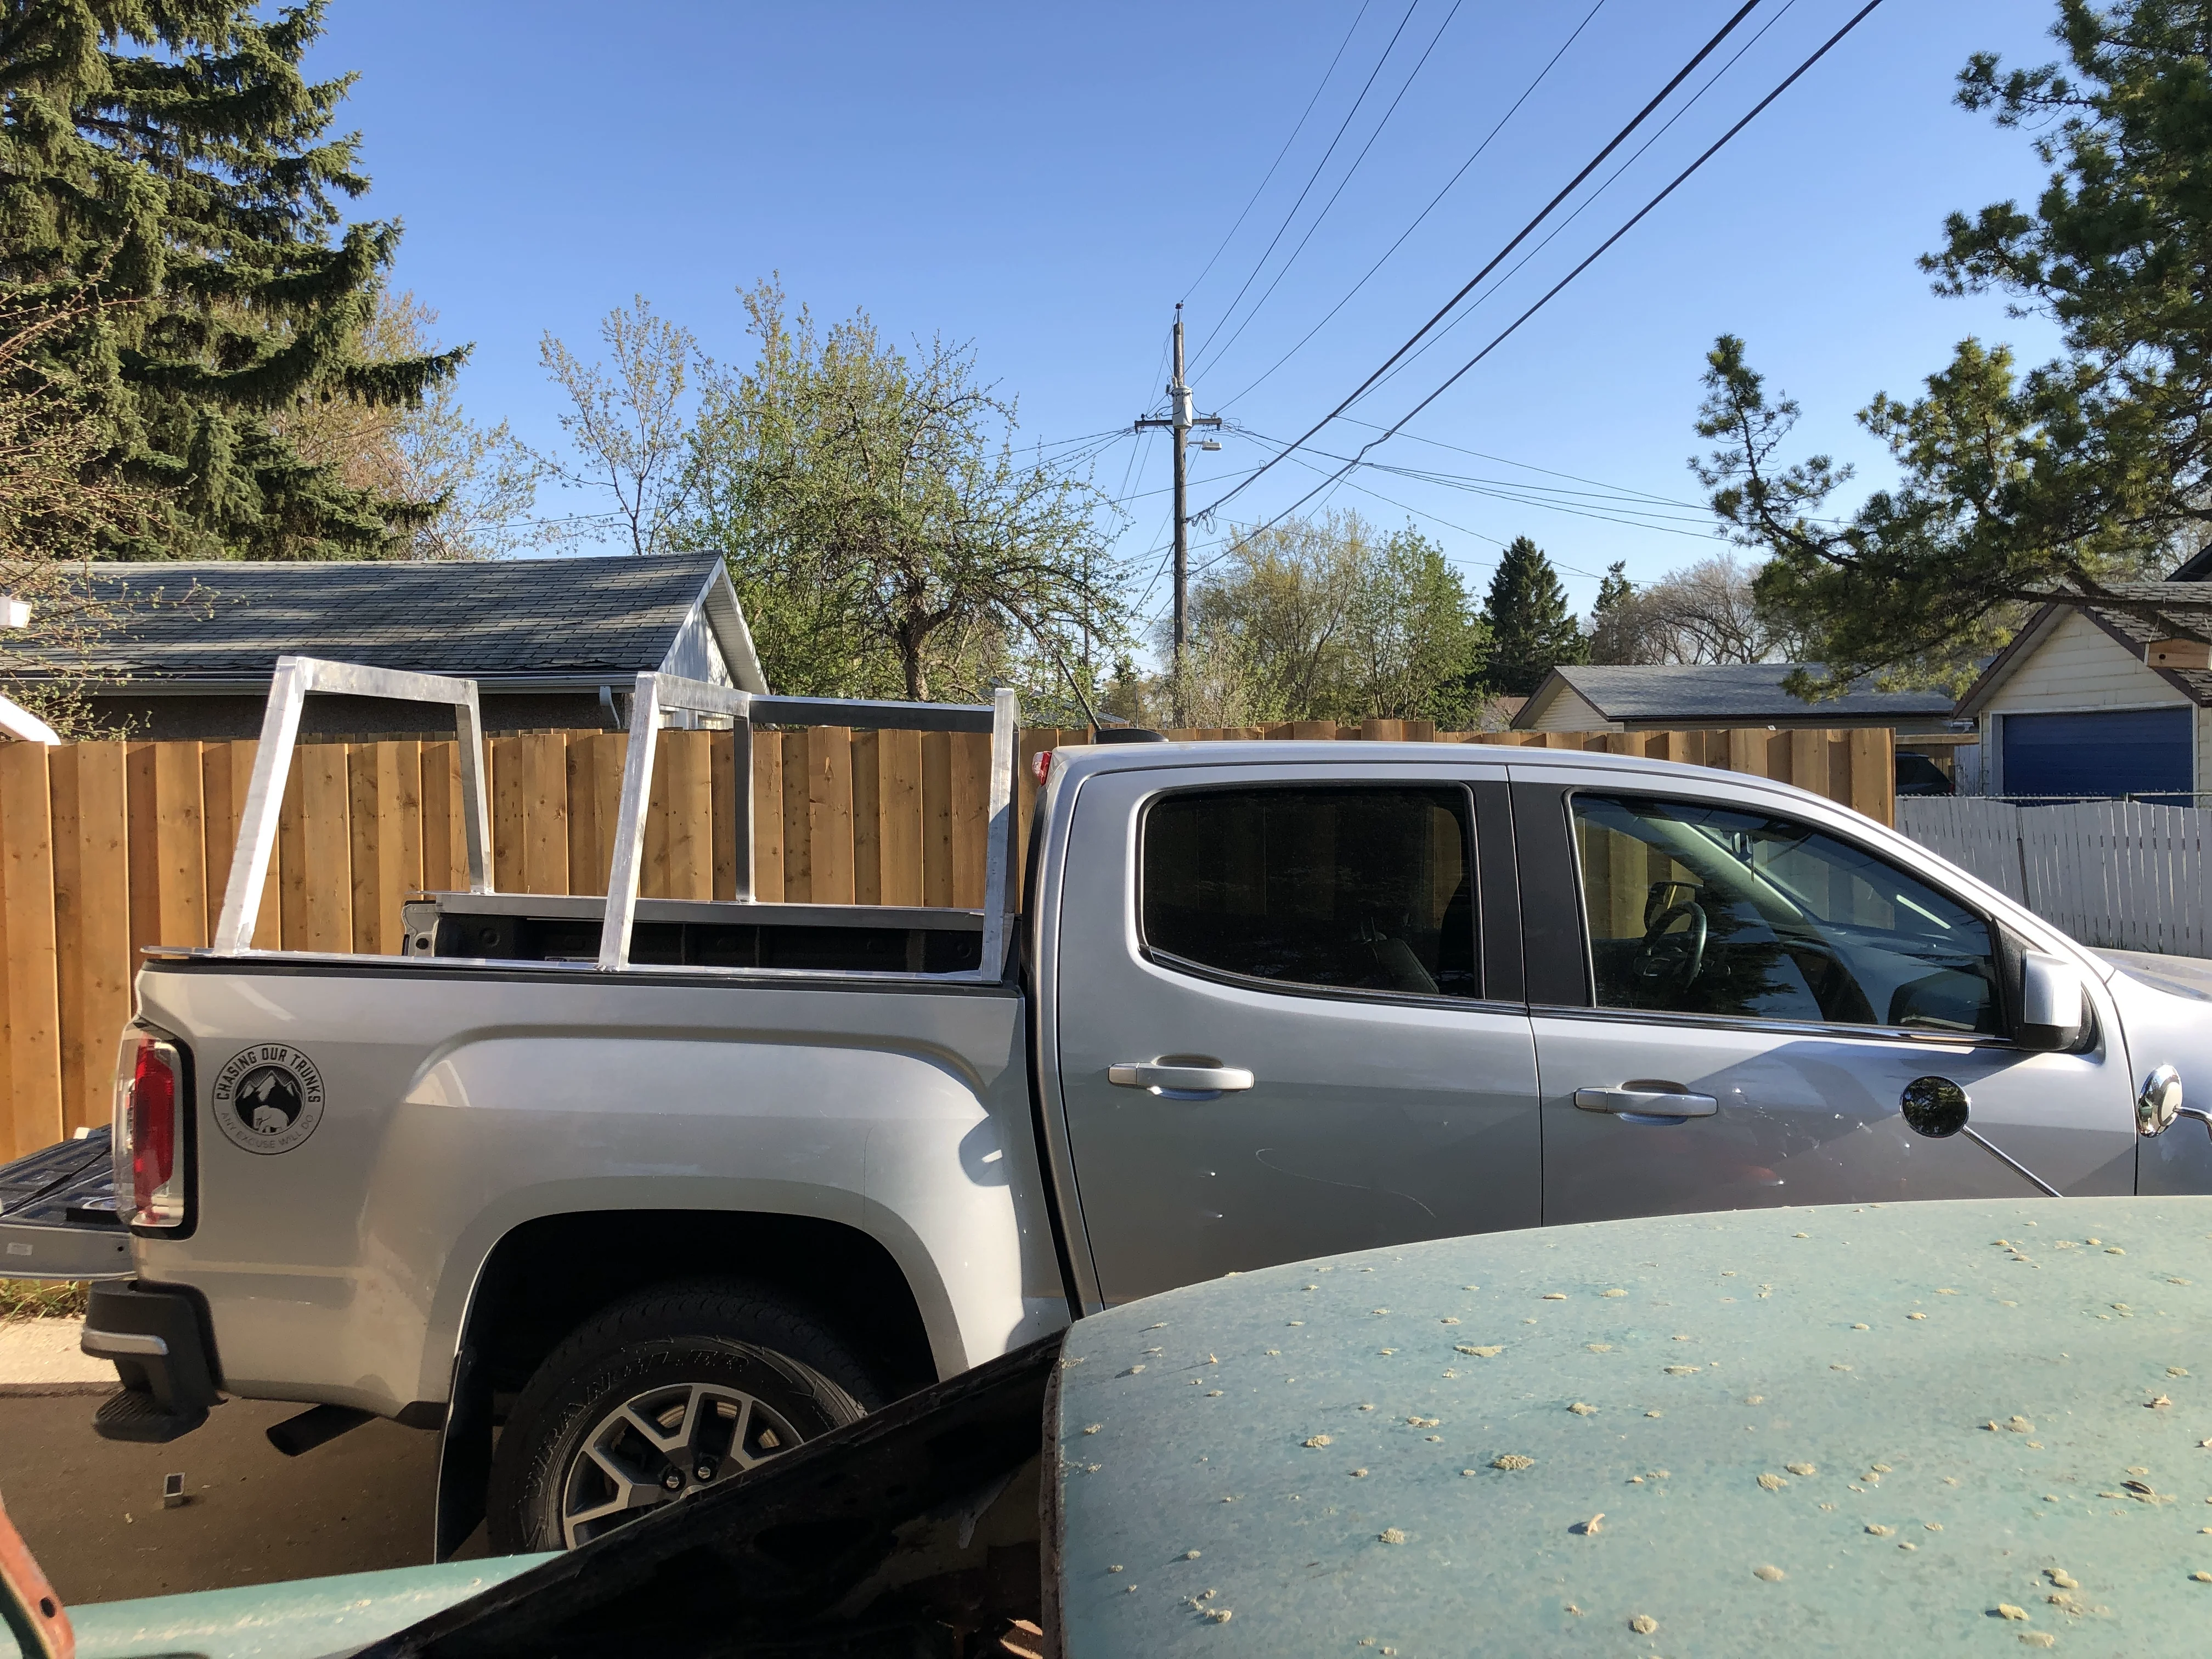
At any rate, the inexperience I'm talking about was prevalent once I dry-fit the arches. One of these things is not like the other!
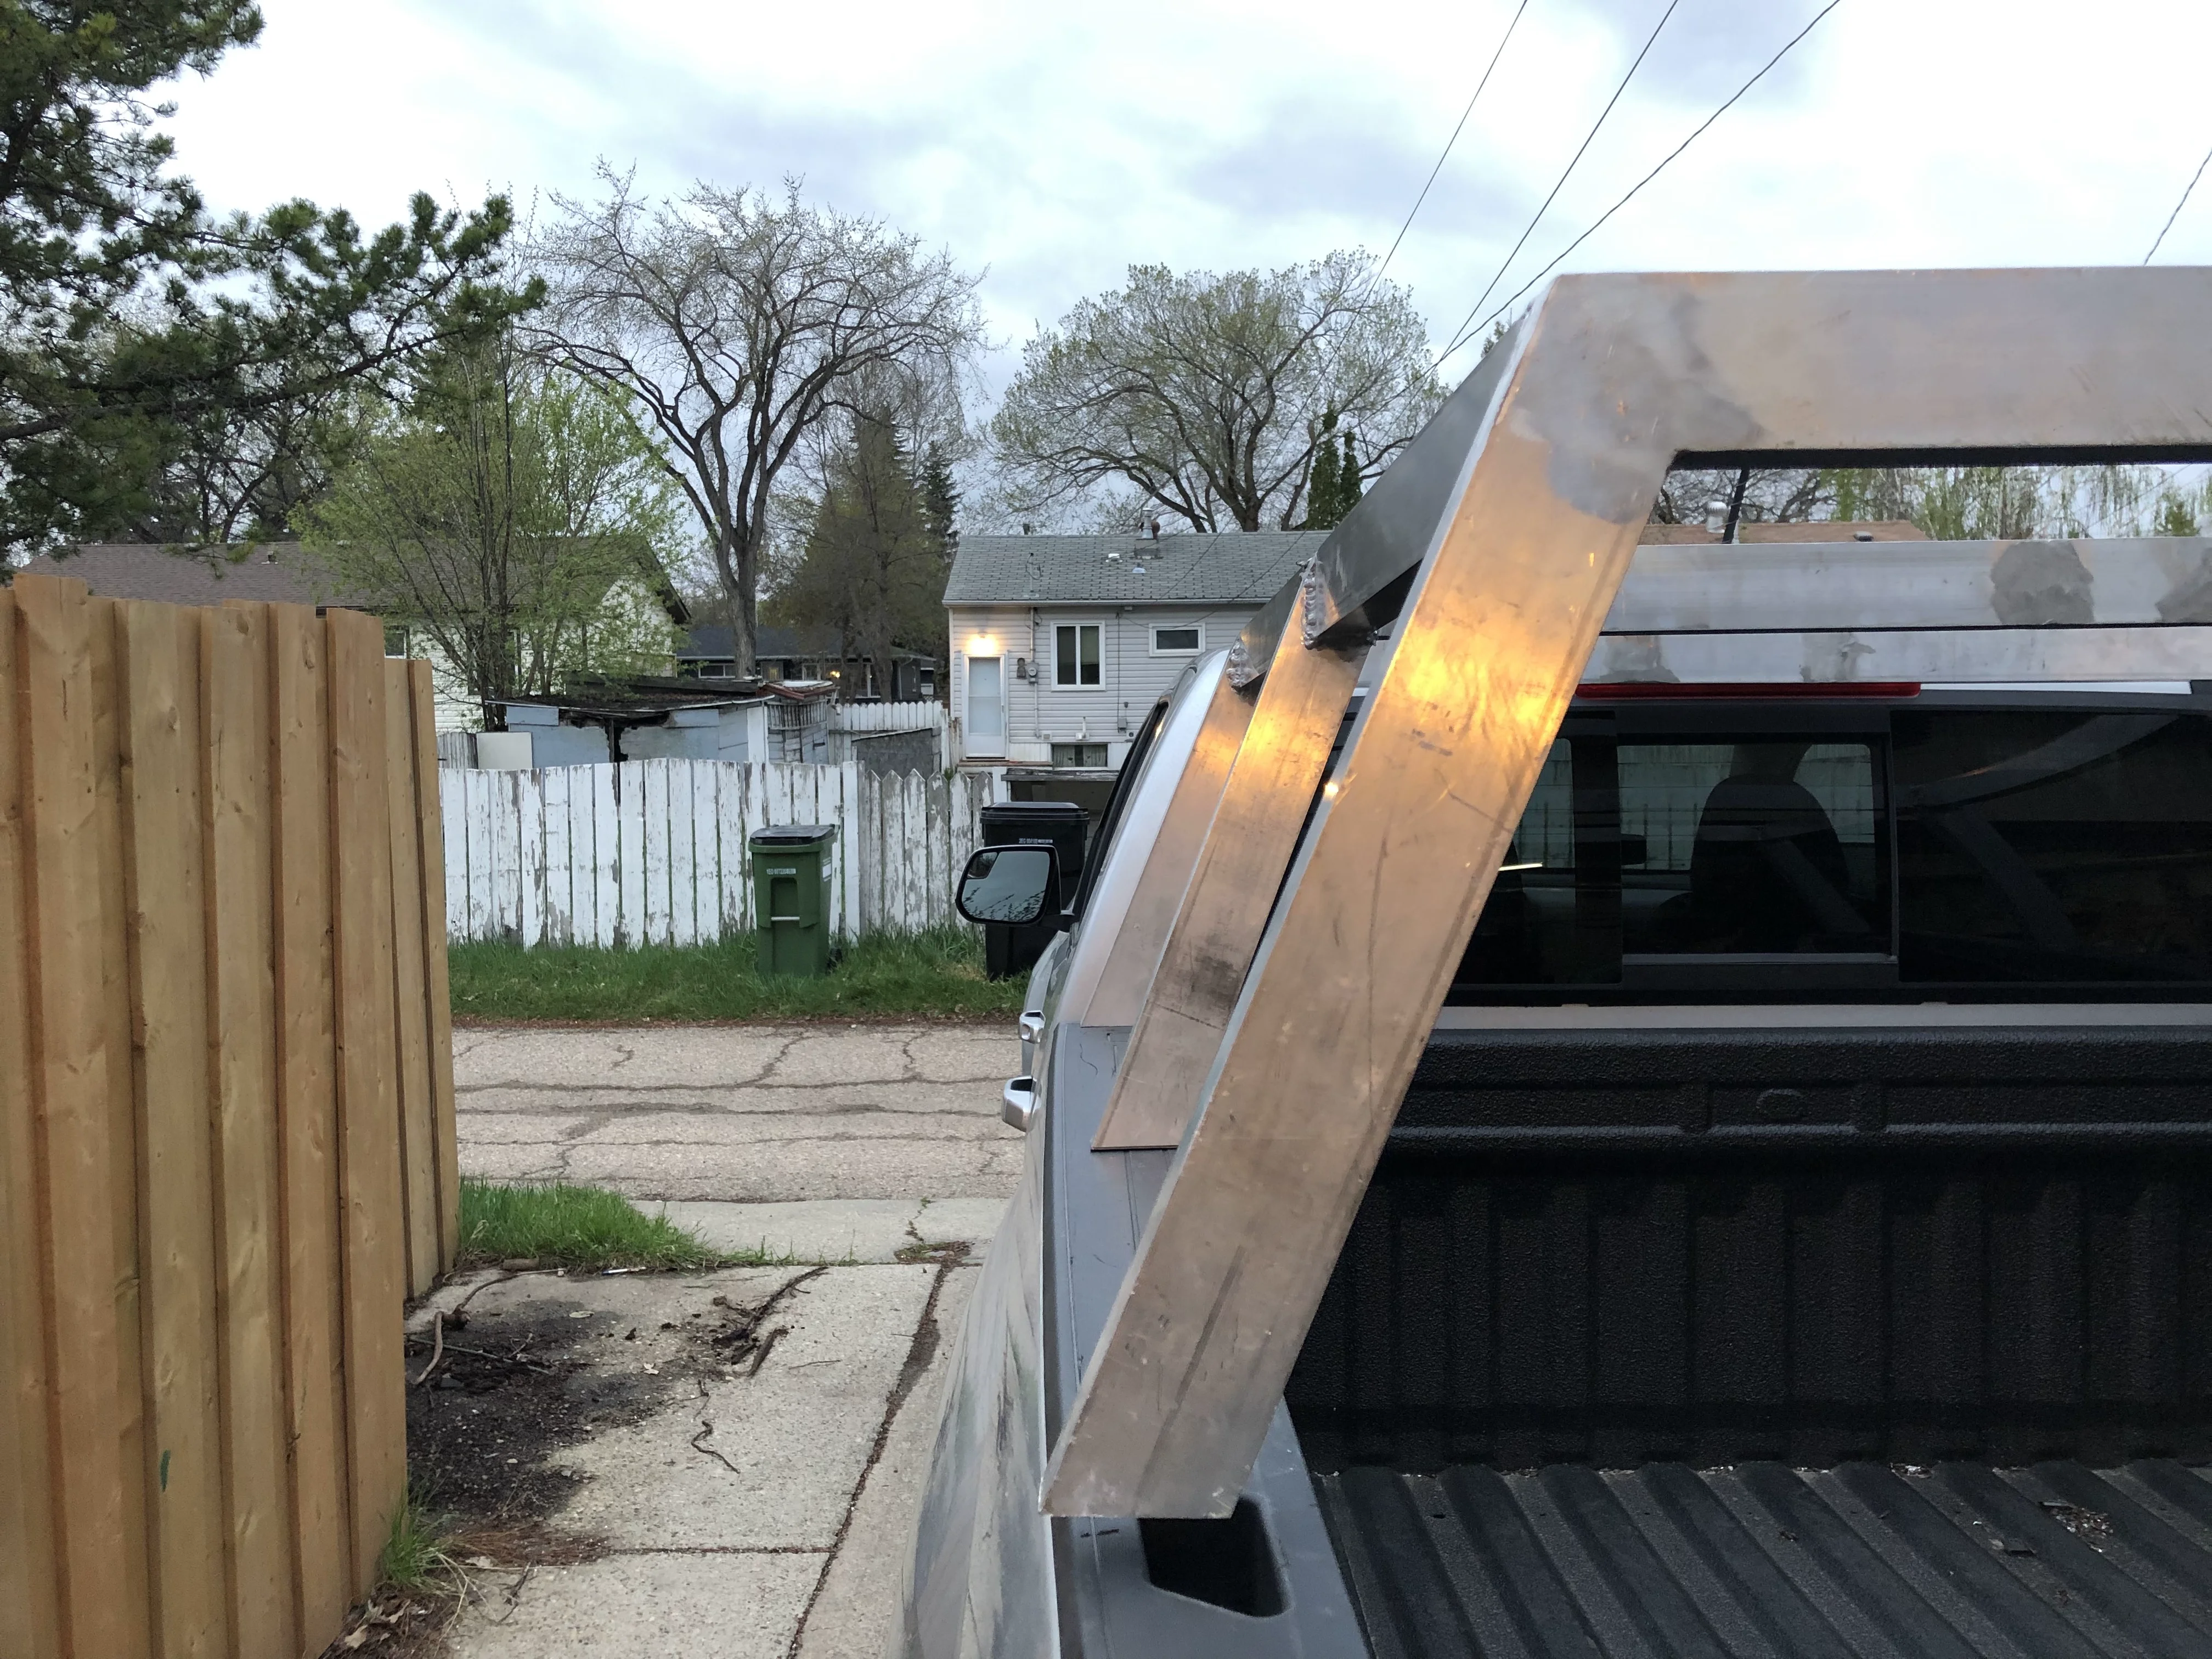
That shouldn't stick out like that... So, I had to get creative on cutting that leg off. I decided to cut it off in an odd way so that the two pieces, when welded back together, would "joint" together as opposed to simply being butt-welded. While I checked all my welds for penetration using a bore scope camera to see the backs of the welds, this joint approach would guarantee a bit more strength along the backbone of the piece I had to cut and re-fit (Note: This is the piece I cut off; the piece I re-fit was cut more carefully and cleanly, and mated up with almost no gaps except for a slight gap where I had to adjust the angle a bit).
..webp)
Eventually, after going through a full tank and a half of Argon gas in practice welds and re-doing the real thing when there was a question of weld strength or penetration, I had something that resembled a bed rack (Ignore that it looks warped; it's not that's just some beads on the underside holding it up that I had not smoothed yet):
-.webp)
Mounting the Rack
To attach the rack to the bed, I used two solutions. The first was to use a small bolt and actually drill through the plastic bed rails. Beneath them in the sheet metal are a series of oblong holes that the bed rail caps clip into. I sacrificed one and put a bolt through it to hold the rack down near the tailgate. To mount the rack near the cab, I designed my own brackets that would go up through the stake pockets. The end result looked like this (forgive my drawing and apologies if this doesn't show up well; I'll work on a better version ASAP):
.webp)
The whole canopy assembly can be removed with 4 bolts, and the only indication that there is anything there would be two 3/8th holes in the plastic box caps. The rest uses factory mounting points and positions.
Through all of this I really need to give full credit to my dear Dad, who was on standby to talk through designs, helped me with welding resources, and gave me the encouragement I need to get this done. Teryn was hugely involved too, as her ideas and labour on helping with fabrication made it go much faster. Honestly I'm so grateful for my dad and Teryn for the help; this would not have been possible without them.
Anyway, with the rack structure done it came time to attach the tent, awning, and put the traction aids in place. I plan to upgrade to MaxTrax, but it's not in the budget today, and since we were under time pressure to get this done for the May Long Weekend, I knew I wouldn't get both the rack and the winch mounted so I wanted some kind of recovery gear. Our plan was only for a few gravel roads, so we didn't intend to push it far, so for now these cheaper traction aids would work.
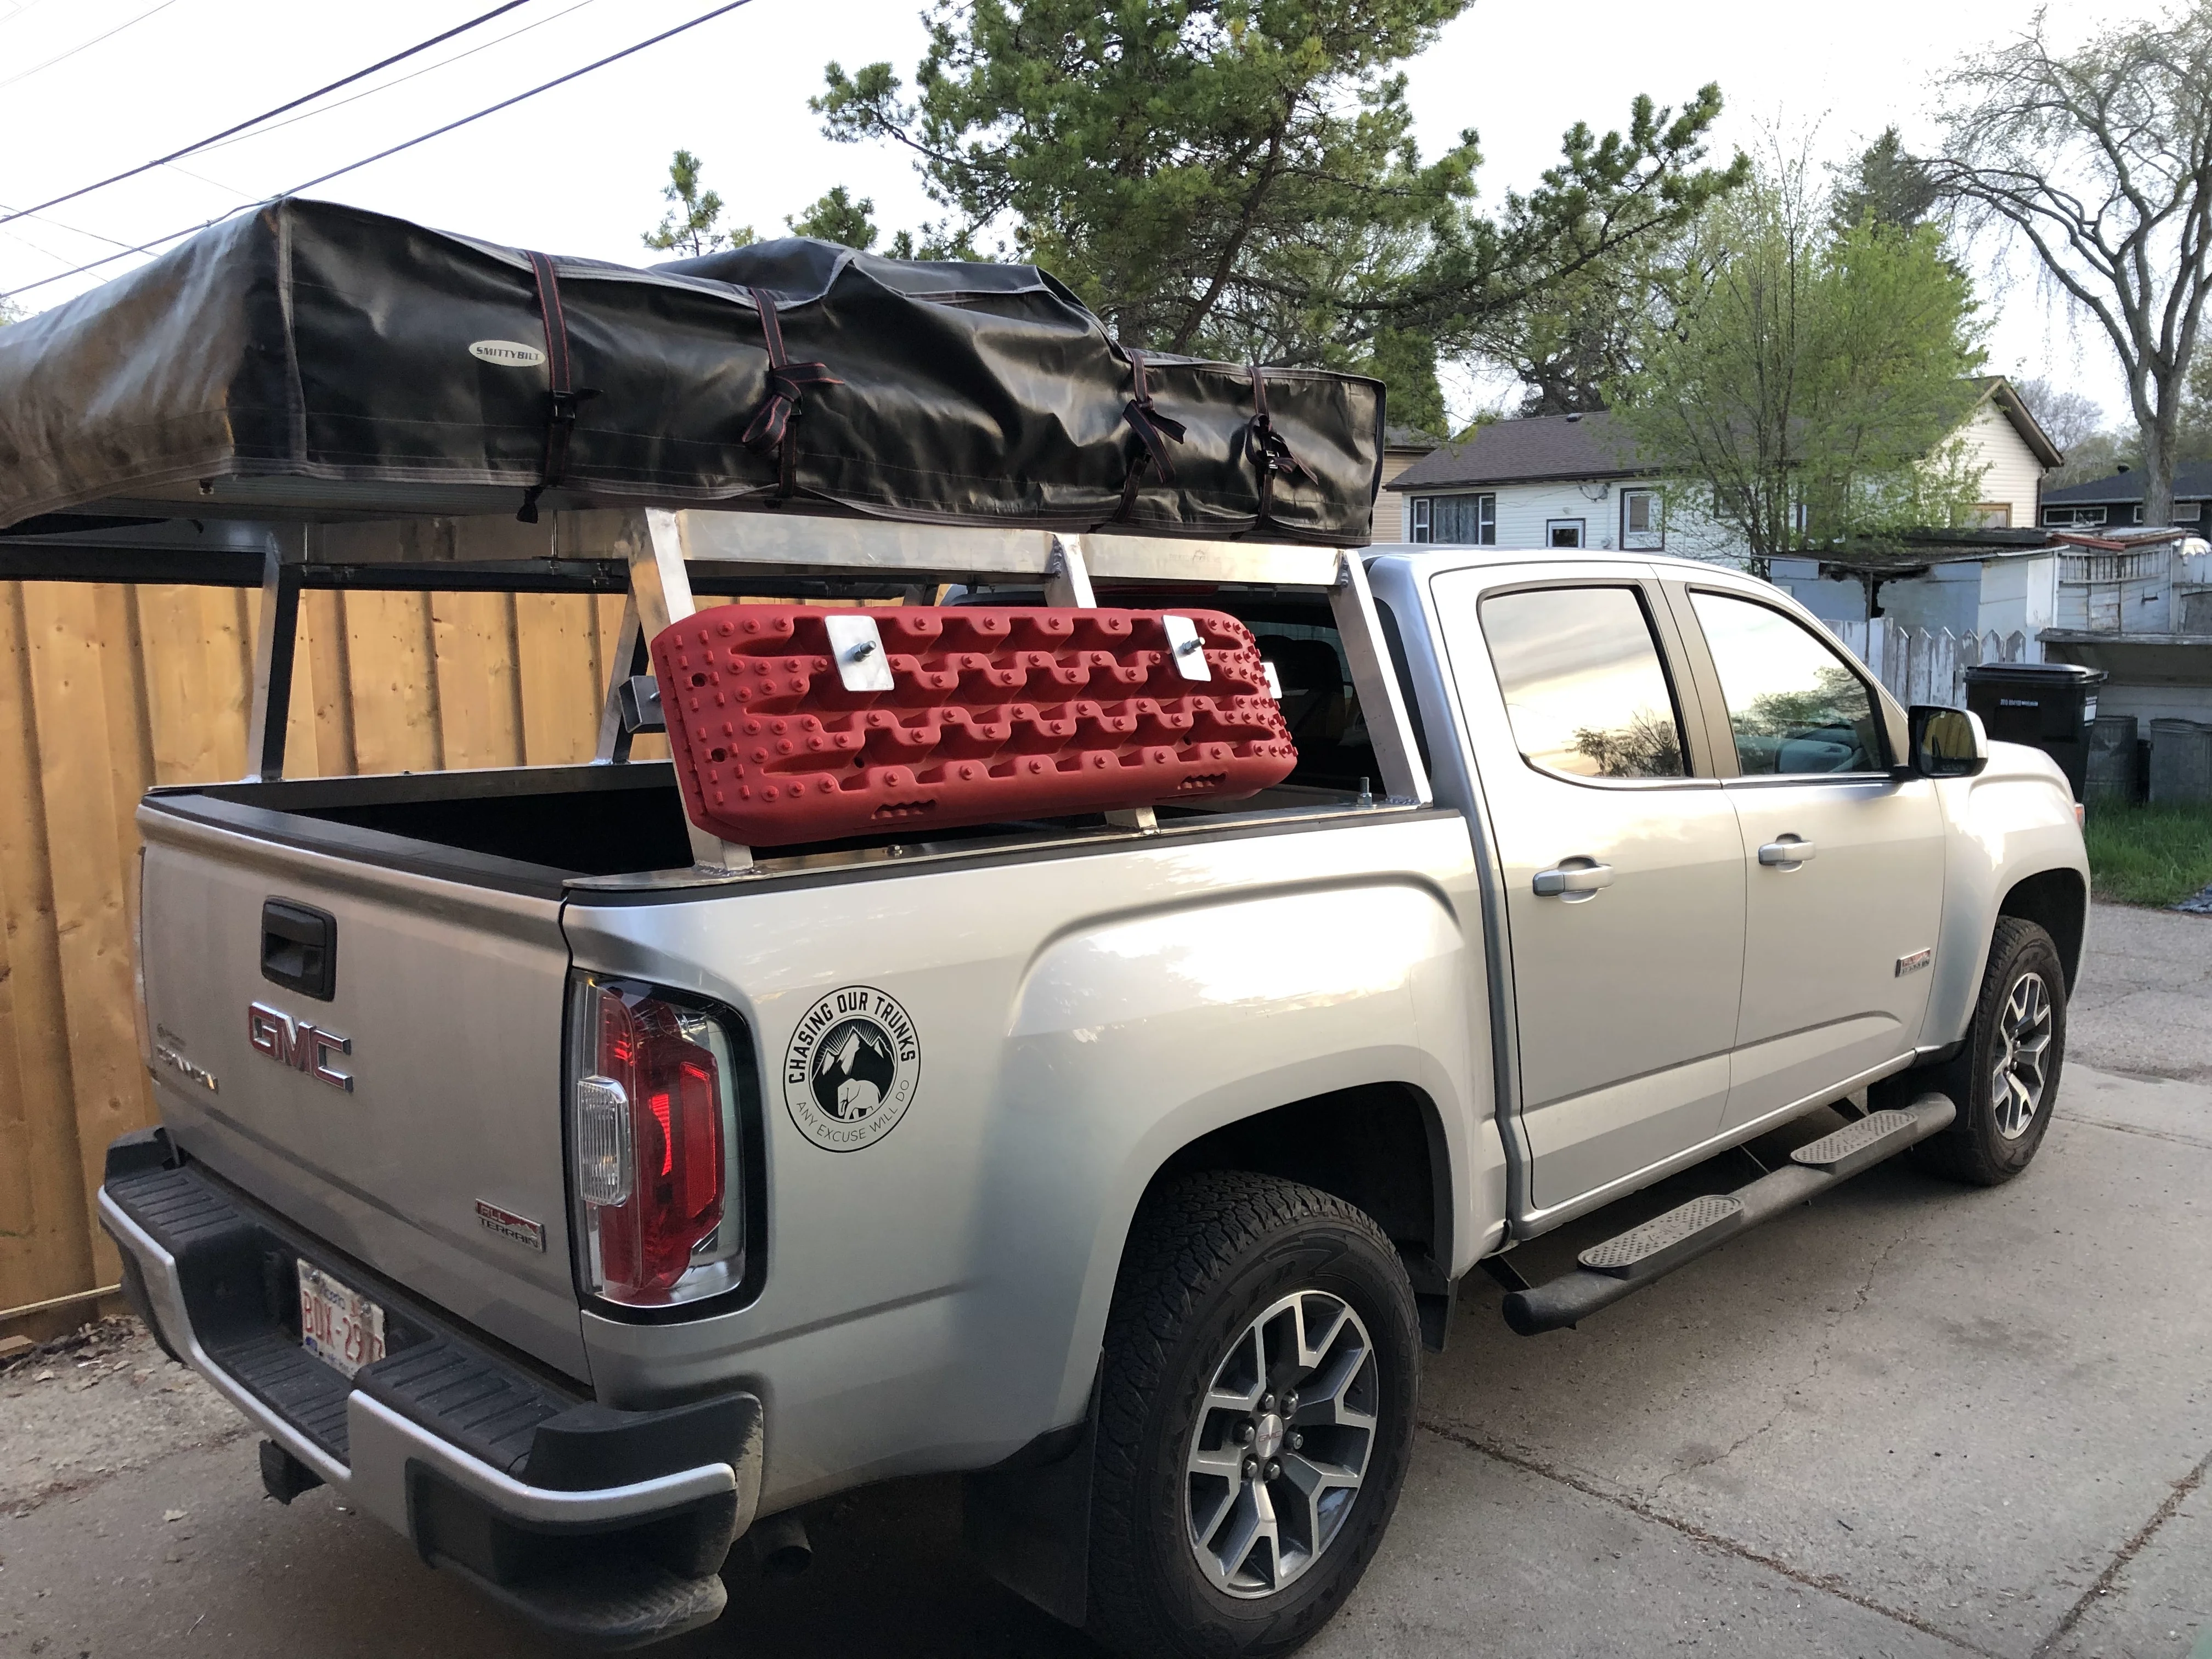
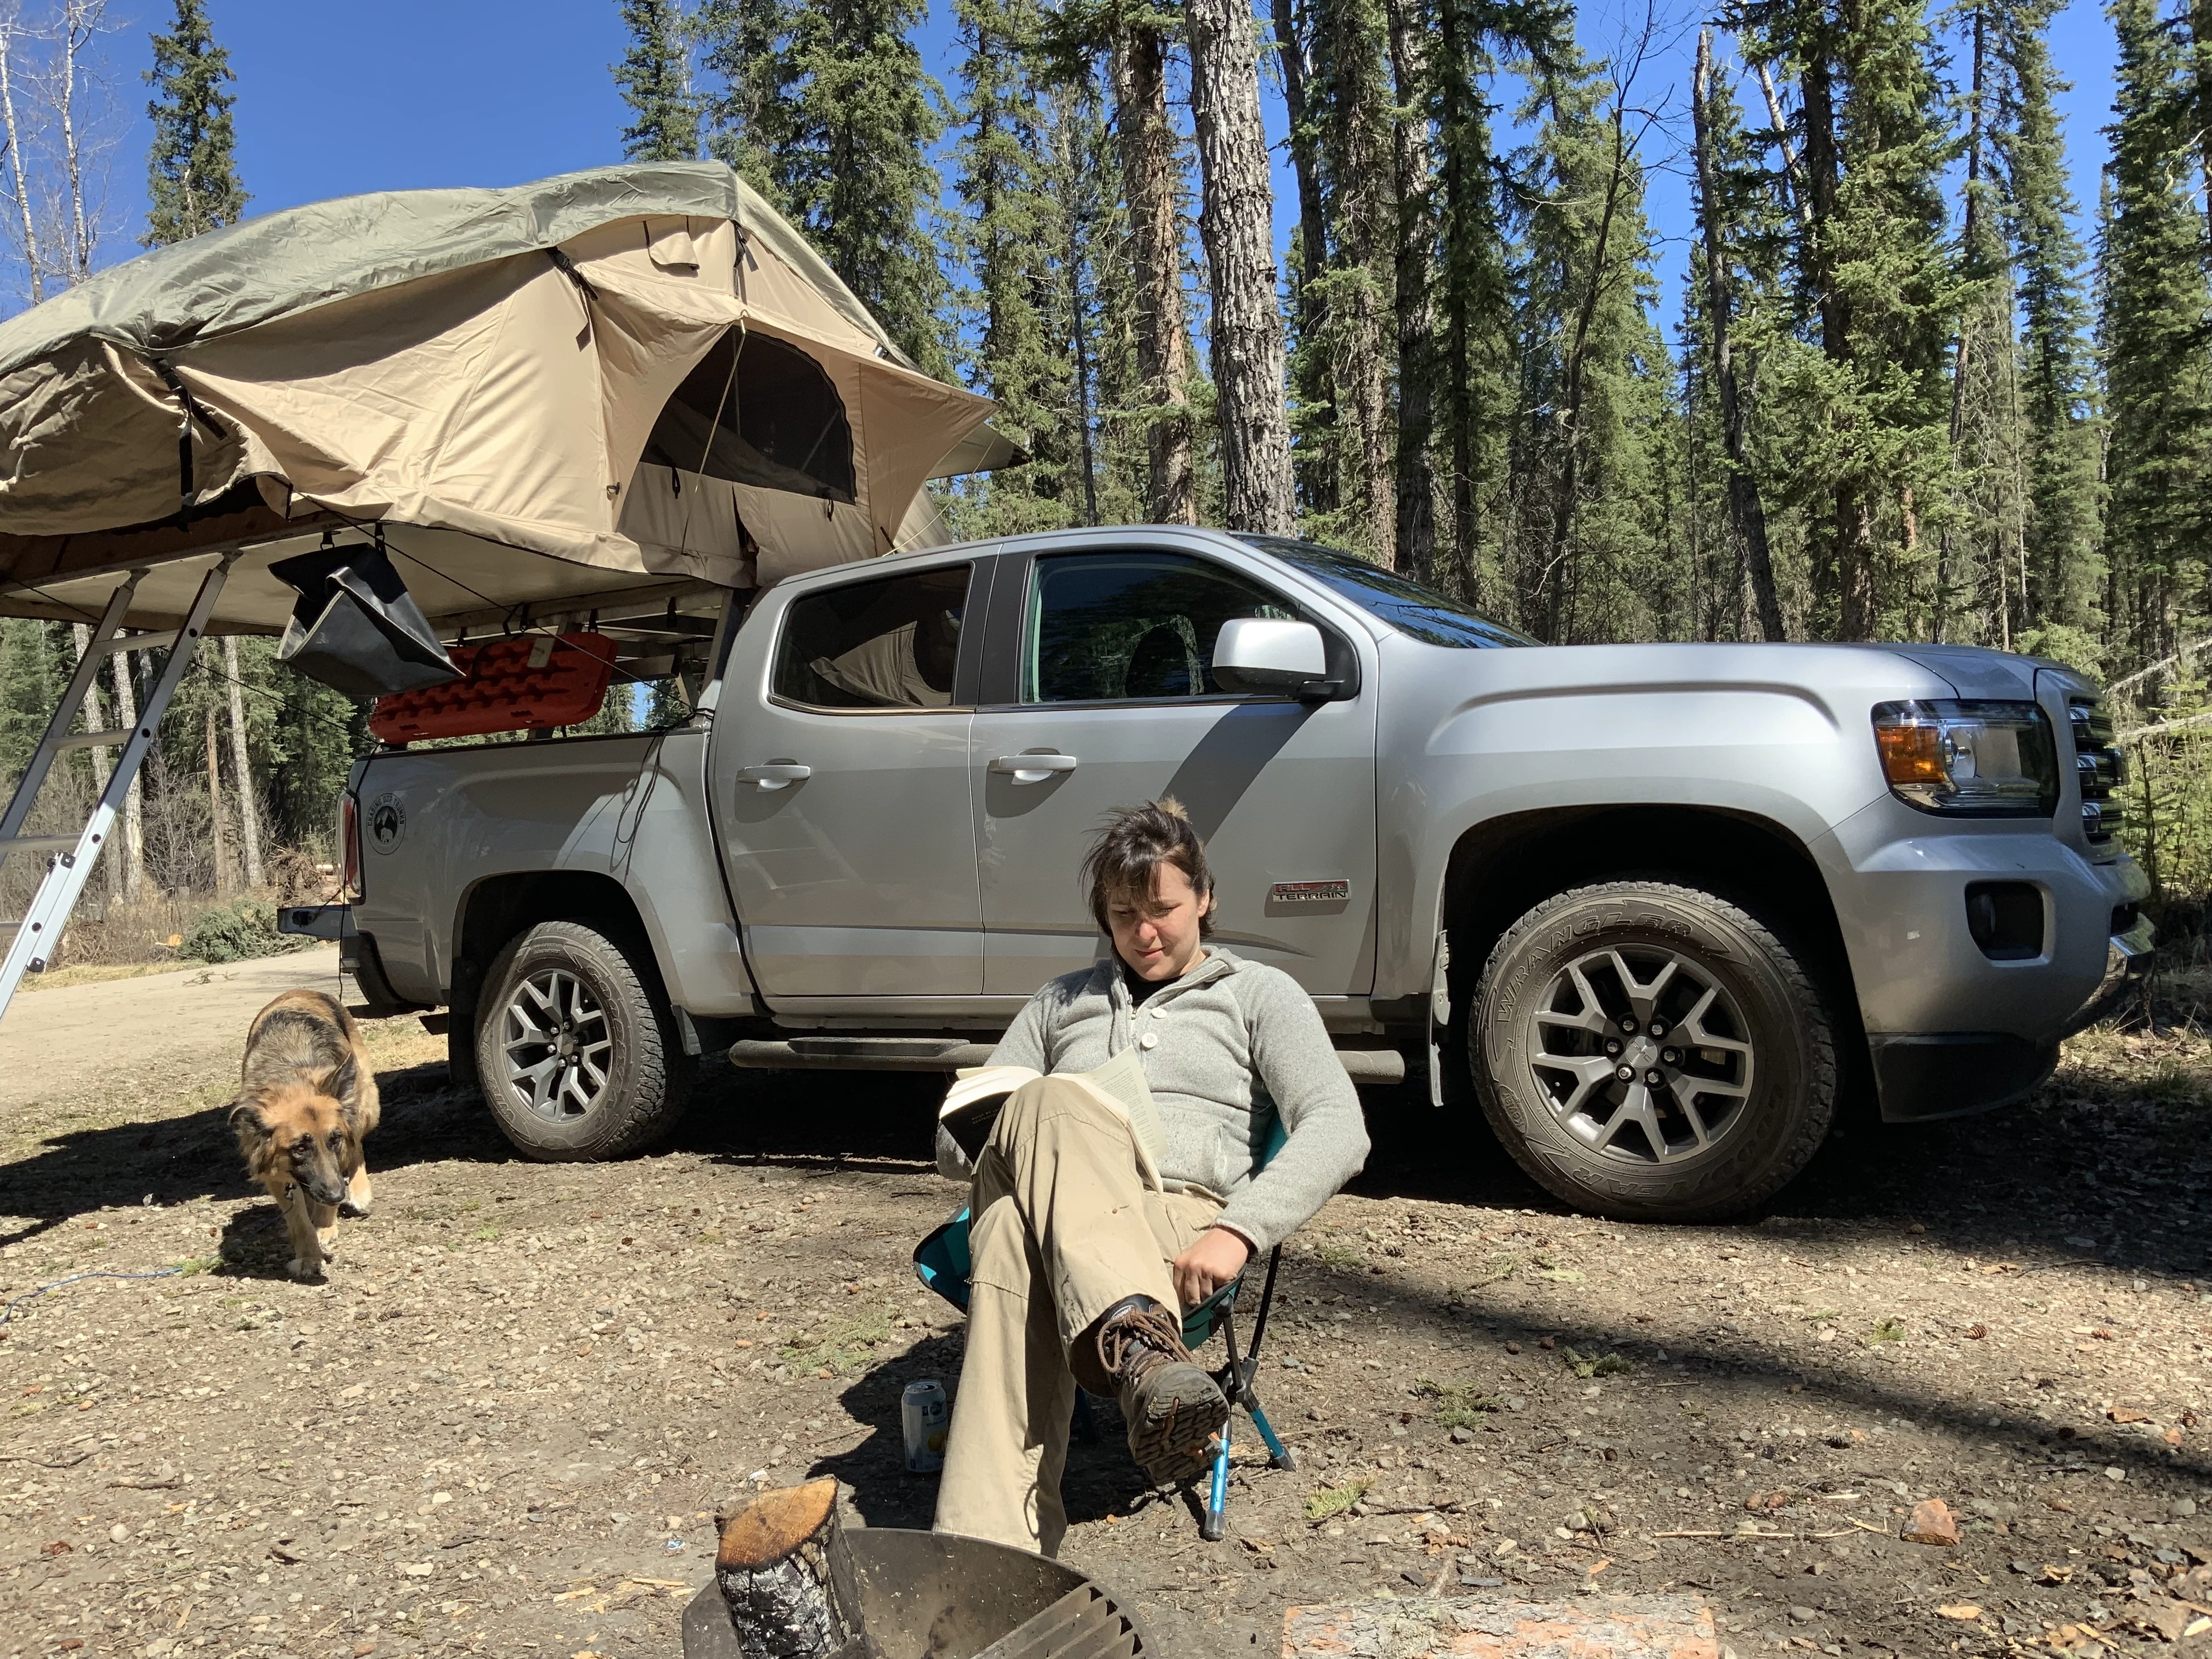
And our first test was in the shadow of the Rockies outside Hinton, Alberta. The rack worked flawlessly.
Rack Weight and Philosophy
Some might wonder about the weight. My estimate for the rack is about 90 lbs, but I hoped to take it off and measure that to get that 100% accurate. I have no problem lifting the whole thing on my own despite being blessed with the body and raw, animalistic strength of a soft-handed office worker. The Leitner system is 70 lbs, also aluminum, so I'm a bit heavier than that, but our rack would serve as the base for a full cap in due time and thus was made a bit heavier to support our anticipated weights. If we went down to two ribs (which we probably could), we'd be lighter than the Leitner.
That being said, once we got a final weight, if my estimates were off by too much I was very willing to re-do the rack to be lighter. I wanted to err on the "too strong" side of the weight scale given I lack the engineering resources to dial it in on the button to exact tolerances, and I can't do things like X-ray my welds. Our overall goal was 80% of GVWR, so if we could hit that with all our kit and the rack as-is, we'd leave it alone.
I wasn't able to find weights for the 589 Fab option (which also looked to me to be aluminum, but was too low for our needs). The CBI off-road option is listed as 120 lbs so I was well ahead of that.
The next stage for this project was to seal the cap against dust and moisture. We also had a plan for the tent as we found the Smittybilt to be a bit too big, and our old Tepui was a bit too small, so we were looking for a compromise. Now that I could weld aluminum with reasonable efficacy, the world was our oyster!
If you take one thing from this build thread, please let it be that with the right attitude, you can learn how to do this stuff. It will take trial and error, but stick with it through the frustration, keep the blood sugar elevated, and you can do it. I'm proud of the work I did on this rack, and as my skills improve, so too will my fabrication.
Total Cost so far:
- Pac: $36,500
- Welder: $1600
- Materials: $600
- MOD TOTAL: $2200
- TOTAL: $38,700
I know that seems like a lot for a bed rack, but remember that our bumpers, drawer system, and every other 'add on' will be built using that welder. While it makes for an expensive bed rack, it will make for a very cheap bed rack, bumpers, tire carriers, drawer system, etc. as compared to buying commercial.
But the best is yet to come, so stay tuned!
Part 6: Philosophy on Modifications
It's great to see people showing the learning process. A lot of people are too shy/proud to show the mistakes they made along the way and skip ahead to the fully developed final version. Our goal is authenticity in this stuff—that includes the blemishes and foul-ups. My attitude towards vehicle modifications is the only permanent mistake is the one you give up on fixing. As a wise man on another forum told me once: "It's only metal—it'll yield".
Part 7: Suspension Plans
Some might wonder about suspension modifications given the weight we're adding. I hadn't done any upgrades yet at the start of this build—the plan was to finish building it out first so I could know for sure about weights and such.
Based on my research I planned on going with ARB Old Man Emu with a small lift (less than 2"). They currently offer 3 kits for the Colorado but they depend on typical weight configurations like winch, bumper and winch, or stock—but since I planned to run aluminum bumpers I'd have to get some advice from the experts in Australia.
Part 8: The ARB Bumper Decision
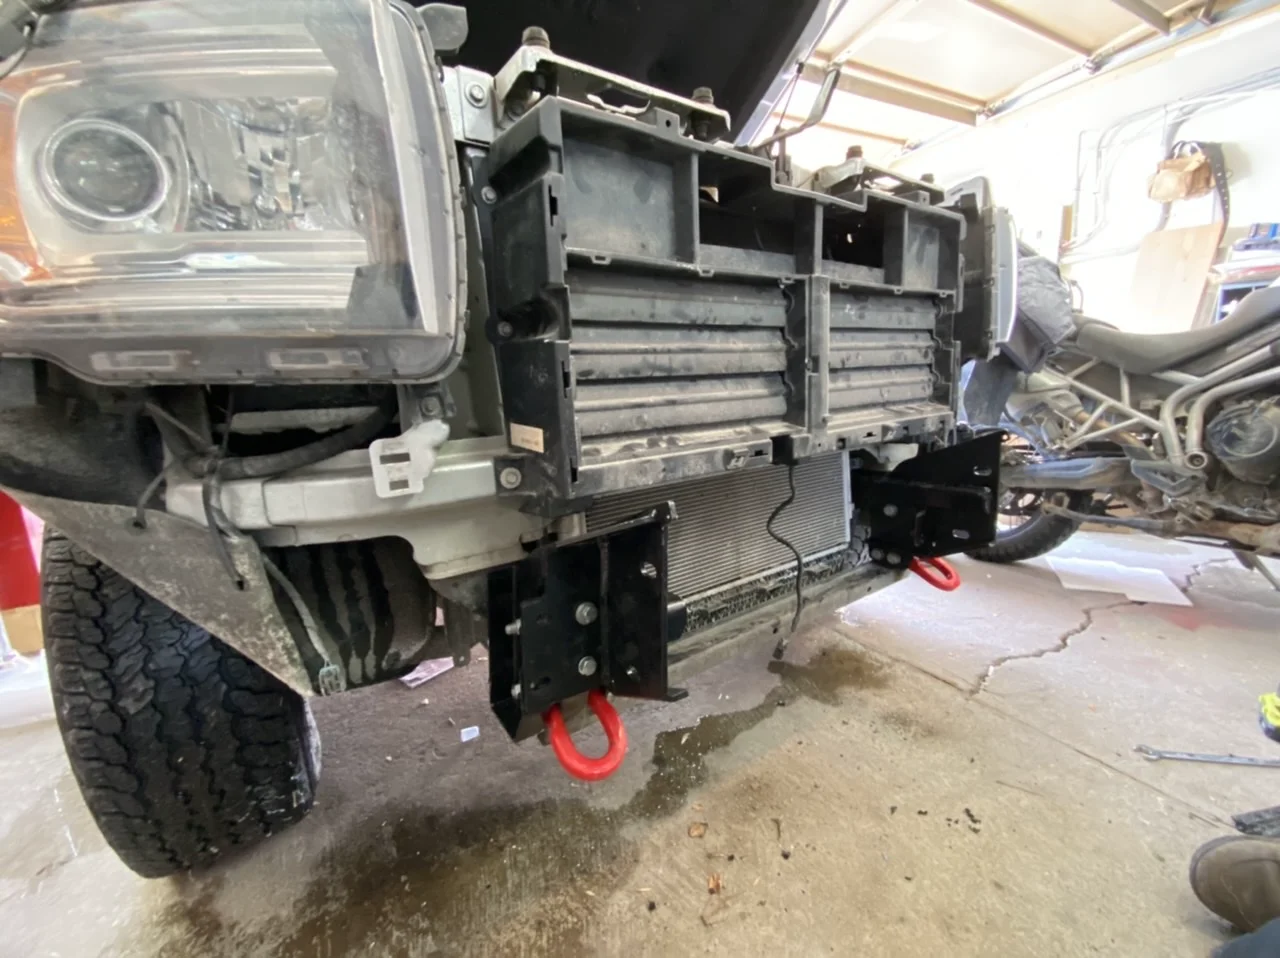
I've posted elsewhere on Expo my reasons for going the route I did but the short version: I pulled all the plastics off my truck with the intention of building a winch-capable bumper out of aluminum. However the price of aluminum meant this was a rather expensive proposition—Plus, COVID has made everything that much harder to do for a hobbyist like myself, and so I abandoned the idea of building my own.
I looked to the aftermarket but the only bumpers available for my rig were steel—and frankly, not exactly changing the world in terms of good design. The difference between most of the bumpers I saw out there and one that I would build myself was negligible. The only exception that I found to this rule was the Australian bars, specifically ARB.
Of course ARB don't make their summit bar for the GMC Canyon, but they do make it for the Chevy Colorado. The trouble is I've been unable to find anyone whose fitted an ARB bumper to a Canyon—they SHOULD fit given they are the same platform, but it seemed nobody wanted to gamble the $2500 to see if the ARB would fit.
Well, I gambled.
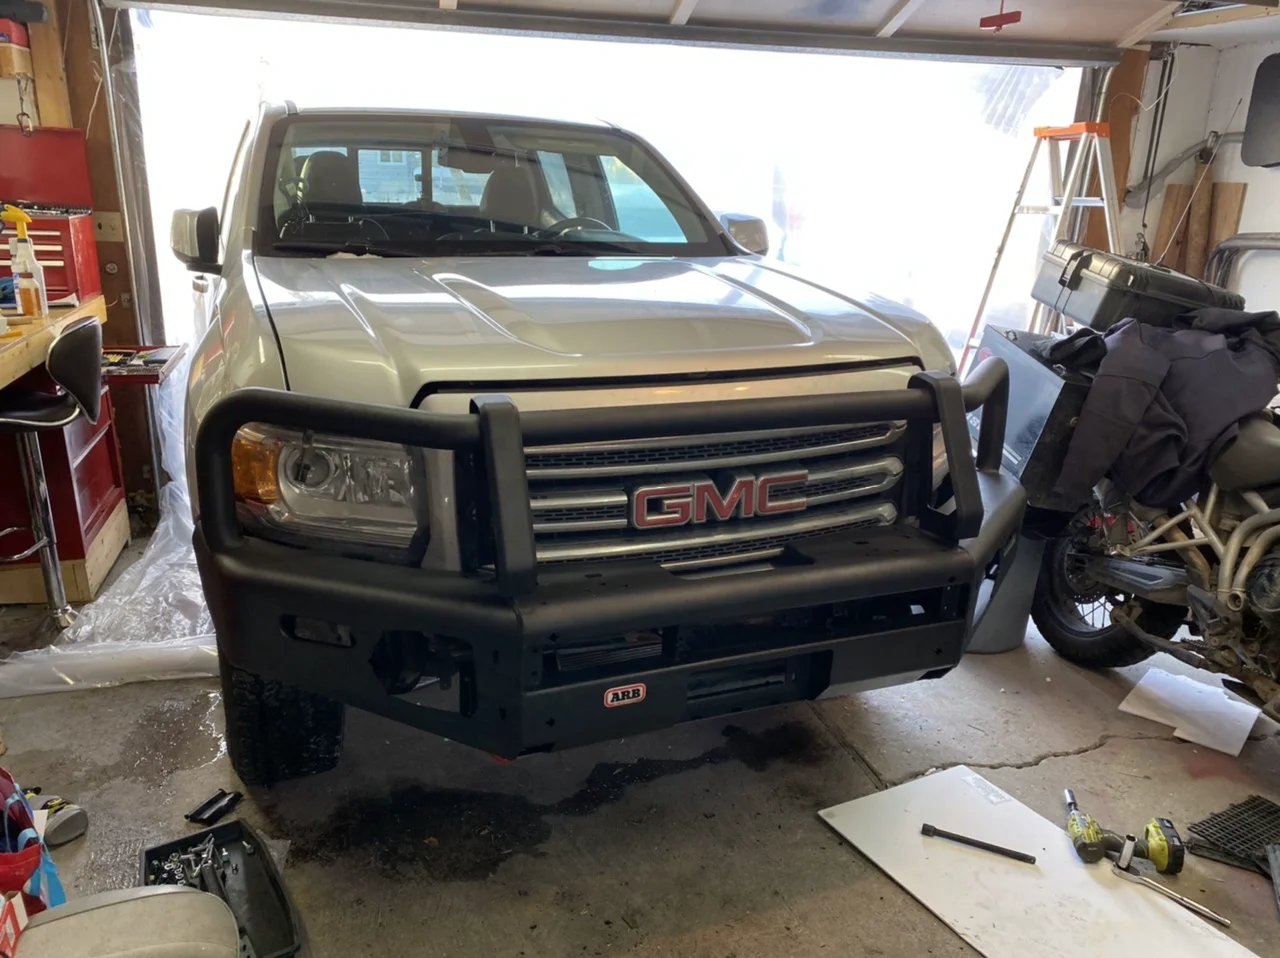
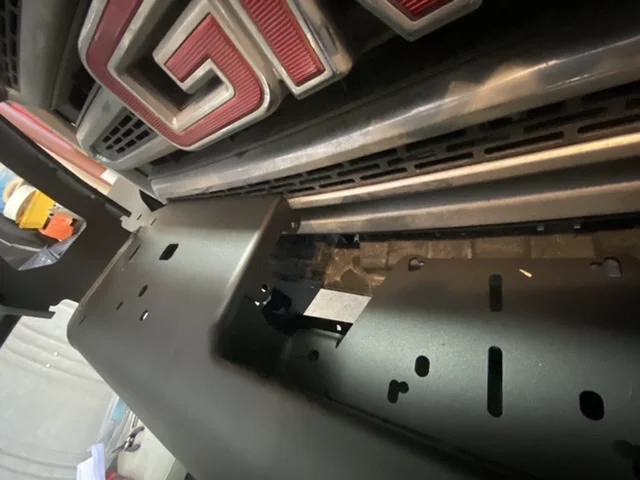
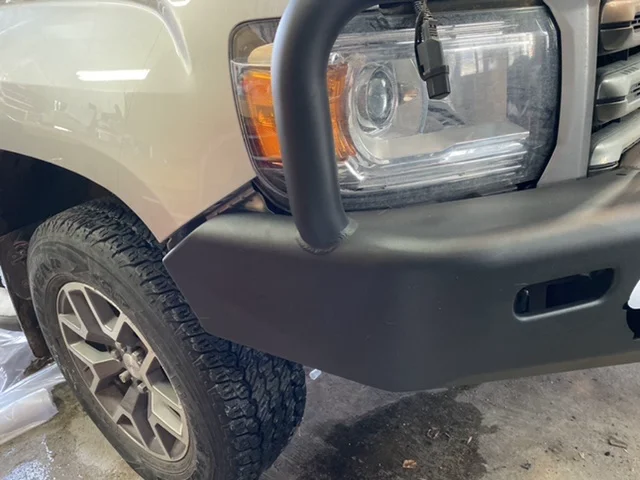
It fits super well, with minimal trimming of the plastics—in fact there's less trimming on the Canyon than the instructions call for on the Colorado. It's not 100% done yet—the above was just the dry fit. I'm currently working on mounting lights and my winch so I can put it back on.
I'll do a fuller write up on the process but for now—if anyone is wondering if the Colorado summit bar fits the Canyon, the answer is 100% yes.
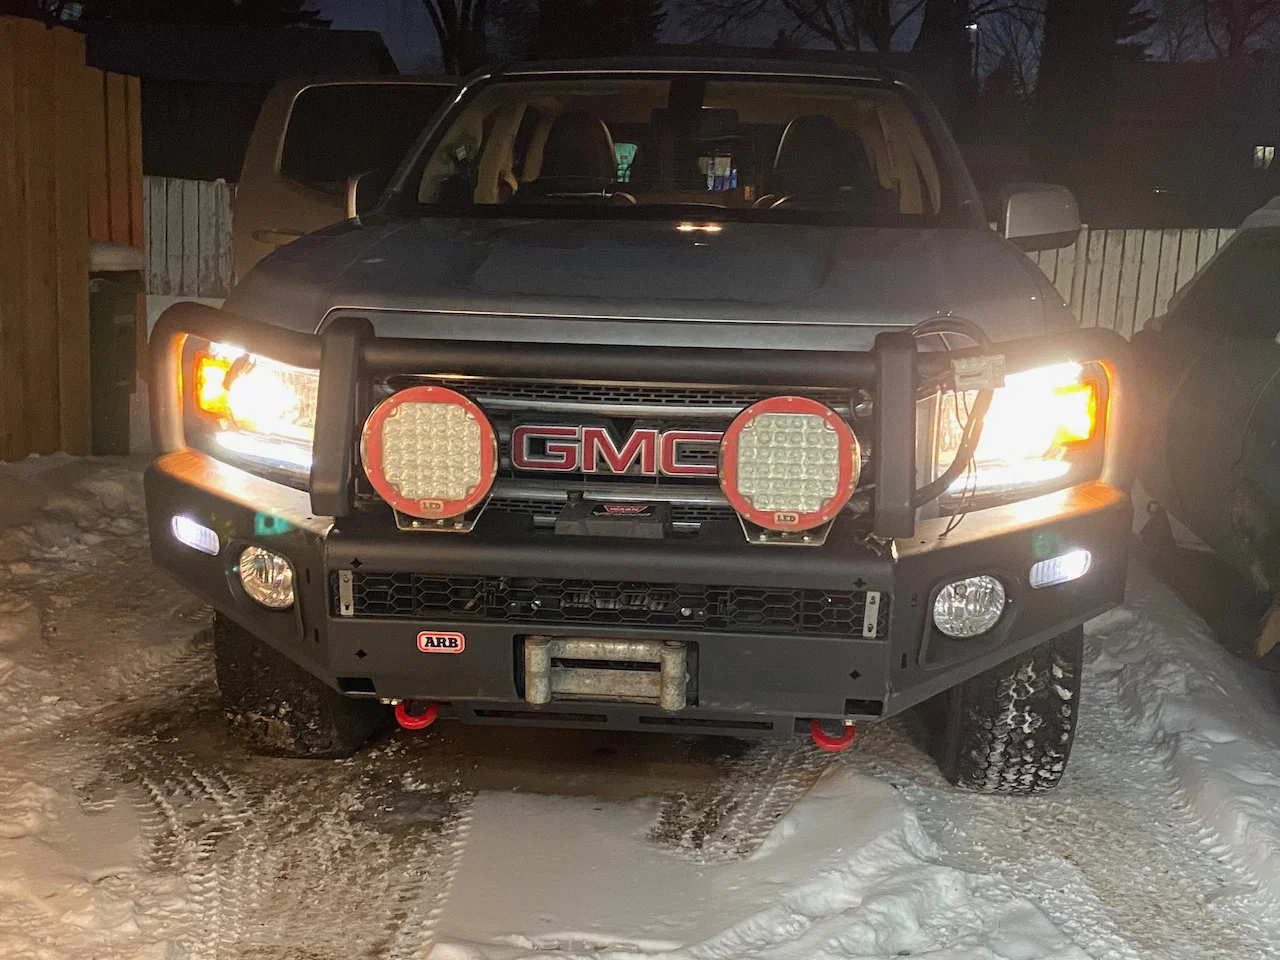
ARB Installation: The Full Process
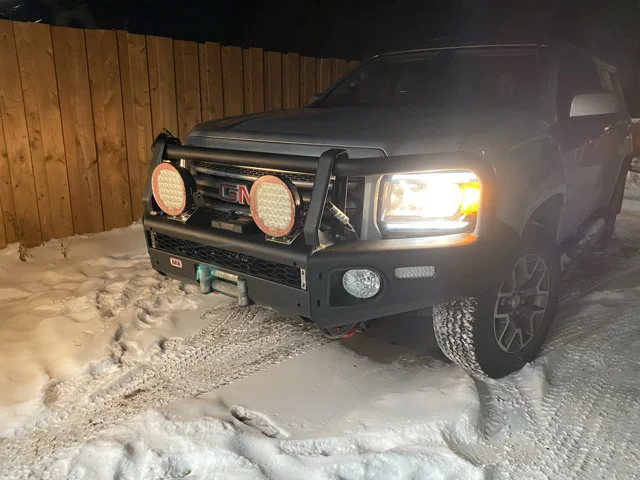
A bit more done on the front bumper, mounted up the winch and the lights. Tomorrow I'll wire everything in and bolt on the skids.
Here's a few notes in case anyone else is wondering about the process:
ARB Instructions:
I read them over a dozen times or so until I could understand all the steps. But honestly the instructions aren't the best. My goal was to trim as little as possible so I kind of went a bit slowly. I only removed enough plastic to access what I needed to/provide clearance for the mounts. Once I got the mounts on, I started adding back plastics piece by piece and trimming as I went along. I had to trim very little. I then dry-fit the bumper to see if it would fit (the instructions call for you to mount the winch and everything first). That's when I posted that photo above. Once I mounted the winch, I did need to trim off a bit more plastic from the bottom of the grill.
Install Time:
I just started at around 11 am today, and called it quits at about 10:30 PM. I already had the front plastics off my truck (just the grill was left on). I did that to measure everything for my own bumper but when I decided to go a different route, I decided not to put it back on....7 months ago! There are plenty of YouTube videos on how to do this and if I remember correctly it was less than 4 hours on that part. So, this is definitely a two day job. I still need to wire everything up and bolt on the skids but otherwise it's done.
A transmission jack makes this job much easier. I was able to adjust the height and the angles of the bar very easily so it was fairly simple to slot it in.
I don't think the manual calls for it but for final fitment I put blue loctite on everything. I also sprayed down all the surfaces with steel on steel with Fluid Film as a rust preventative.
A Few Other Notes:
For the air vents on the gassers, there is an "upper" set of vents and a "lower" set of vents. You will have to cut off the lower set of vents. I think the same is true on the Colorado but I'm not sure. The instructions don't say anything about this other than to call ARB and they just say "remove them" but that approach will apparently throw codes so you have to trim them. For Canyons, the only things I found on mine to be careful of were the air temp sensor and the wiring going to the servo that controls the air flaps; cut or damage any of those systems and you'll throw a code, but it's easy to trim around it and leave most of it intact. On the canyon, I had to take off the entire lower flaps. It was an easy cut, but the entire upper flaps still function which is good.
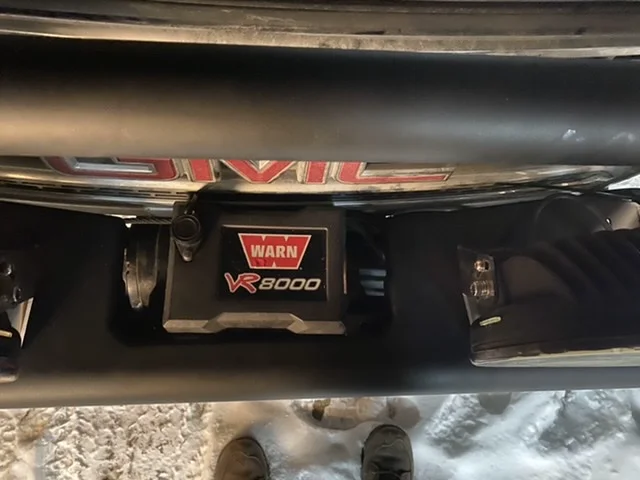
It fits VERY close to the grill. I have a VR8000 Warn, and it fits, but it's very tight. But it fits nonetheless!
The mounts fit fine but I did need to enlarge a couple of holes by a millimeter to get bolts through. That and a mallet that won't mar the powder coat was enough to get it on there. I suspect this manual labour would be the same on either of the Twins; it's more to do with manufacturing inconsistency than anything else.
On the Colorado, you have to trim the lower fascia for some filler pieces. This is a 4-6 inch gap on the Colorados. On the Canyons, that isn't the case—it's only an inch. I actually don't think I will trim my factory bumper—this thing fits very close to the lights. I'm going to rivet on some black rubber trim later to tidy it all up.
Overall I'm pretty happy about this. Given these are identical vehicles mechanically, I don't think I've compromised the function of the ARB design at all, and they have their reputation for a reason—this is an excellent bar. It's very well engineered—most bars that I looked at were just plate steel welded or bent into shape, but the ARB has some very clever gusseting and reinforcement.
If anyone else is doing one on a canyon, feel free to ask me questions.

I do question my wisdom of installing this over the weekend we just had given it's been -30 C and my truck doesn't fit in my garage so I had to rig up some plastic and a heater just to keep a bit of warmth in it, but that's why they invented wool and hot drinks, and alls well that ends well.
The spotlights look like the ARB ones but they are not - they were cheap copies I got off Amazon. I will be replacing them with a better light; probably a bar instead of spots to allow better airflow. These fAkeRBs are bright but the colour temp is all wrong so it makes driving at night in the winter very fatiguing. But, I'll be setting up my auxiliary cab wiring next so I wanted to mount lights temporarily so I could run the wiring, switches, etc. even if it takes a few months to get a proper light on there.
Oh I should also mention for anyone who stumbles on this—the fog lights are super easy to wire to the factory fog switches. I just replaced the factory connector on the loom with the ARB one. The Factory connections are a much lighter gauge wiring so I used step-down crimp connectors, some dielectric grease, and some marine-grade shrink wrap so the wiring should be better than the original.
Part 9: The Back Cabinet and Electrical Build
We are putting a bunch more work into Pac over the next few weeks so I'll post updates as I'm able. We have been meaning to make Pac a more dedicated overland vehicle for some time, and decided to bite the bullet this spring to get it ready.
We are going to replace the cap, get our dual battery/12v and our water system installed, as well as set up our fridge. This will be a bit more robust than what we had in our Jeep—we want this to be set up for comfortable long-range touring, so that means living out of it as if it were home.
I started with building out the back cabinet and fridge slides.
Fridge Slide (Nearly Done)
This was pretty simple - I used some HD lockout drawer slides and some aluminum angle iron. It's 2 inches by 4 inches, so there's a longer edge. These runners will bolt through the truck bed and also act as an anchor for the entire drawer unit. I wanted a bit of extra height so I could use decent bolts and washers for that part, so I flipped around the angle to (short edge to large edge). I also figure this will give more support to the fridge when it is done.
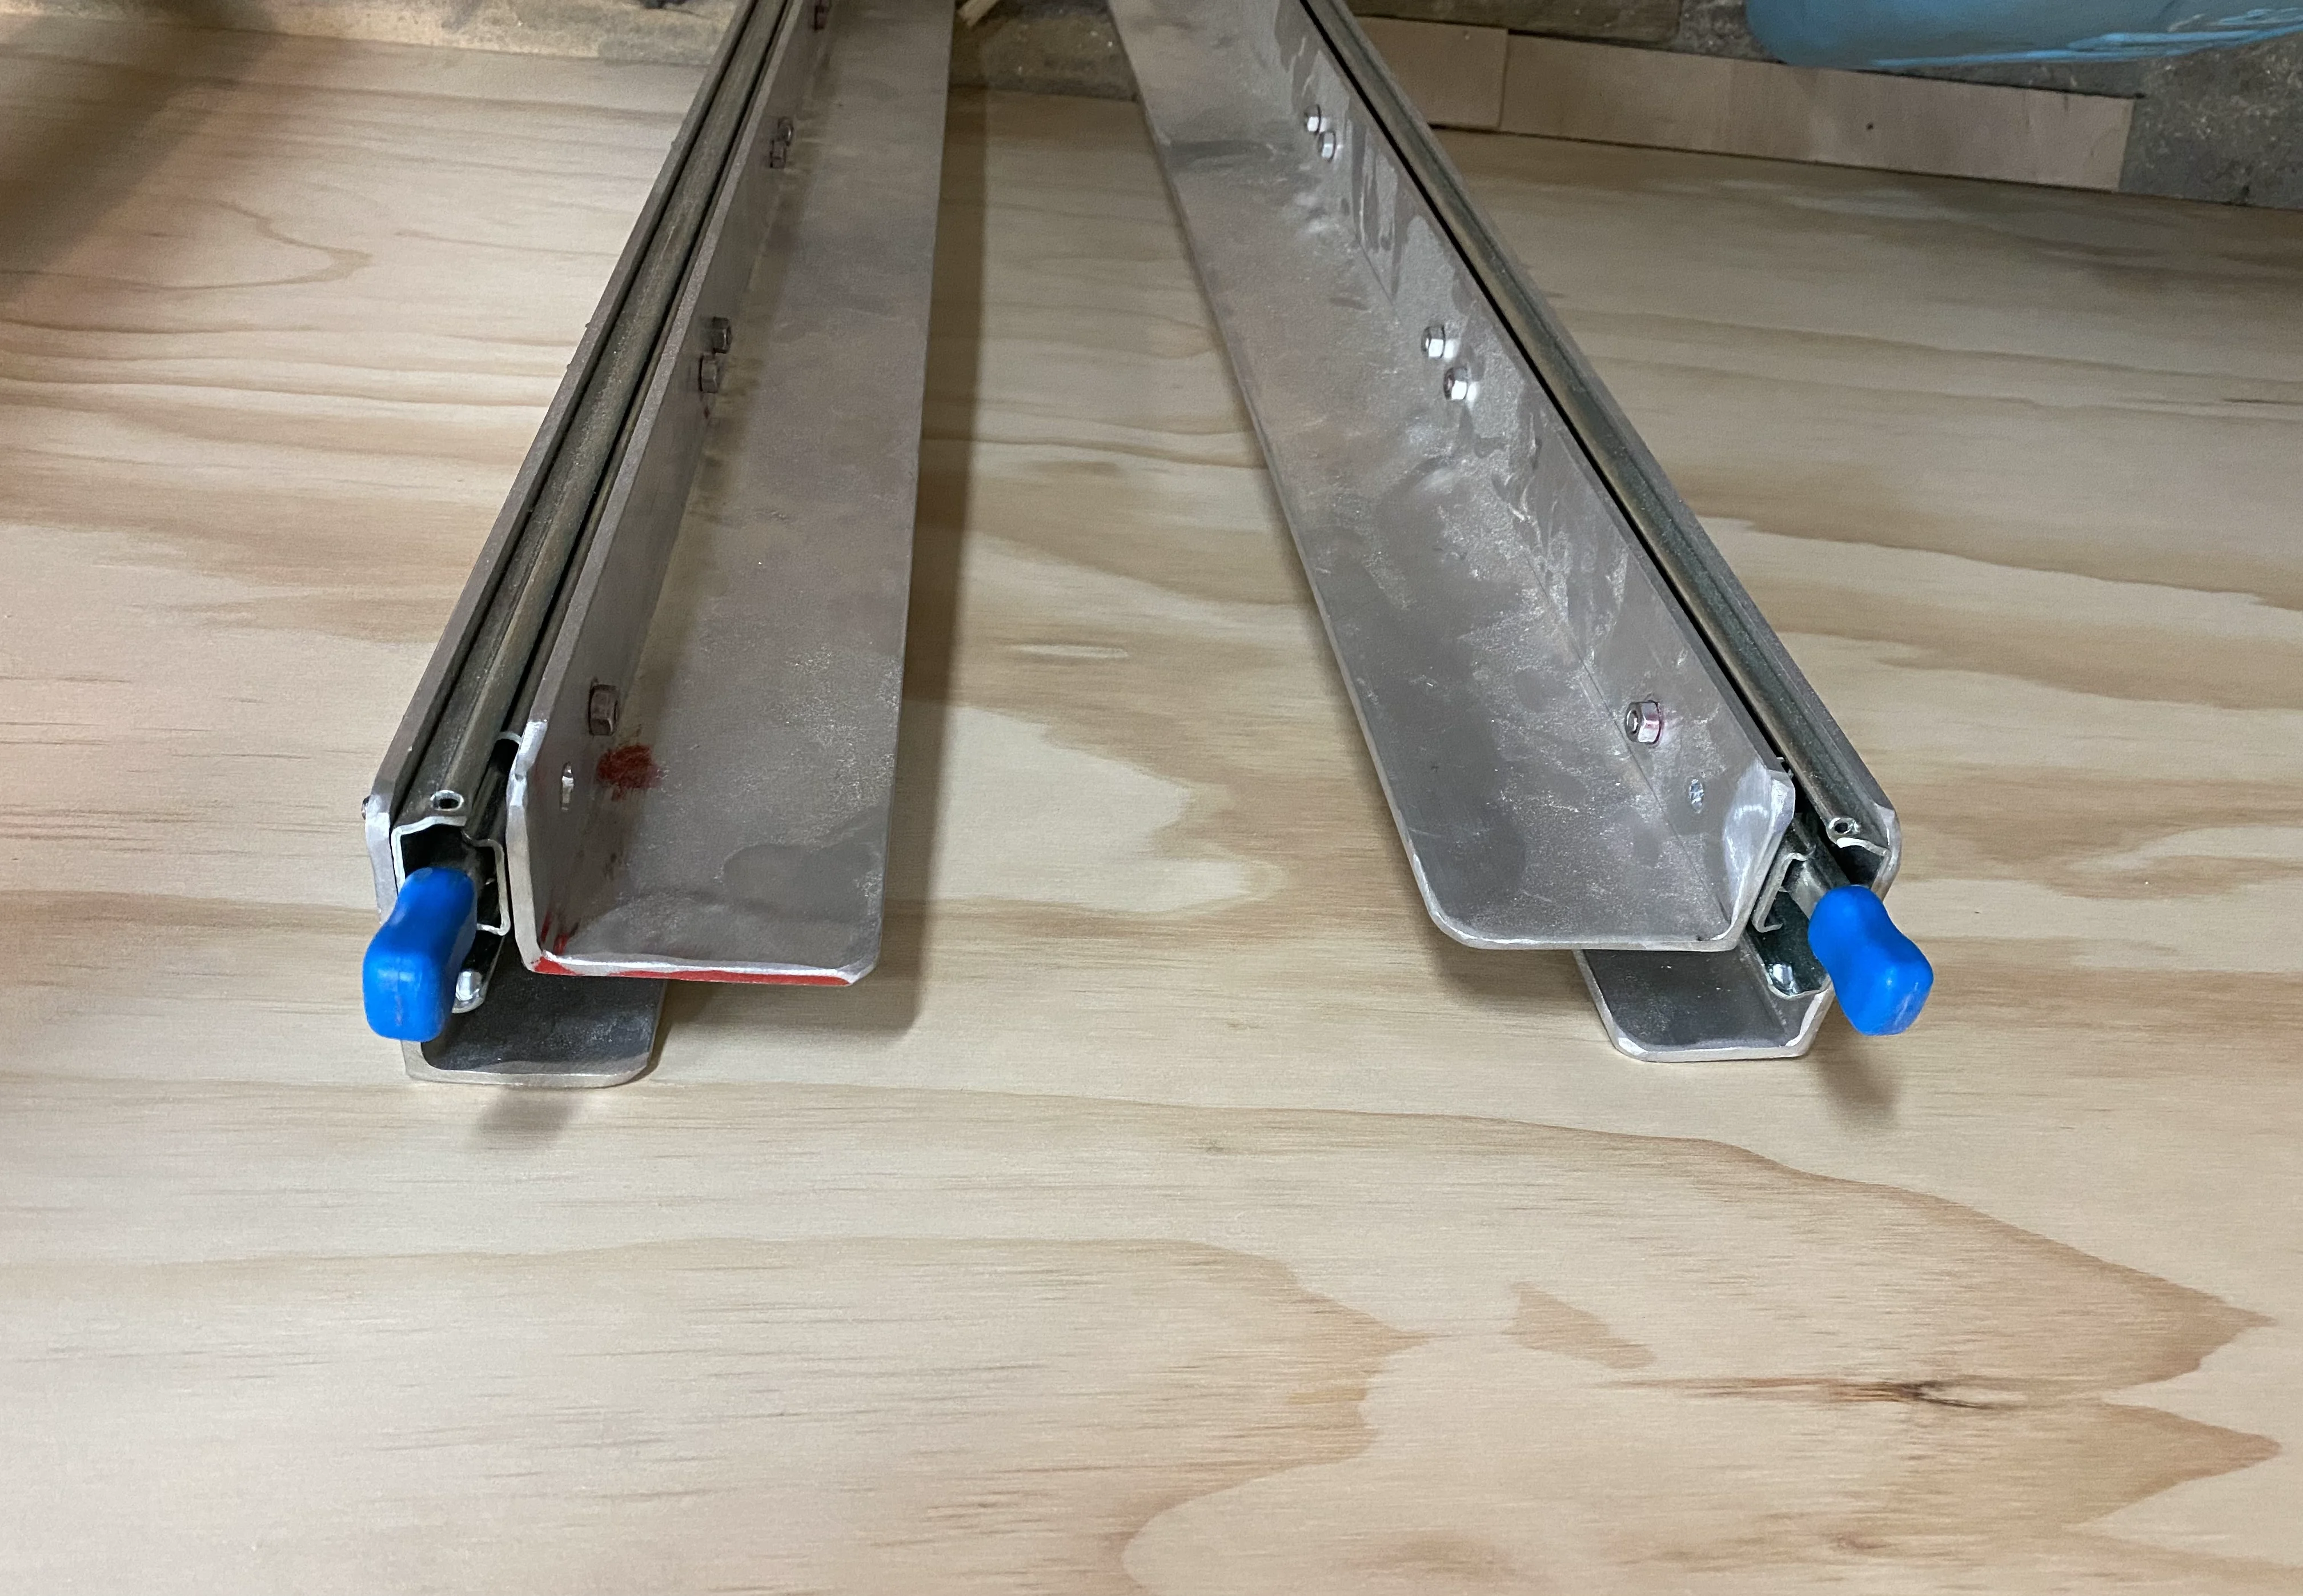
Eventually, these will be tied together at both ends to form a stable rectangle but I am waiting on material. I wanted to build these first as I wanted to build the rest of the cabinet around where my fridge was located, so with these put together I could account for everything (bolt heads adding width, function of the slides with tailgate, etc.).
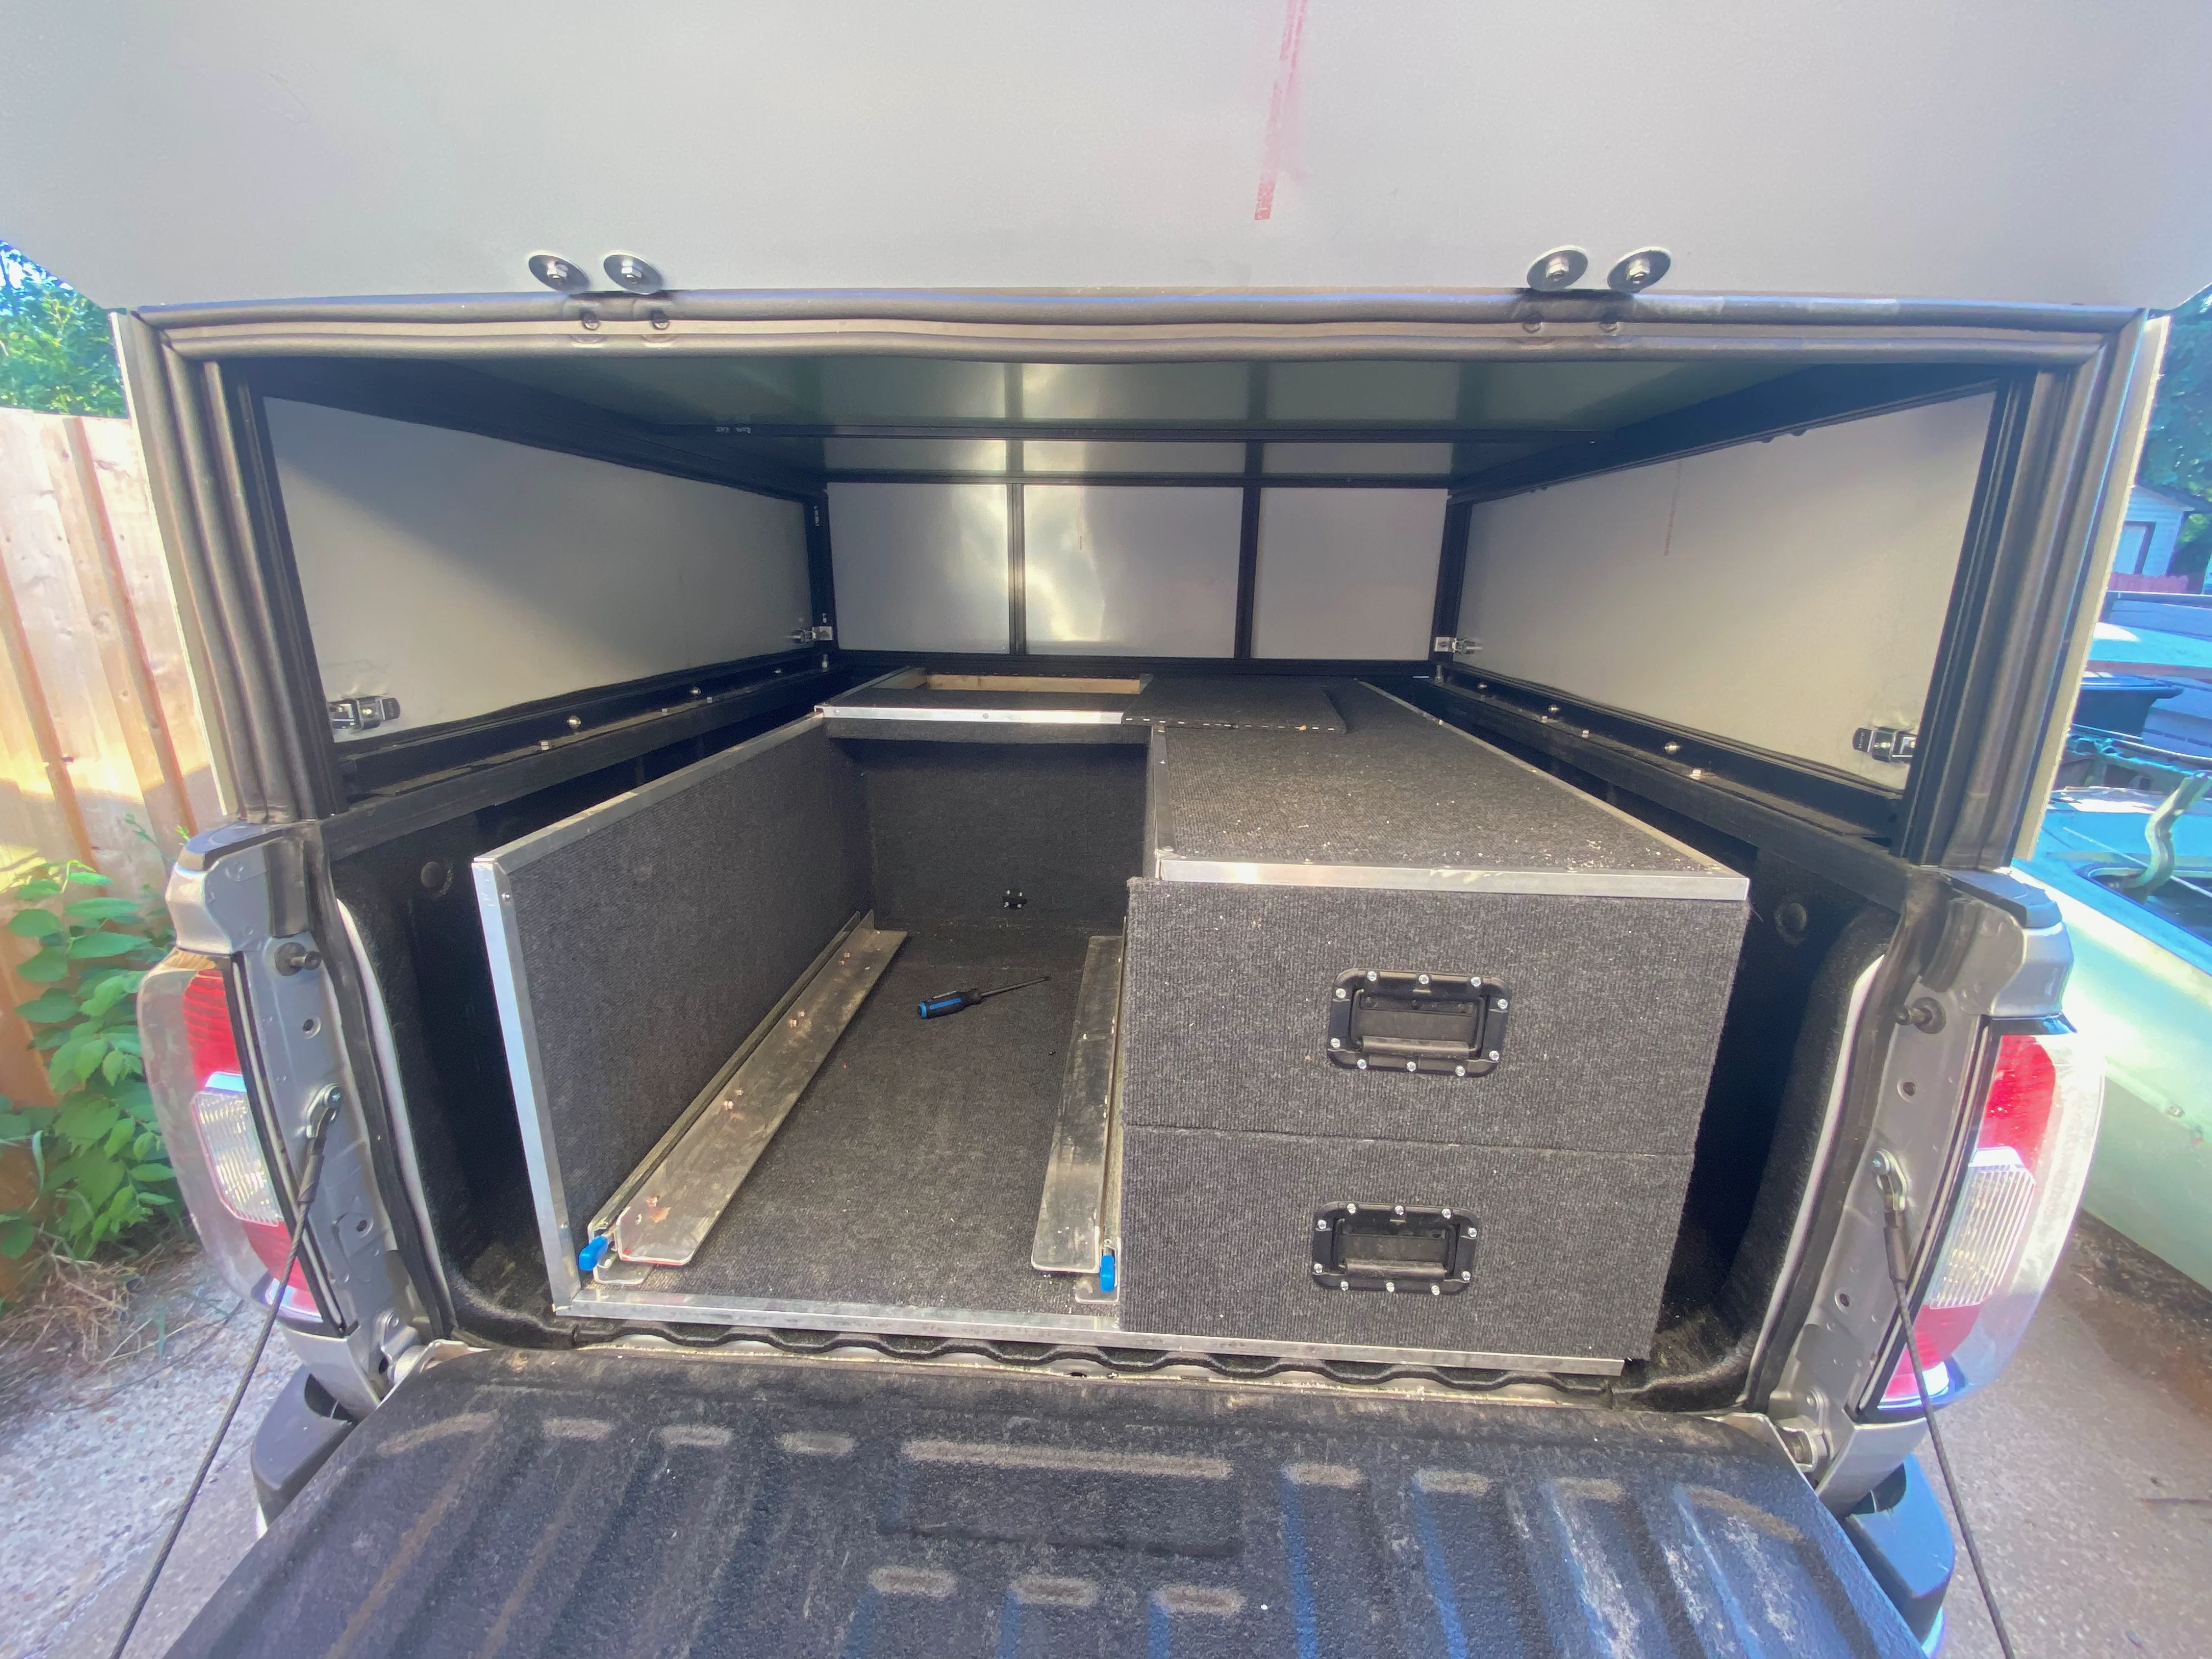
Drawer Unit
The drawer unit is really the major part of the build for the back. It will house our second battery and a few other things. We wanted a design that would make the space in our truck usable and accessible. We decided to do utilities on one side, drawers on the other.
The entire thing is made of plywood. I used a KREG jig and screws—that is a handy tool if you are going to do something like this. It is both strong and fast to assemble. At least, that's what the internet told me and my experience today has born that out. I have no idea, I've never done this before (I did build a box in my old Jeep that probably would have gotten a failing grade in a high school wood shop class so my carpentry skills are pretty limited.)
Because I'm not big into carpentry, I don't have a ton of good woodworking tools. I bought the jig mentioned above just for this project (about $130 for the jig and screws), but beyond that I only have a Ryobi 18v circular saw and drill, so It doesn't require much to bring this together. I found a long 2x4 aluminum stock made an excellent fence for making straight cuts, and a small foam brush was handy for spreading the glue on the boards before squeezing them together. A couple of clamps and a sander round out the tools so far.
I awoke bright and early this morning with 4 sheets of 1/2 inch plywood, and and got to work. I picked 1/2 inch because that seemed to be the most common thickness of wood that others have used for this application, and it was easy on the wallet ($230 for all of it).
For the drawer slides, I'm using 3/4 inch strips of UHMW plastic from Lee Valley. Not cheap ($75) but I wanted something that was very light weight and simple.
I didn't take many pics of the process, but it's basically measure, measure, measure, measure, measure, then cut, drill the pocket holes, glue and screw everything together. I watched a lot of YouTube videos in preparation and that's a far better source than this post for a more detailed "how to".


I'll hopefully get to building out the drawers later in the week and will update as I go.
Finishing the Drawer Unit
Finished the drawer unit today. The entire thing is coated in outdoor carpet that is glued with spray adhesive and tacked with staples. Trim is aluminum angle iron and c-channel. I'm pretty happy how this turned out—it's not perfect owing to my lack of carpentry skills but it will do the job nicely.
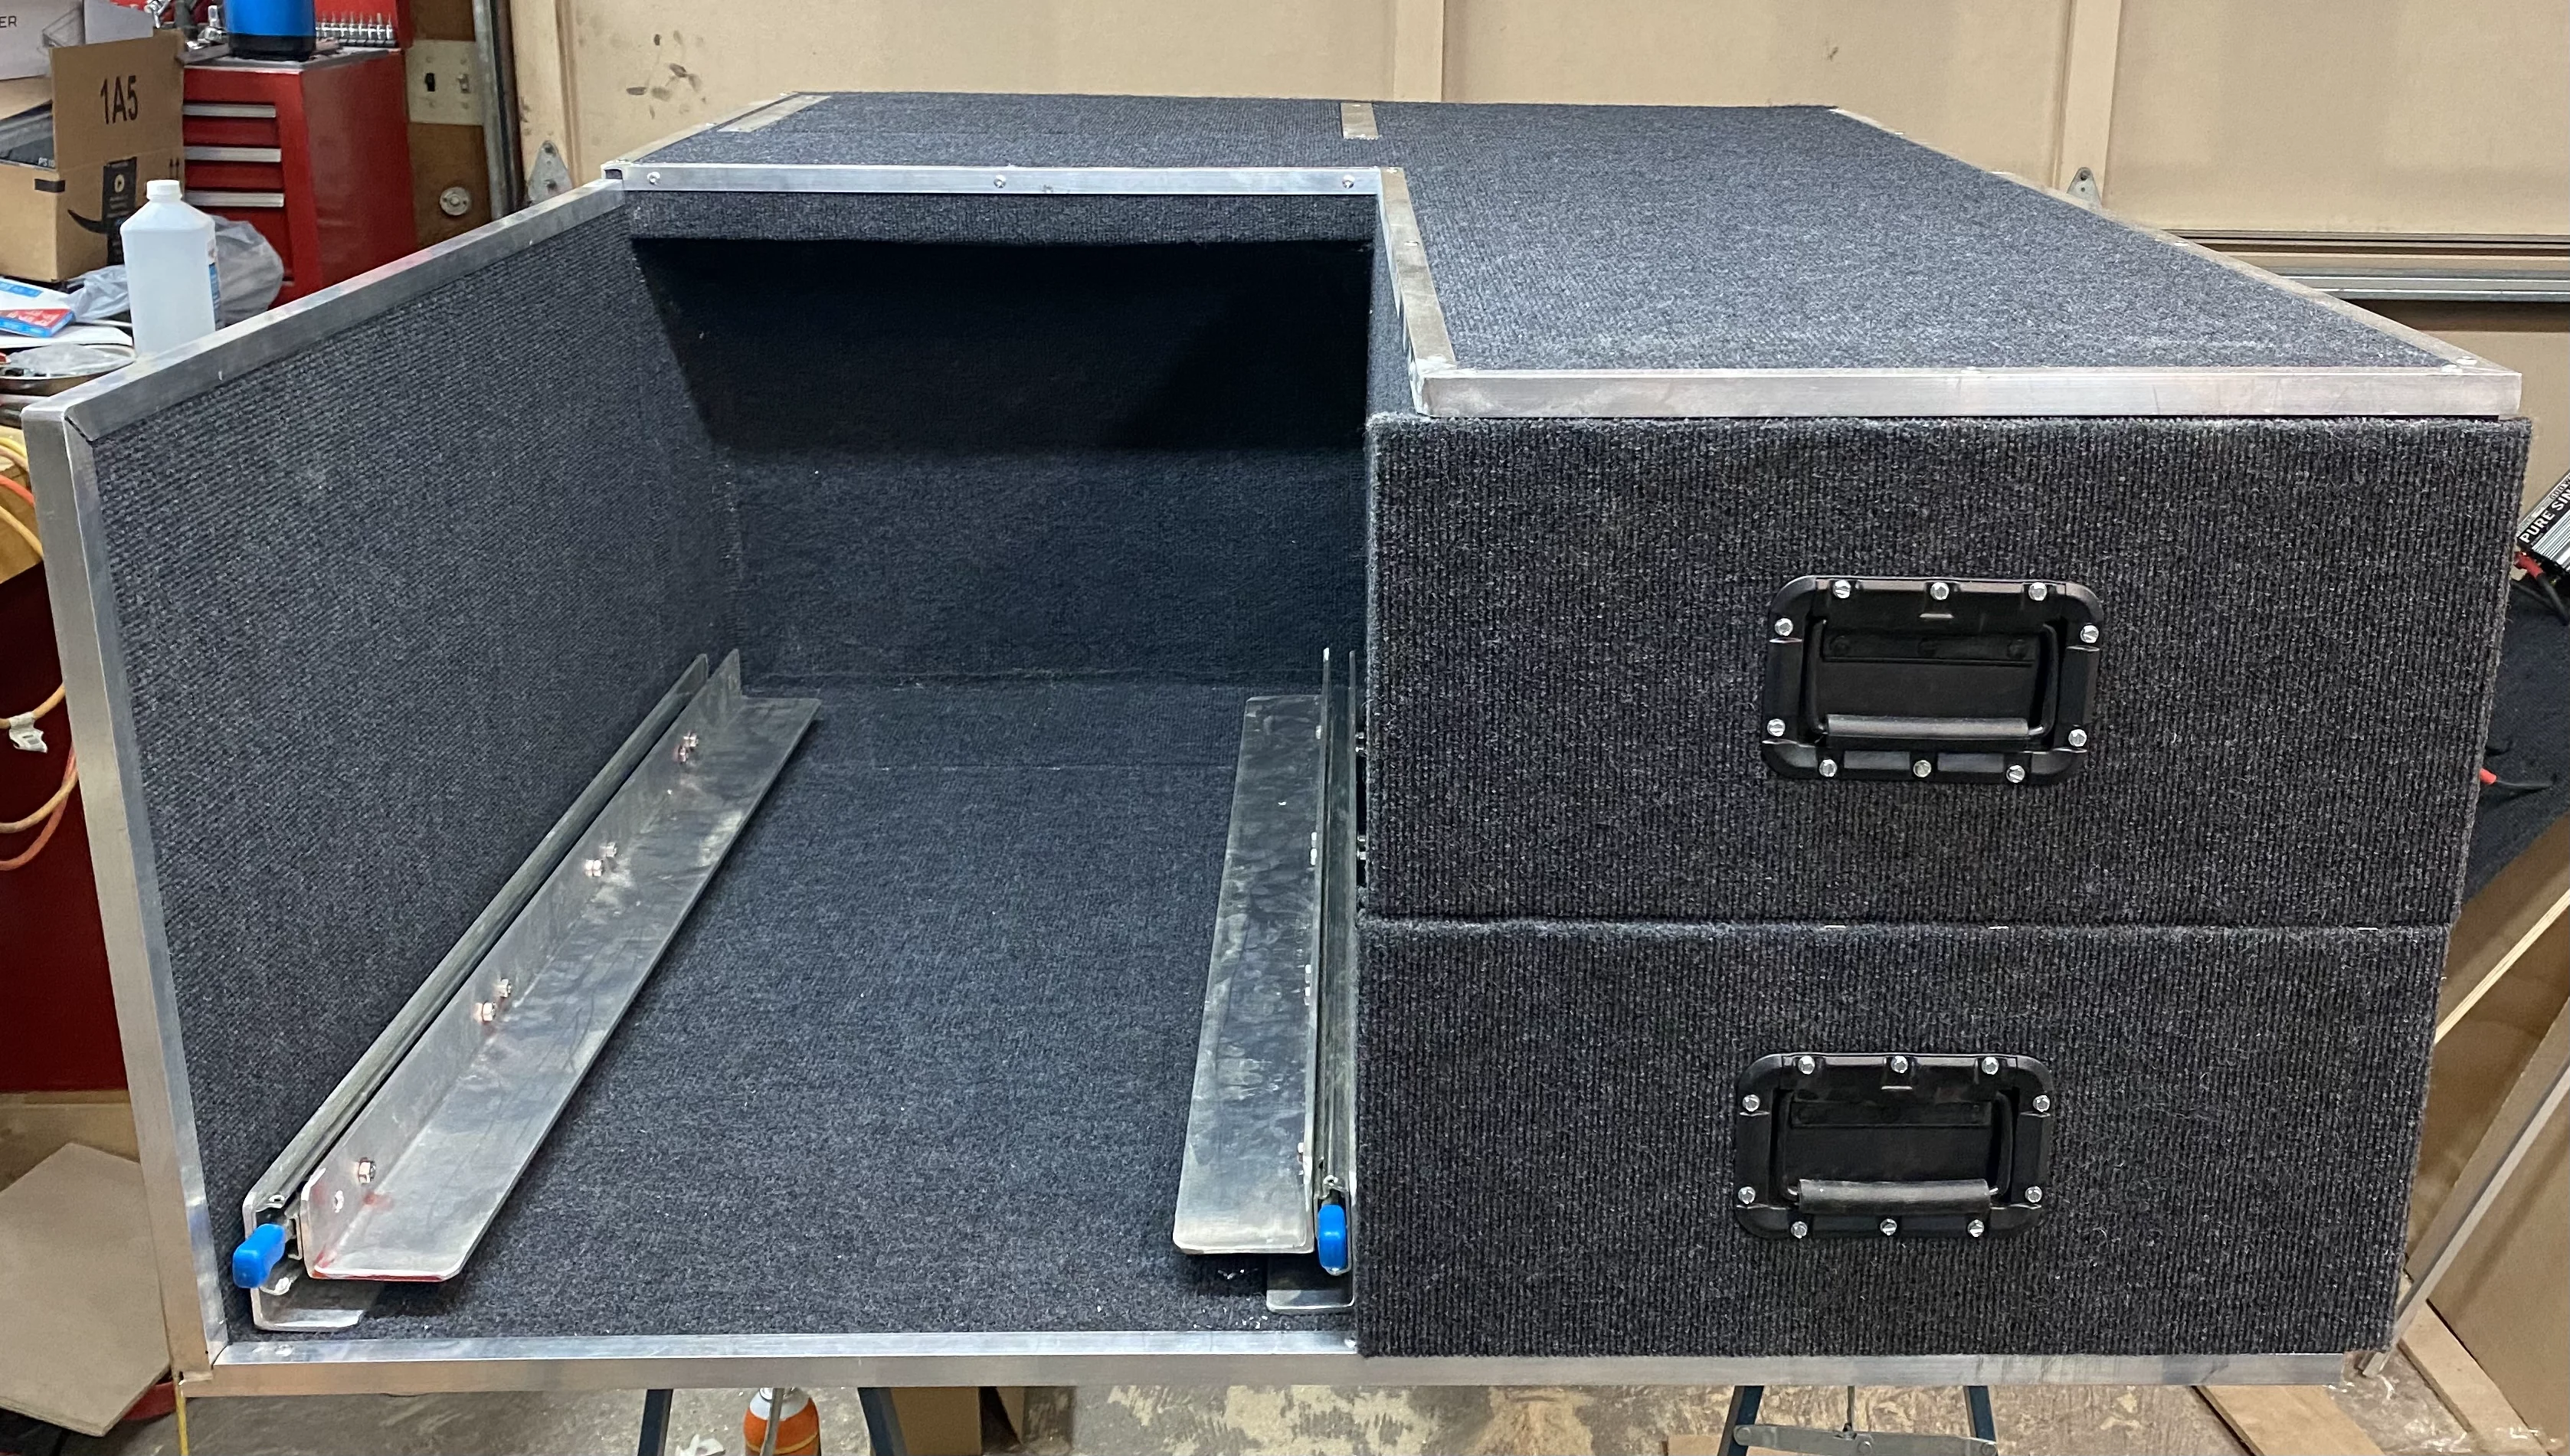
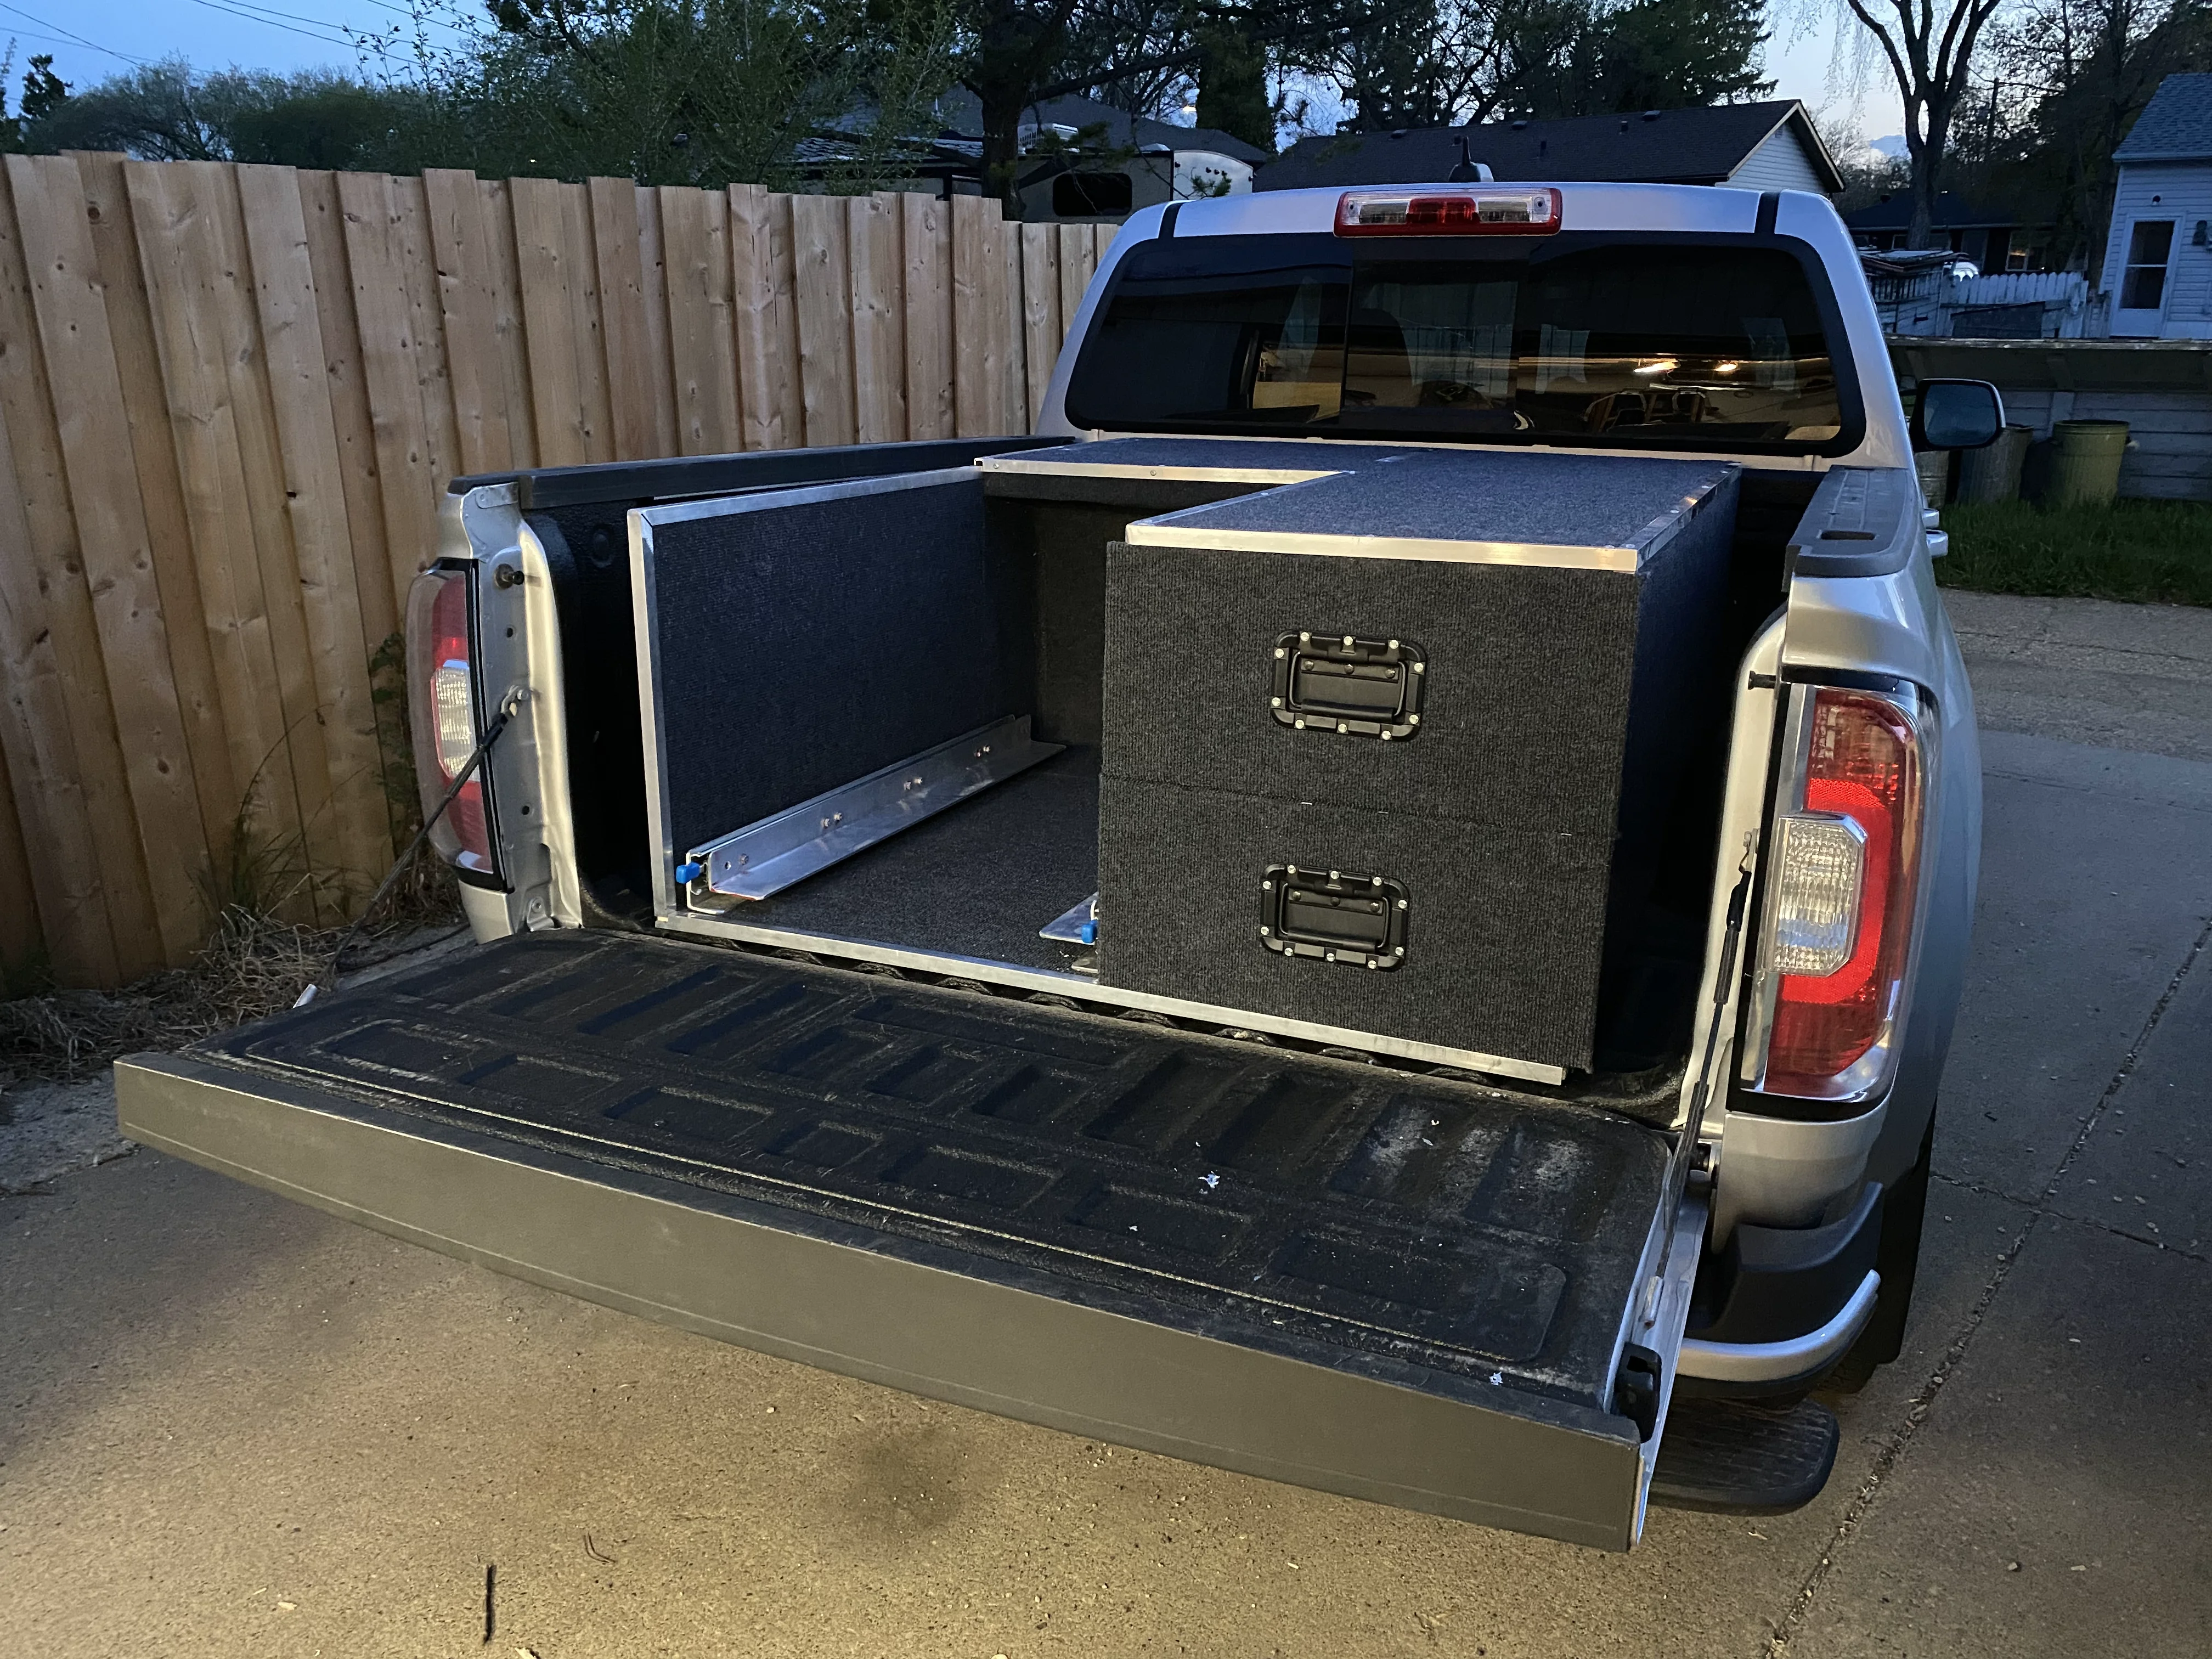
The tailgate even closes properly which is a nice thing to be sure about at this stage of the project! I wanted my tailgate to be the "lock" for the drawers which meant it had to fit pretty tightly with narrow tolerances and not a lot of room for error, but I'm happy to say it works great—the drawers are snug up against the inside of the tailgate.
Coating and Assembly
The bulk of the work this week has been coating the cabinet unit in verathane. It takes about 3 hours between coats, and since there are parts of the project I cannot get at depending on positioning, that's 8 coats in total (4 one side, turn it over, 4 on the other). If I had spent extra on marine grade plywood, I think I could skip this step as my only desire is to give it some resistance to the elements and I plan to carpet it anyway.
Electrical System
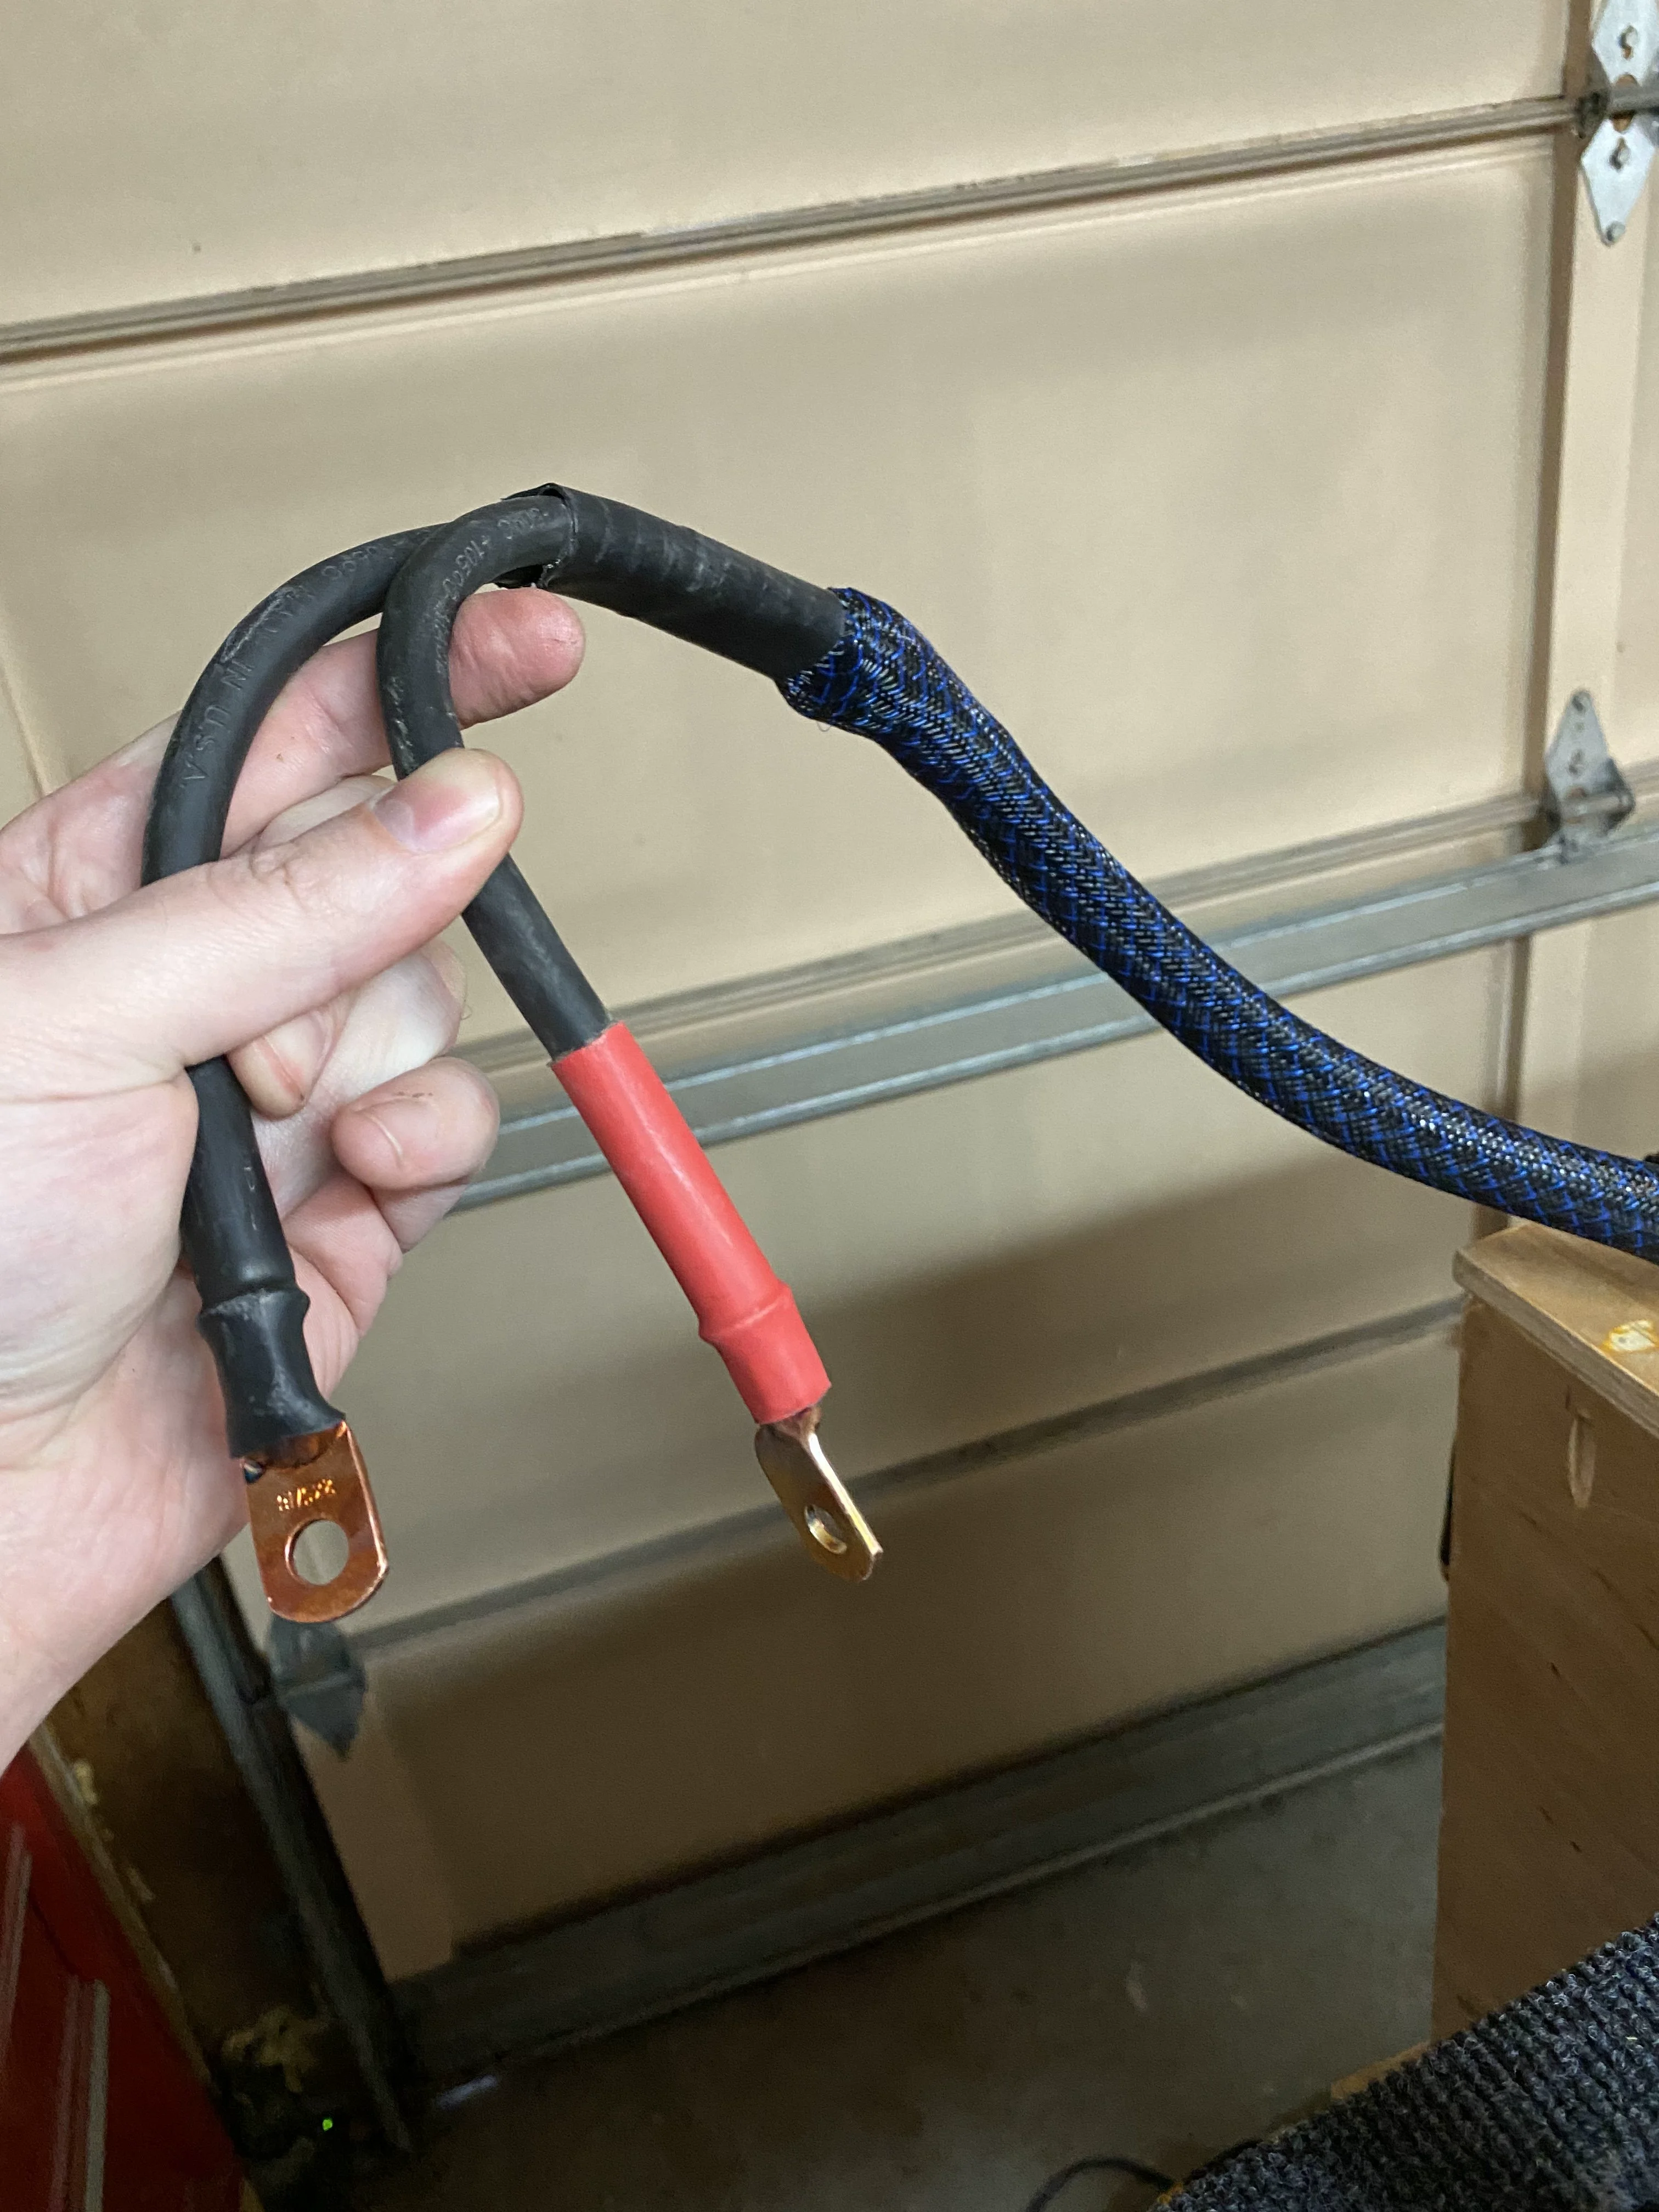
I also got started on my electrical system. First, the cables. I'm using 2 AWG welding wire as my primary current carrier for the second battery, the inverter, and the DC to DC charger. It's super rugged and above spec (but not by much - my DC to DC charger calls for 4 AWG given the length I'm using). It's not cheap, but I had a bunch of it laying around from my old receiver mounted winch—I used to be able to move the winch from the front to the back of our old jeep, and so I fashioned an extension cord out of welding wire to plug it in, and that extension cord is no longer needed). Still though, I needed more!
I'm using a hydraulic crimping tool to put a 12-ton crimp and also solder the ring ends, followed by marine-grade heat shrink to seal everything up. Go figure, I'm two ring ends short on my last cable. Nearest ones are about 45 minutes away so I'll get them tomorrow morning and finish.
Once the ring ends are together (colour coded heat shrink for positive and negative), I then feed them into an expanding tube loom material. This is intended for abrasion resistance. The welding cables are already super tough (one of the reasons I like it for this application) but this helps even more. I'm not sure it's designed for this though so I will likely use additional loom material for the cabling running from the engine bay.
Each cable is made to length for the accessory. These are laid out on a board that will eventually mount to the front of the canopy. I hope - I haven't built the canopy yet so I'm not 100% sure this will fit. If not, I can make a new board. That space of the cab is open and not really used for much so I figured this was the least obtrusive spot to put all this stuff. Plus, it allows me to route the wiring behind it into the cabinet so that I can be intentional about where my wiring is running (I.e. avoiding pinch points, having cargo dropped on it, etc.
Here's a better view:
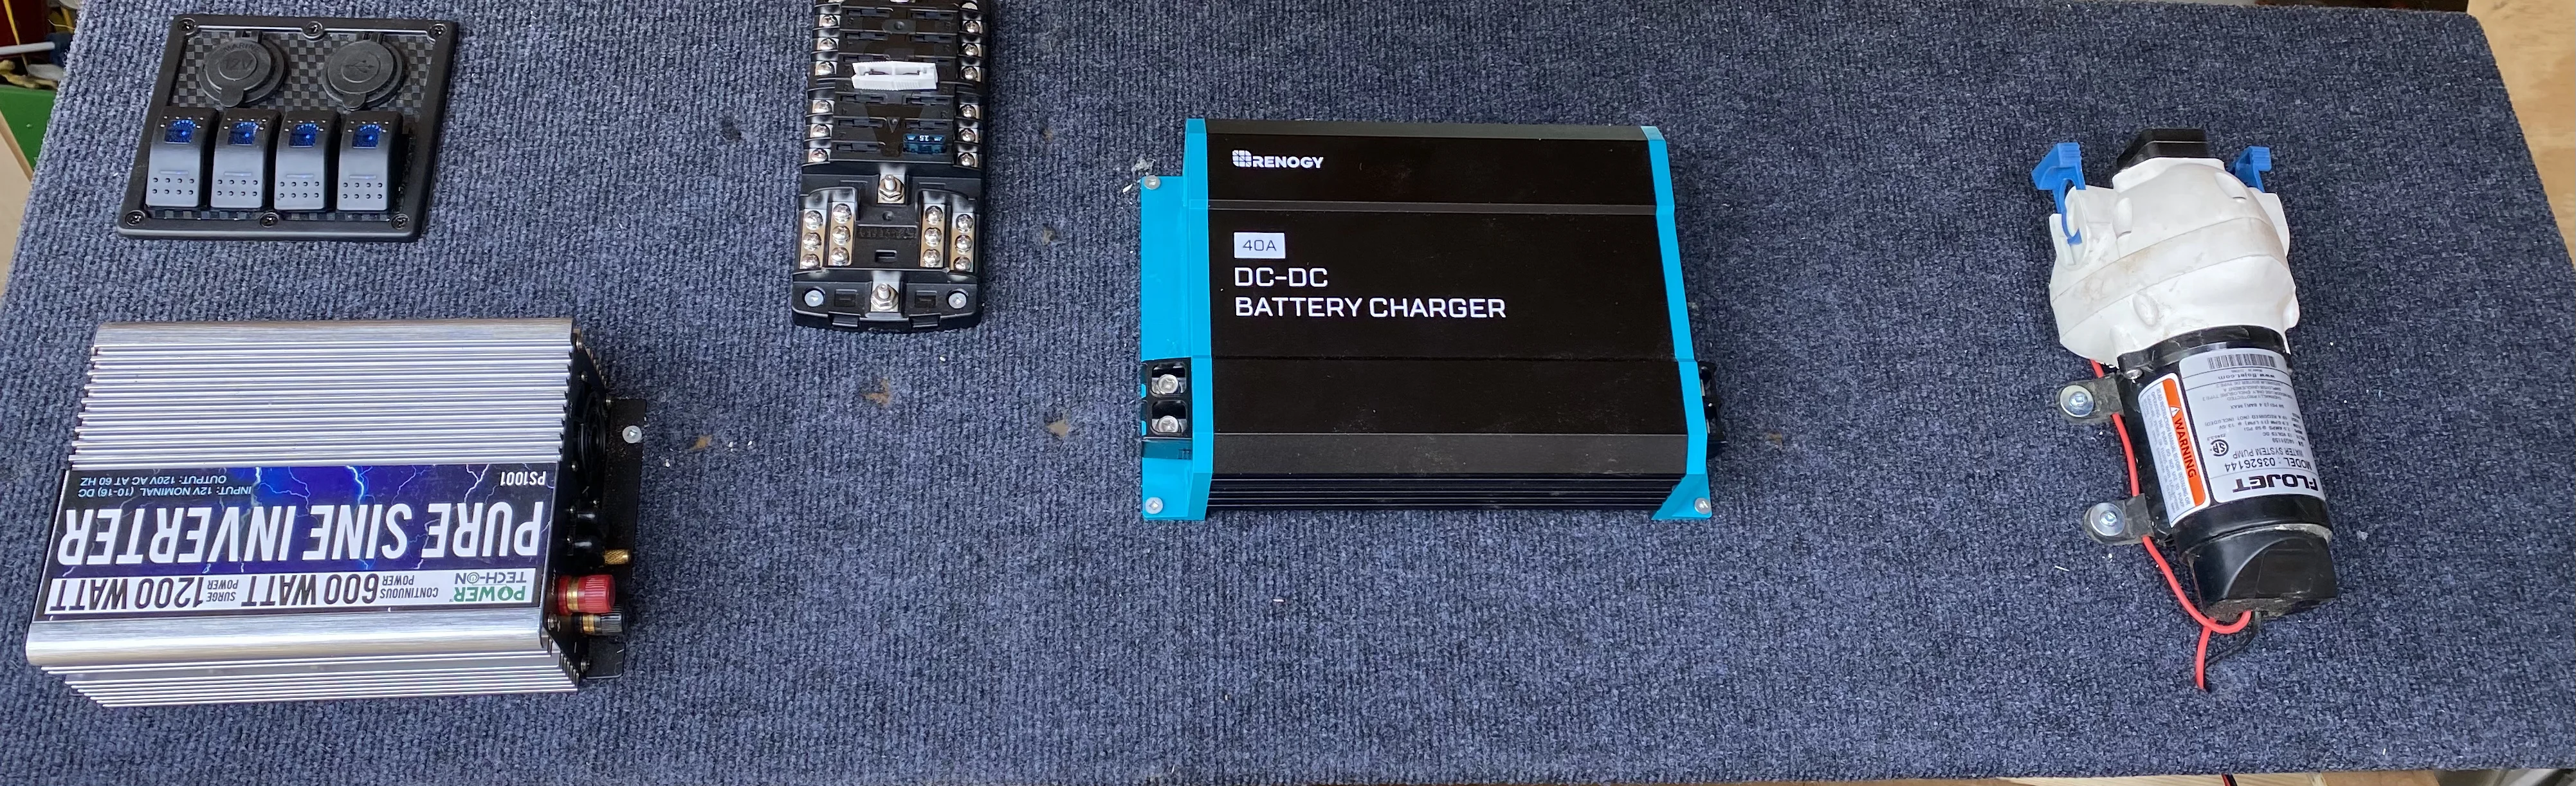
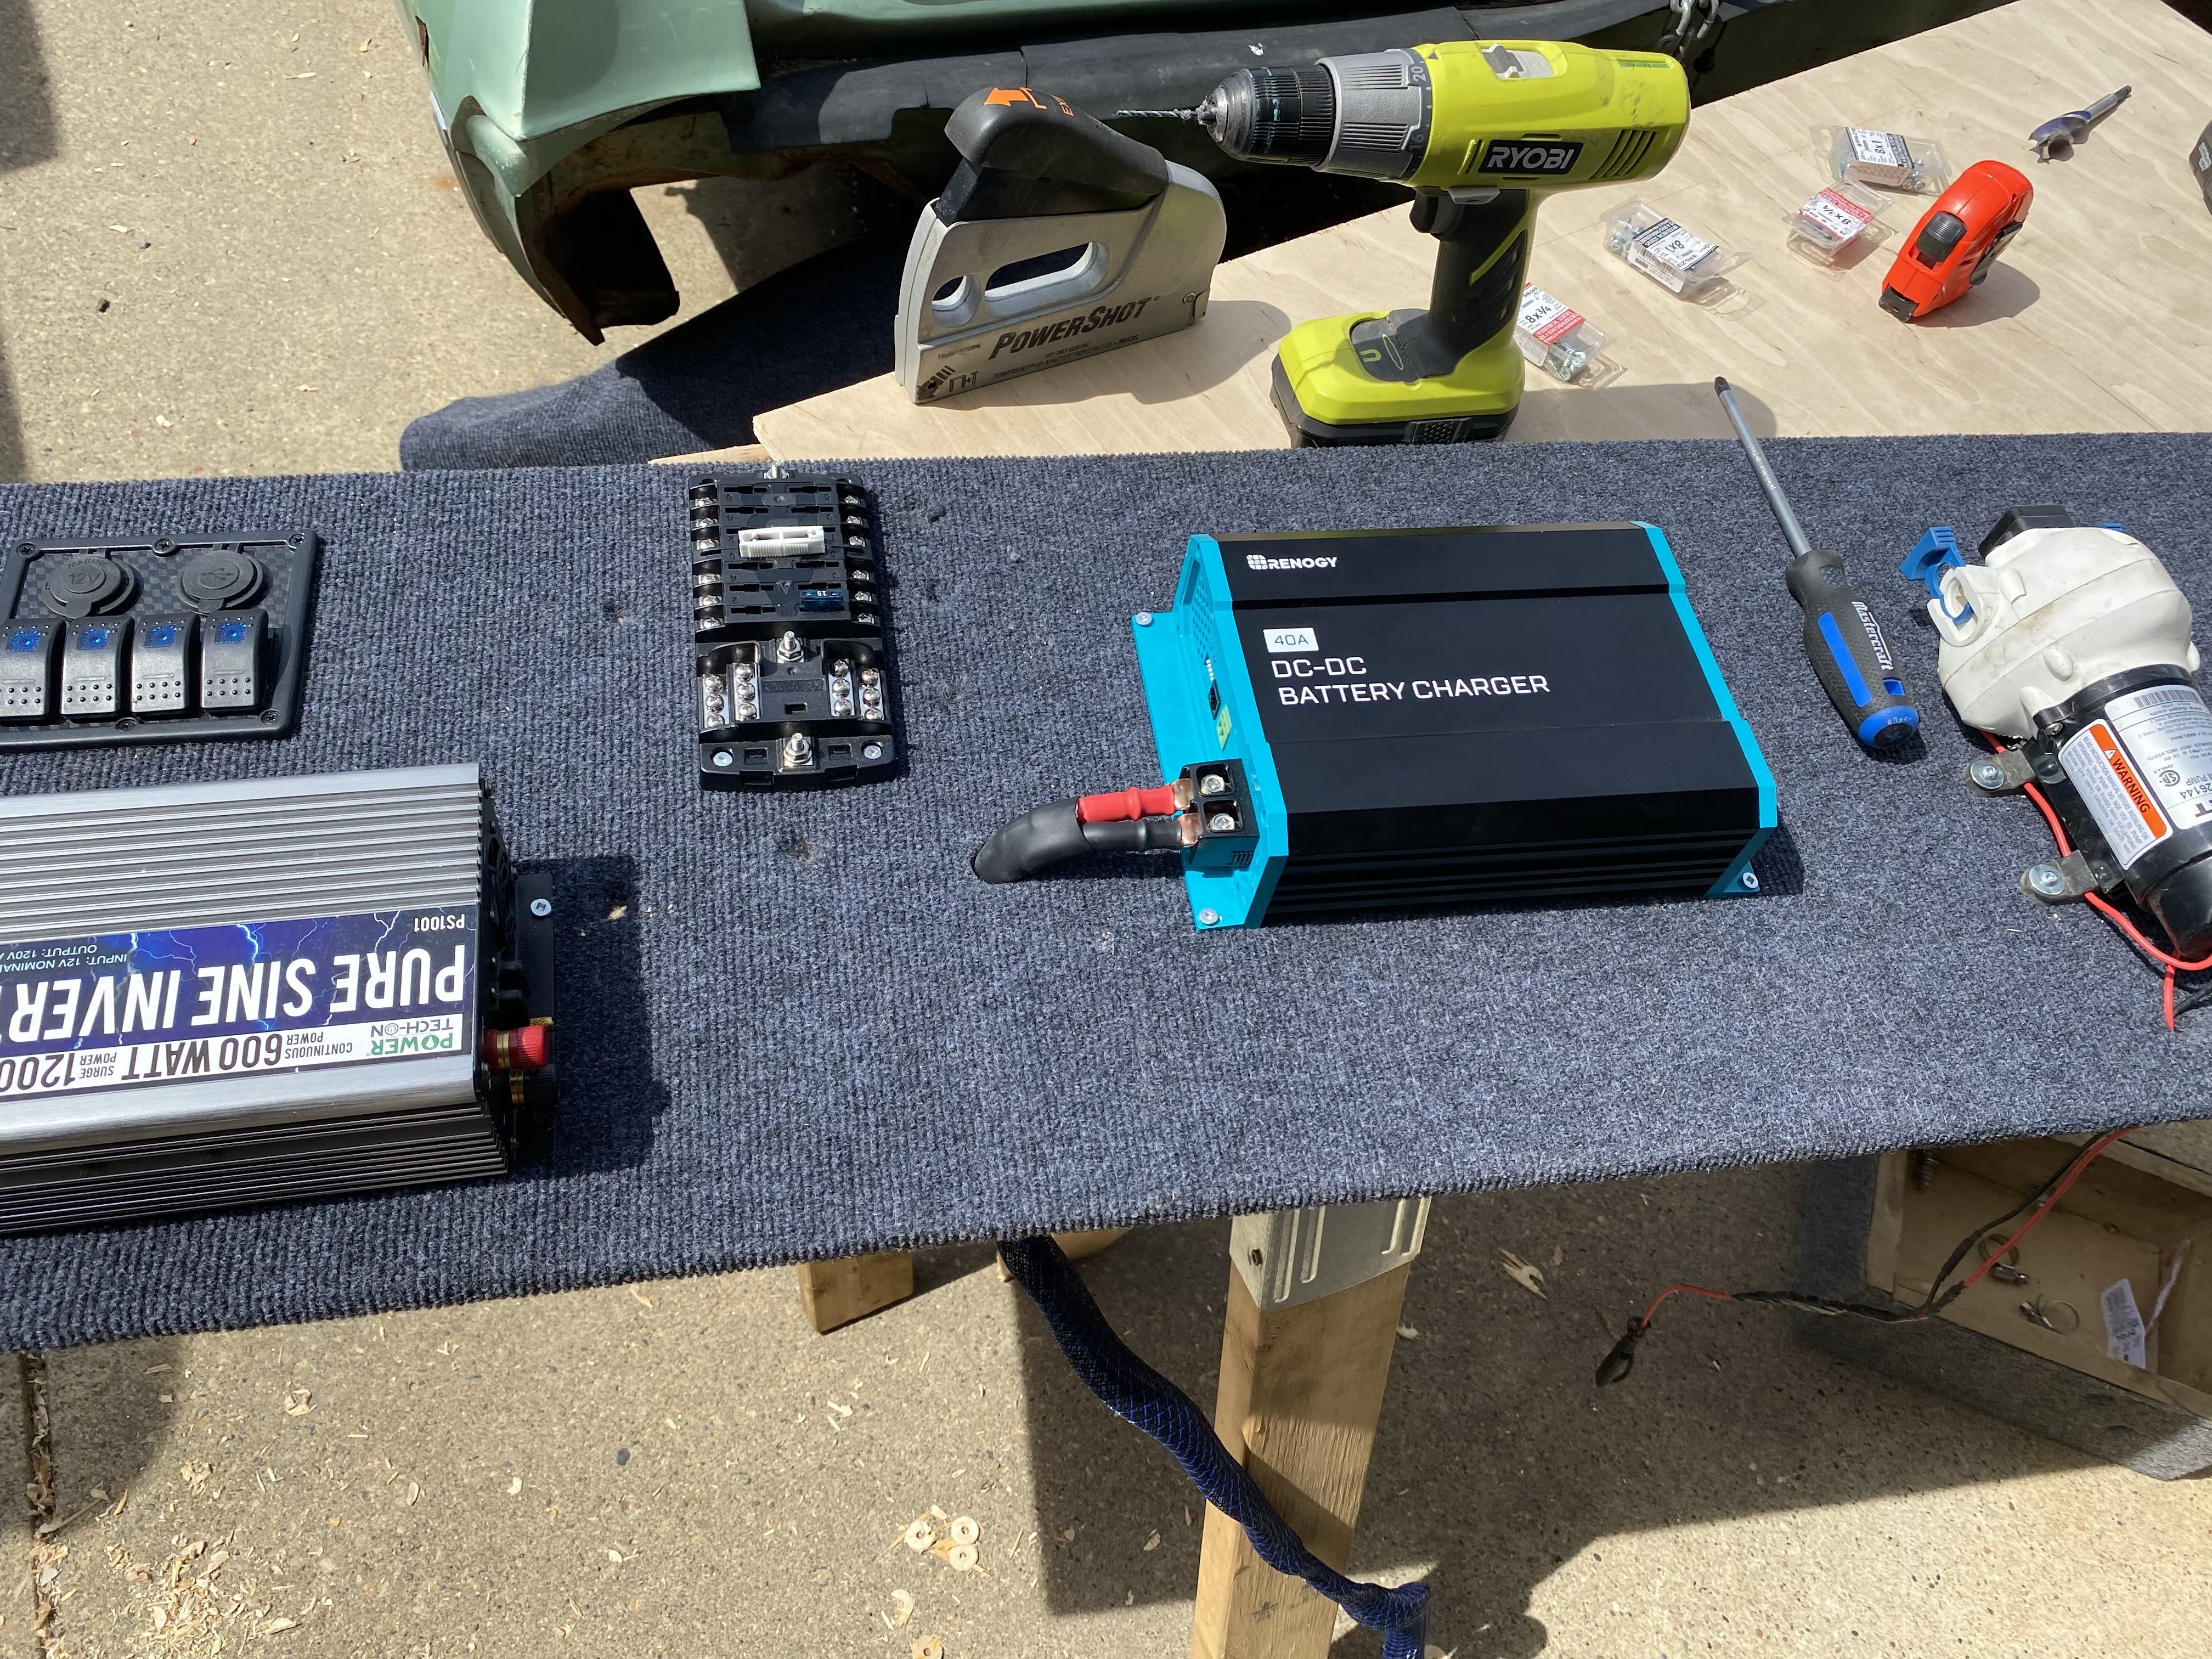
The Renogy unit is the DC to DC charger I chose. It will do what I need it to do, at a price point that's hard to beat. We got it on sale and had a coupon code so we got a good deal.
I'm using Blue Sea fuse box with 12 circuits on it. I don't plan to use all 12 I just like having options! This one was a split positive box which I didn't want but I've fashioned a cable to bridge them together. I plan to run all my secondary electrical off this box, even for some in-cab items, because my experience in the past has taught me that the absolute last thing I want to do is compromise the stock harness in any way. The inverter is a 600 watt continuous sine wave. This is mostly for charging laptops and the like when we are in camp. It will go direct to the battery since it's switched and fused independently. It was fairly cheap from Amazon.
The switch box will control the water pump and the canopy lights for now. We may add more in the future or we may try to rig the inverter to this panel - it would be easier to see when it's on - but we will see.
I want to keep all these things relatively accessible—I expect my water pump to fail regularly (though it never has) as we get a lot of cold temps up here and so I expect it to freeze up each winter but it's 6 years and going strong. Kudos to FloJet, I guess!
Tomorrow is upholstery for the cabinets and trimming them, and then I'm on hold till next weekend I hope - my material for my canopy is hopefully coming this week.
Part 10: Running Power from the Engine Bay
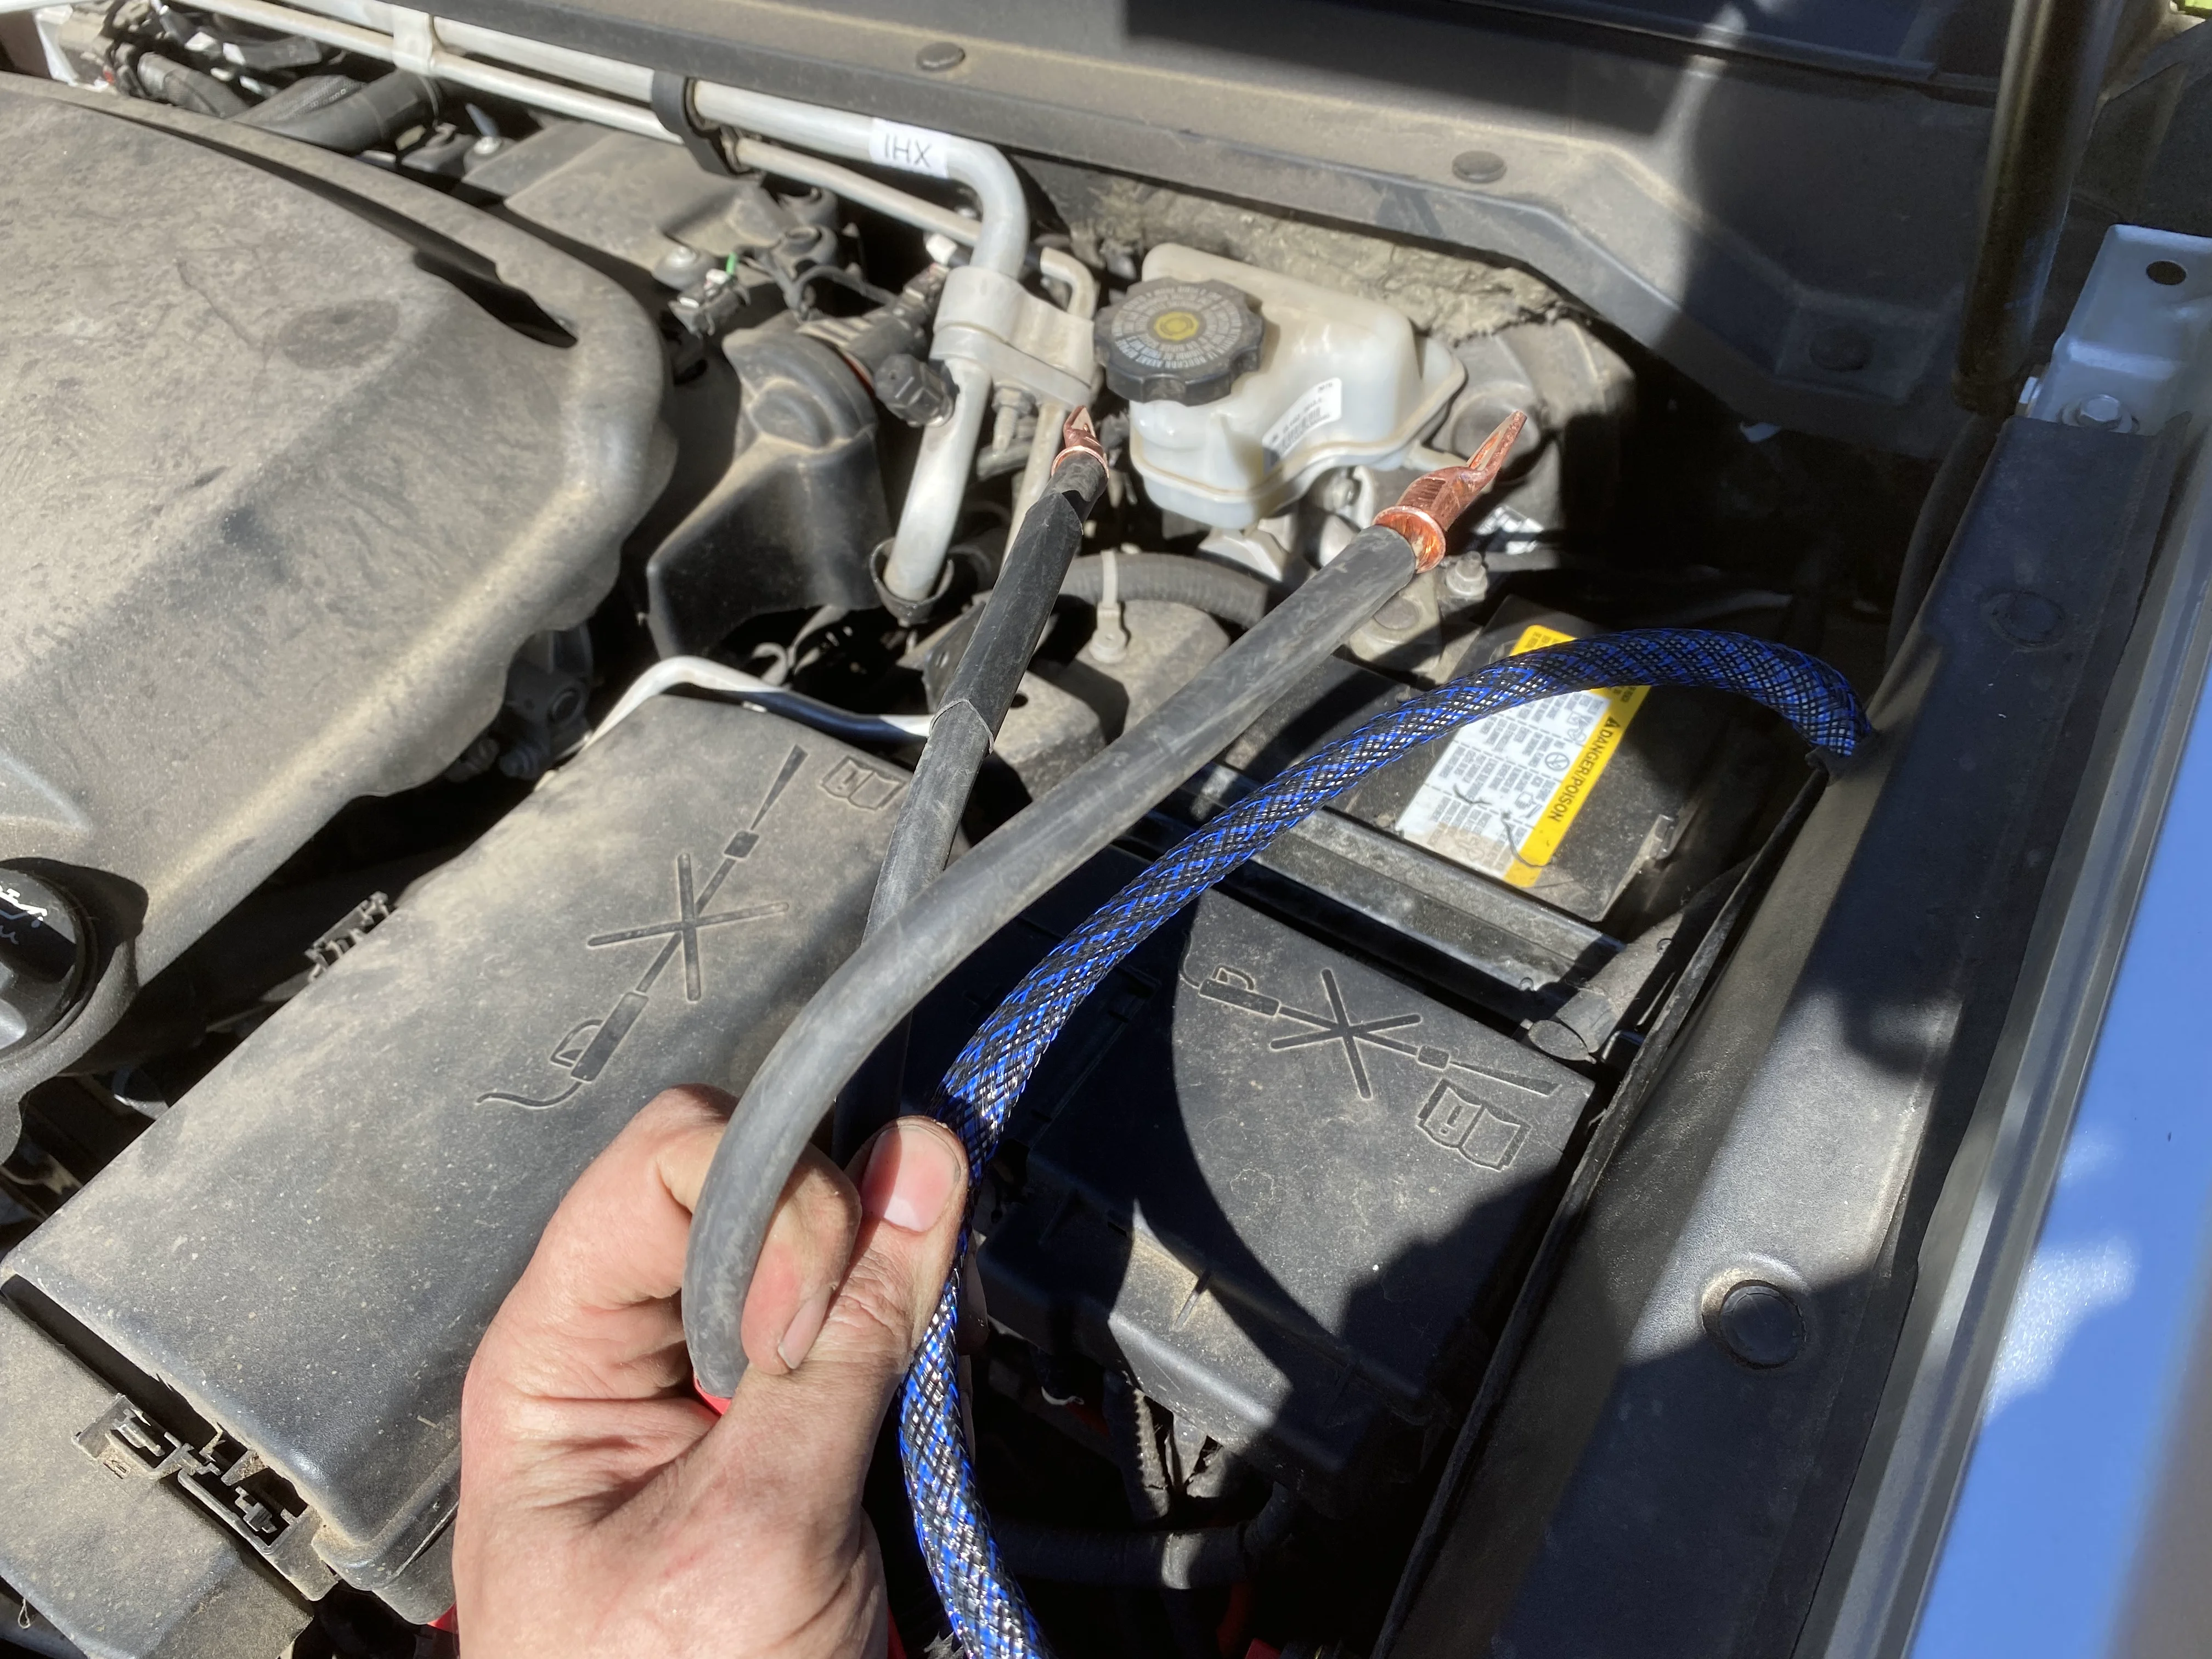
Set up the cabling for the electrical today.
I am using 2 AWG welding cable (I think I mentioned that) and waterproof pass through grommets I got off Amazon. I also ran two powered circuits from the box to the front; my hope is that I can run all my cab accessories off the house system rather than the vehicles battery. This way, the stock system stays the way Mr. General Motors intended, and I never risk accidentally leaving my HAM on and draining the battery and stranding myself.
This was a much bigger job than I anticipated because to access the truck's tub bulkhead I had to actually remove the tub from the frame and shift it back. 6 bolts underneath was enough to shift it.
These are the waterproof grommets. One each for positive and negative from the car battery, and one for the two circuits that I want in the cab.
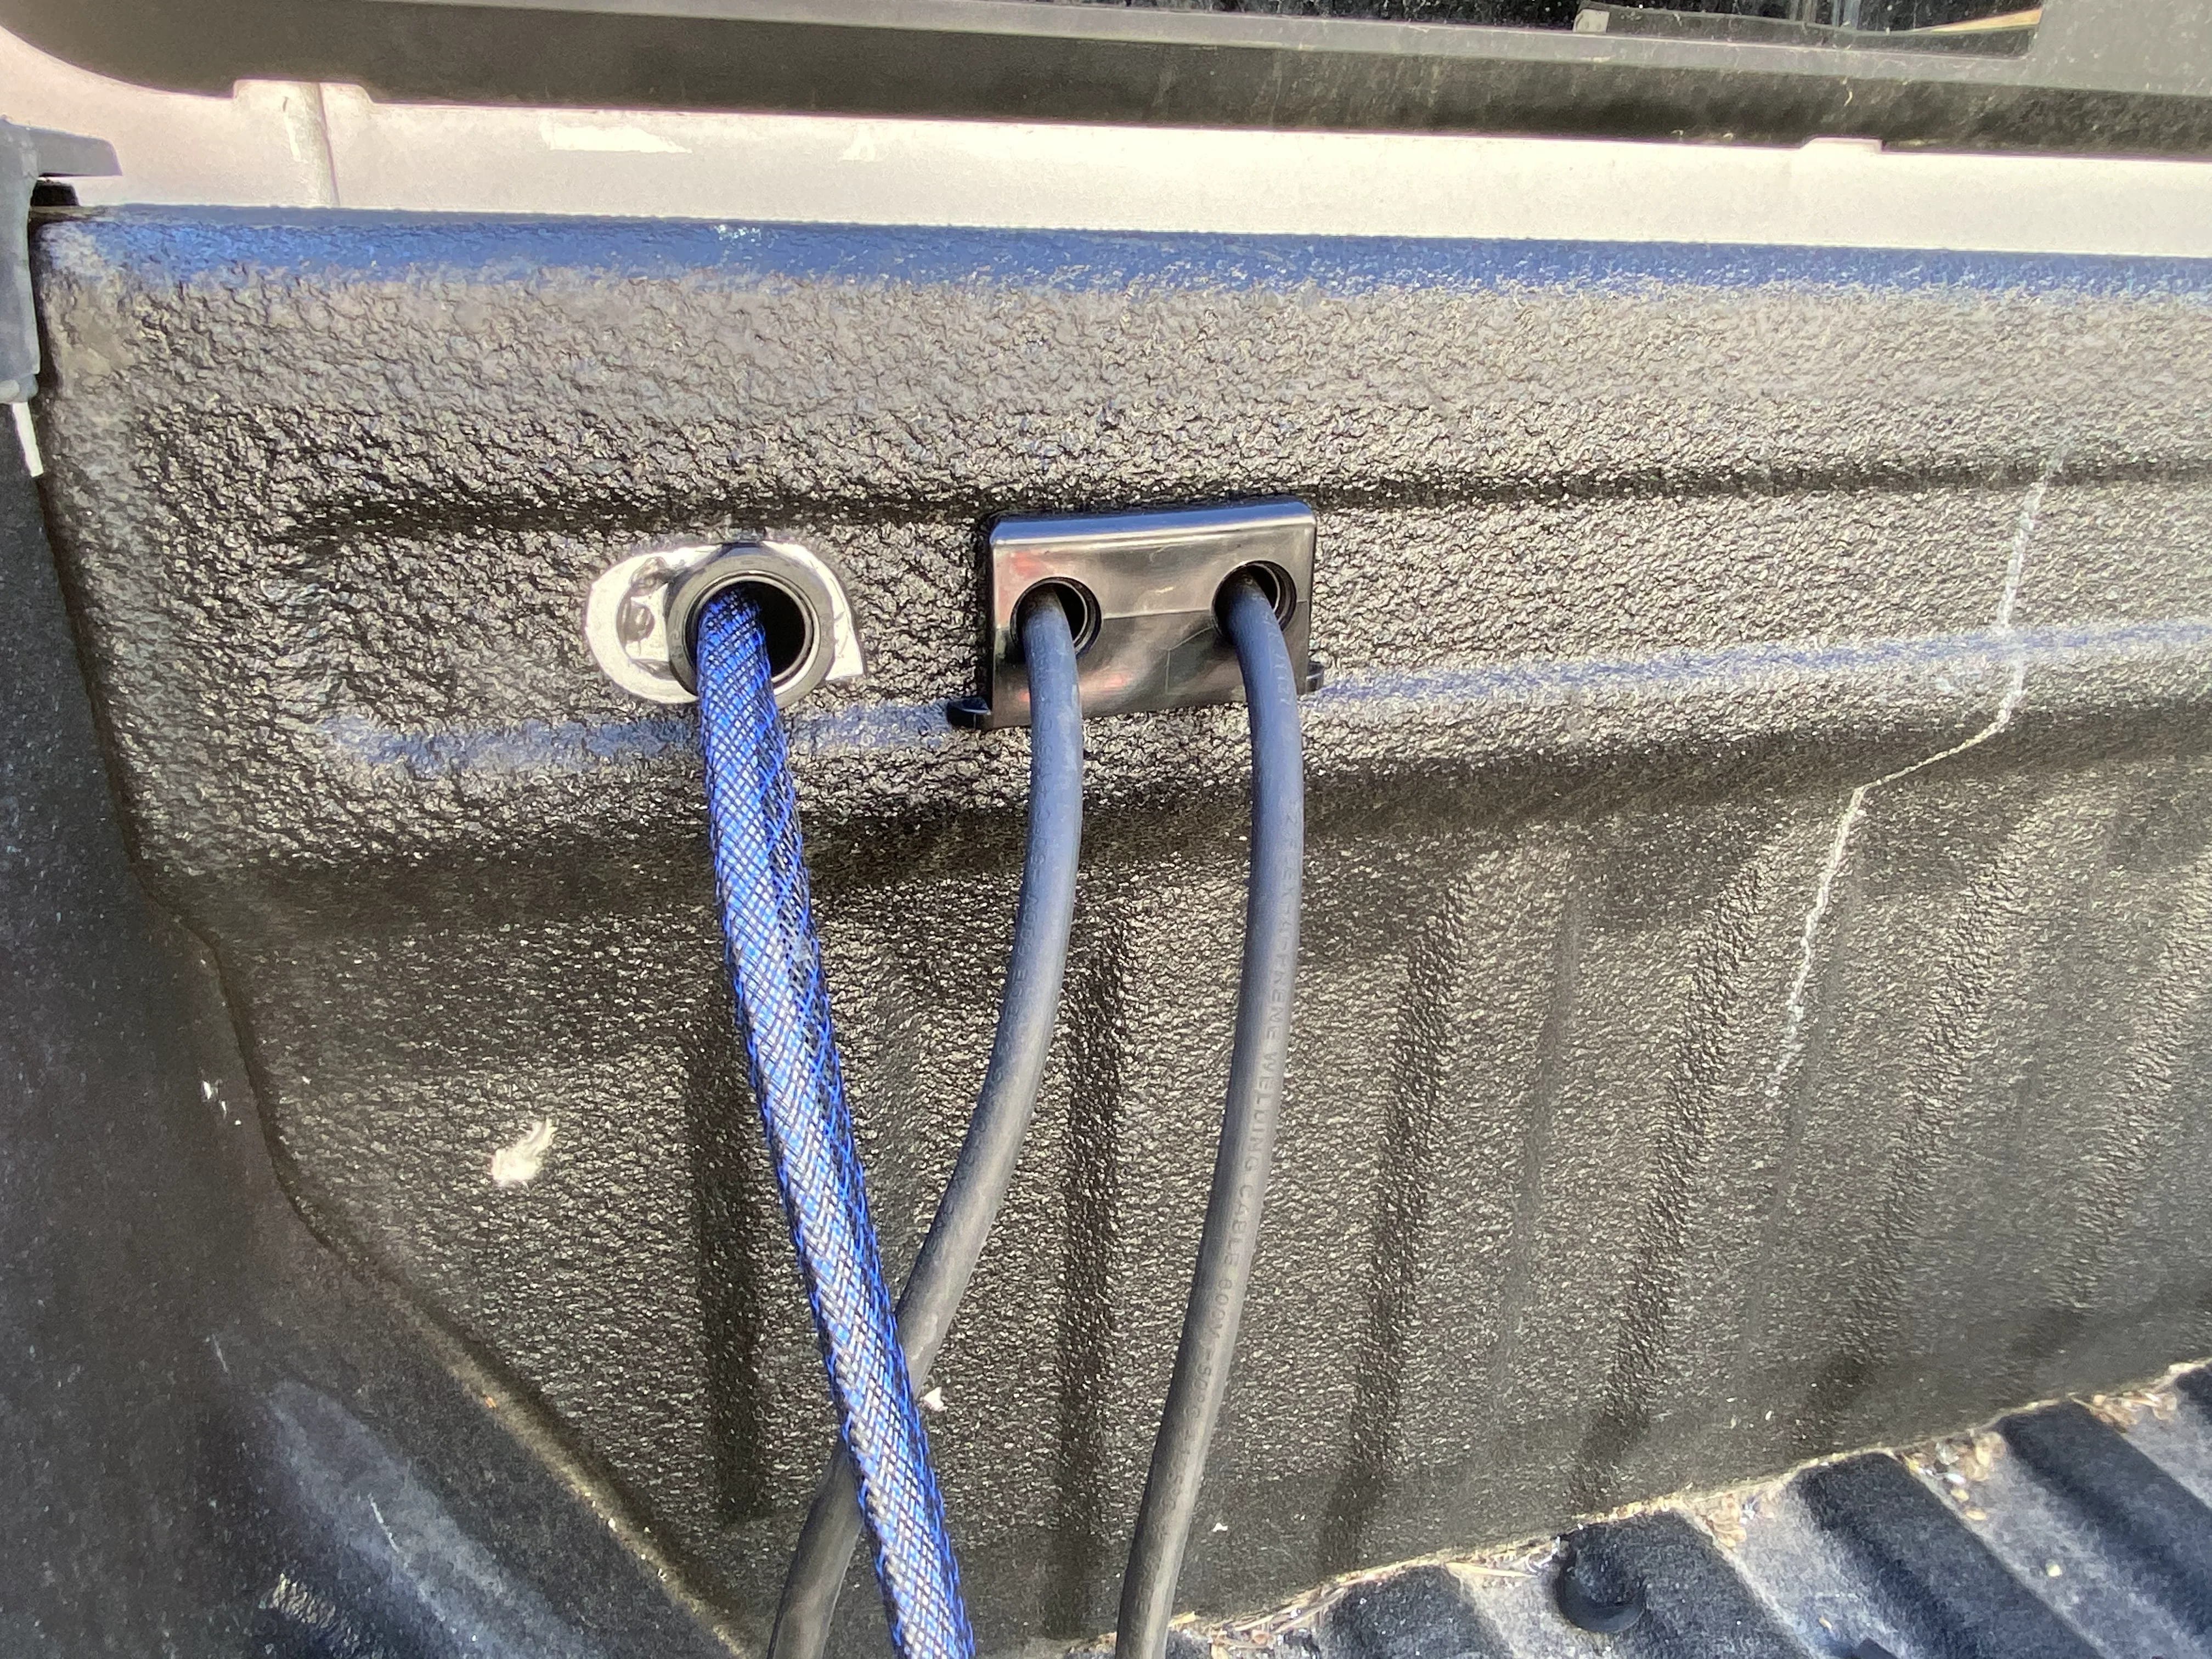
The left-most hole was already in the tub - for whatever reason when they put bed liner on it they didn't take out the plastic insert. I drilled it out and used a piece of alloy for a backer plate with some RTV to seal it (that's why it looks silver). This will be covered by the cabinets but I'll hit it with some spray on bed liner to protect it anyway.
Success! Power is now from under the hood to the box. I have a 60 amp breaker for the positive terminal, so the positive wire will hook to the breaker and the negative right to the battery post.
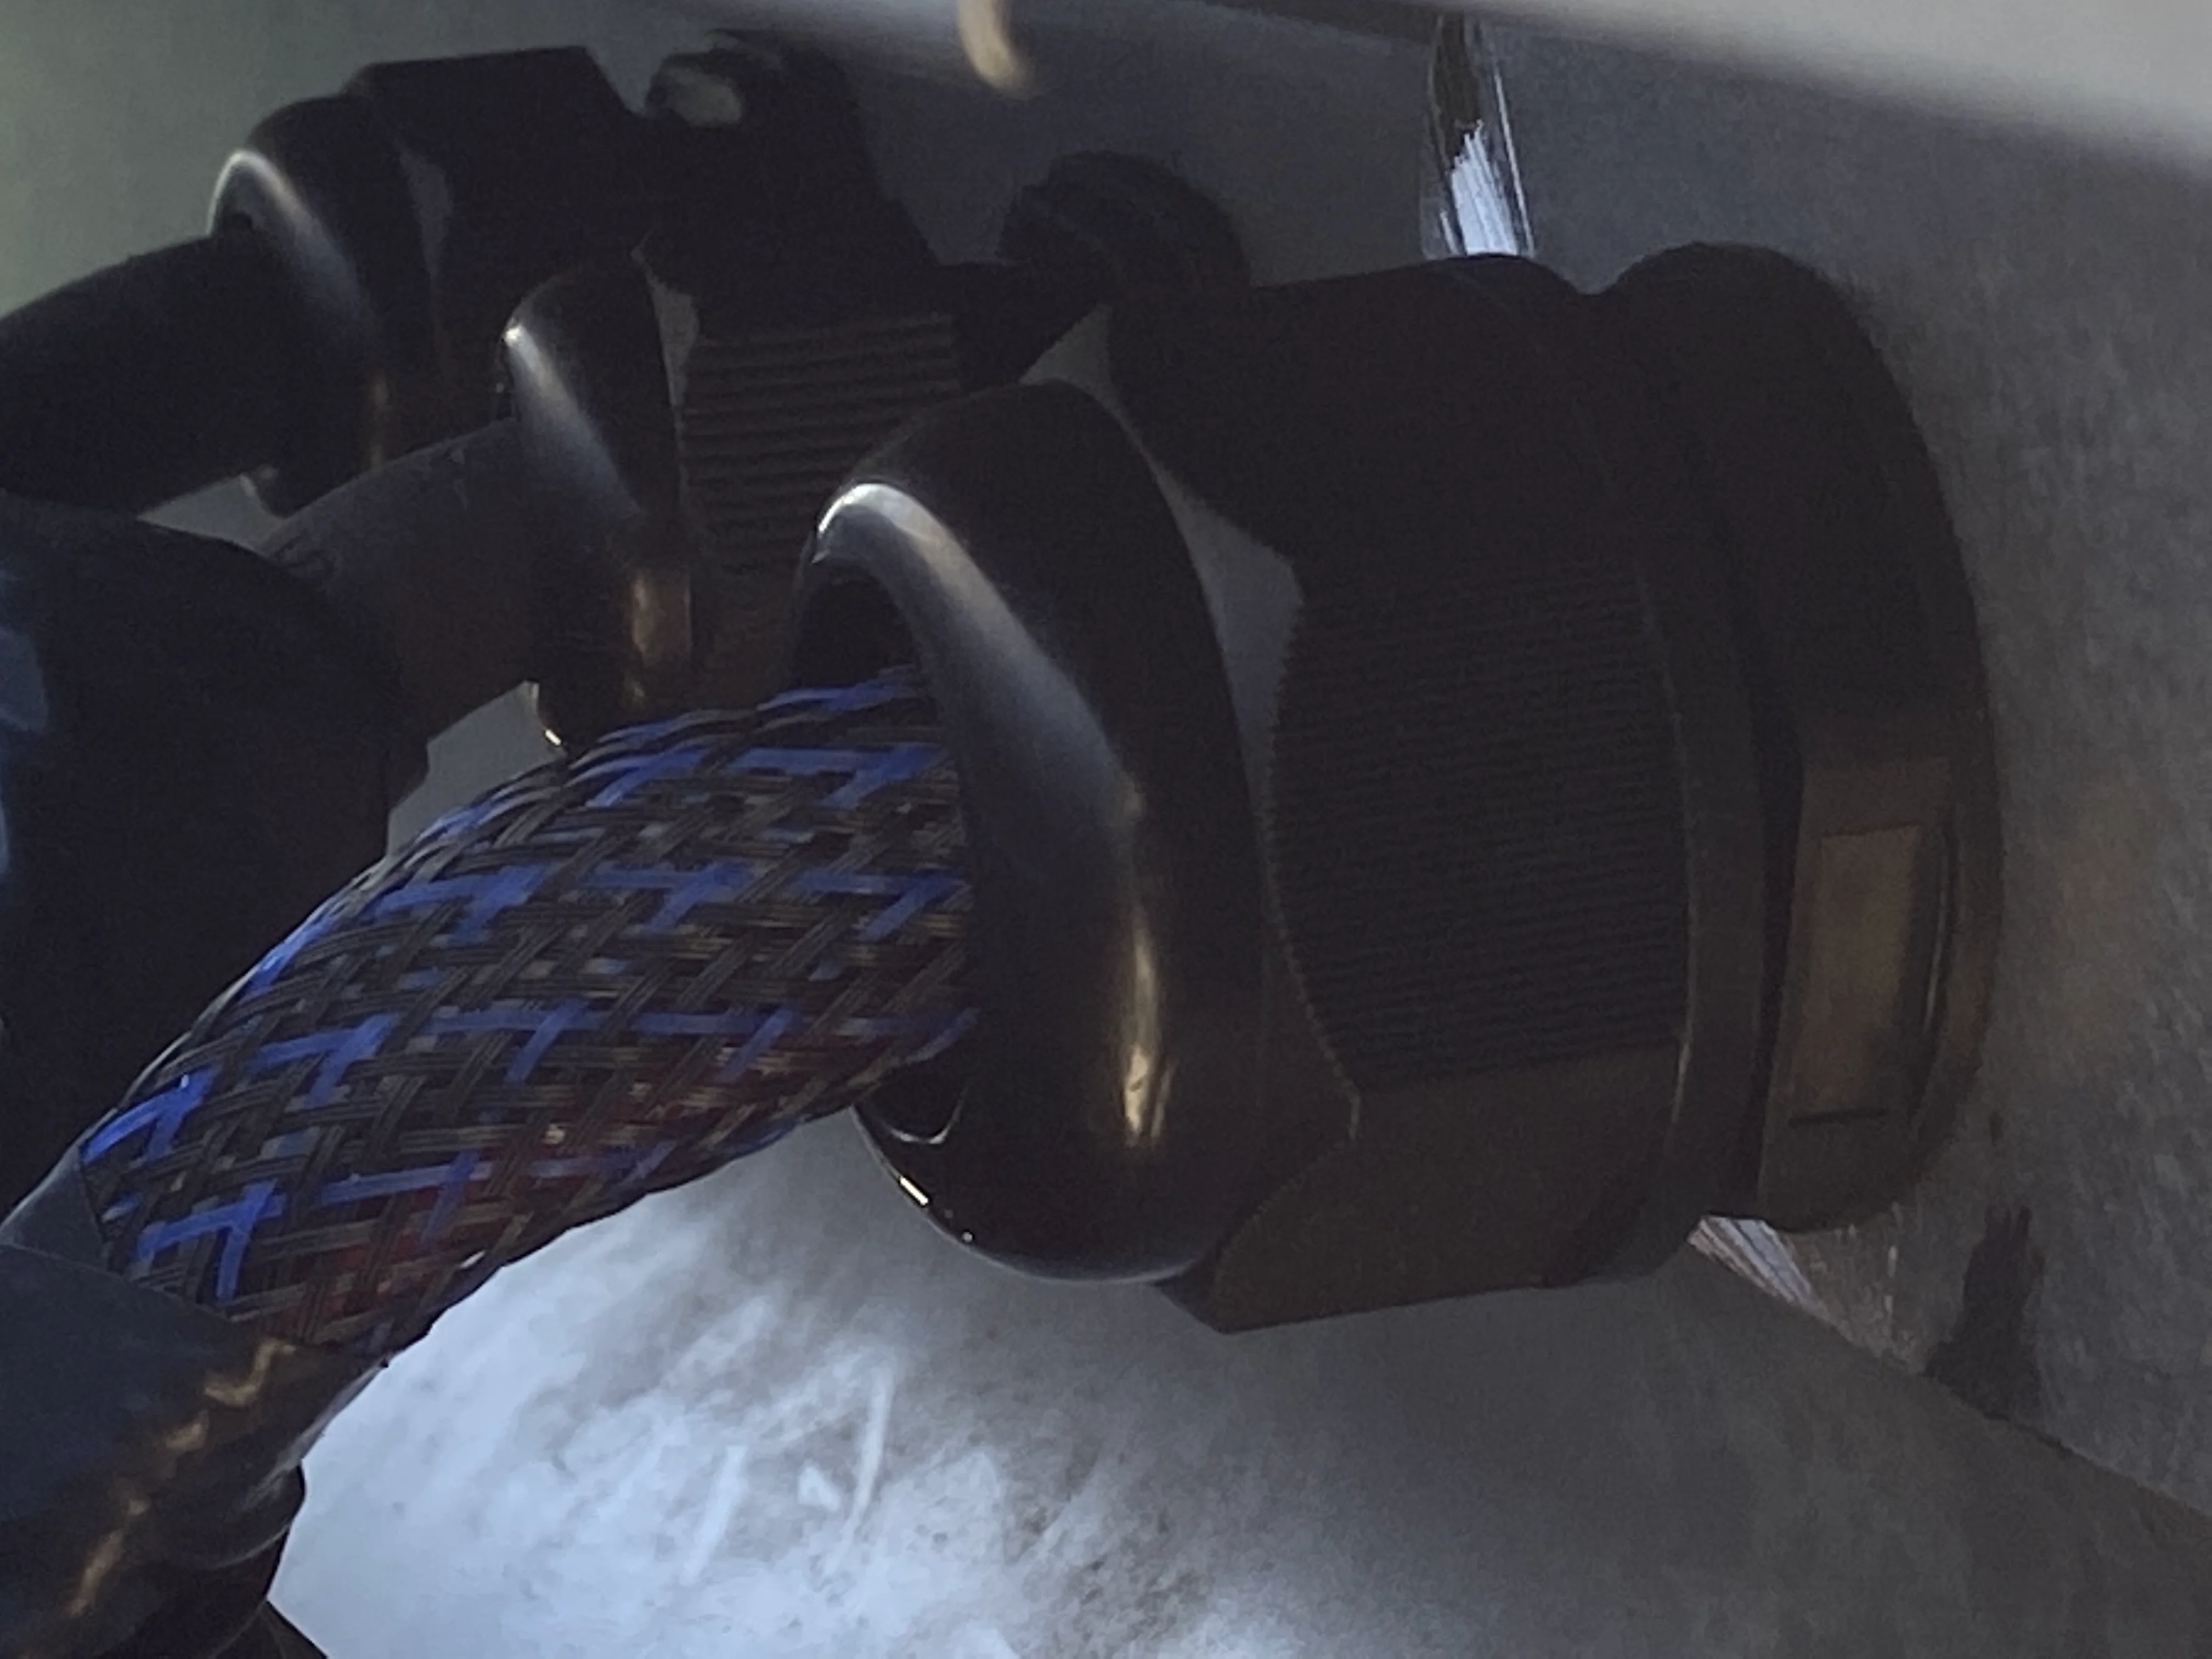
This entire loom is double-wrapped. First the wires are wrapped in that blue poly sheathing. Then, both the power and the circuits, wrapped in blue sheathing, are stuffed into a black split loom. This is tucked underneath the truck running alongside the frame rail as close to the factory loom as I could get it. When it gets to the front of the drivers door, it snakes up inside the wheel well behind the inner fender cover. It's well secured against abrasion, sticks, or anything else that might cause headaches down the road.
Next is hopefully the doors but I'm waiting on parts so a lot depends on those arriving.
Part 11: Building the Aluminum Extrusion Canopy
Finally got my material for my cap, and began construction last weekend. Ended up not feeling the best so didn't get much done, but here's the update all the same. I'll put it in sections so people can skip to the part they are most interested in. This is a partial update - this stage of the project isn't done - and I considered saving this post for when it was finished but I like to show the mistakes along the way to benefit others so if I capture it while it's fresh I have a better chance of doing that.
You write too much, what's the short summary?
I'm about half-way done building a custom truck cap out of 1.5" aluminum extrusions. Skip down to the photos to see it coming together.
Background
It's a bit of a long story, but I originally built my truck cap by welding aluminum tube, with the goal of eventually boxing it in/waterproofing it. However, as I got back into welding for the first time since starting the original rack a few years back, I was having all kinds of problems. I spent hours trying to figure out why my welder wasn't working right, before finally ruling out everything except bad shielding gas. And thanks to some…lacking customer service from my welding gas supplier, I was in a bit of a pickle. Time is my most valuable commodity, and so I did a bit of a "reset" on my plan to still do this project affordably, but do so with a bit less of a time commitment than welding from scratch.
The Solution
After a lot of back and forth, I considered my three options.
1) Spend around ~$1100 and finish the rack as I intended, with a risk of needing to invest in a whole new welder if I am wrong about the gas and unable to get mine working ($$$$); that risks doubling or tripling the price of this project. If everything went well, this was by far the most affordable option, but it was also the option with the most cost-volatility with the unknowns on the welder. Plus, this approach would be the most significant investment of my time; getting good fit up and running beads takes a lot of hours. The end result would give me something that was plenty strong but only about 5/10 of what I really wanted because of my limited skills. I'd want to be consistently "stacking dimes" a lot more before committing to this approach.
2) Look to commercial options. I looked at several fibreglass canopies, but they did not have the robustness I wanted and were quite expensive for what they were. I looked to metal ones, but they were very expensive and not the most available items here in Canada. The RSI Smartcap caught my eye as I think that's the best Overland-ready cap on the market, but at nearly $5k that was a bit expensive. However, based on the "time saved" argument alone, I seriously considered the RSI because it had next-day delivery and could be assembled in a few hours. Part of me still wishes I went this route, but the $5k price tag meant missing out on a lot of summer adventures. Similar offerings from Alucab and others were priced similarly.
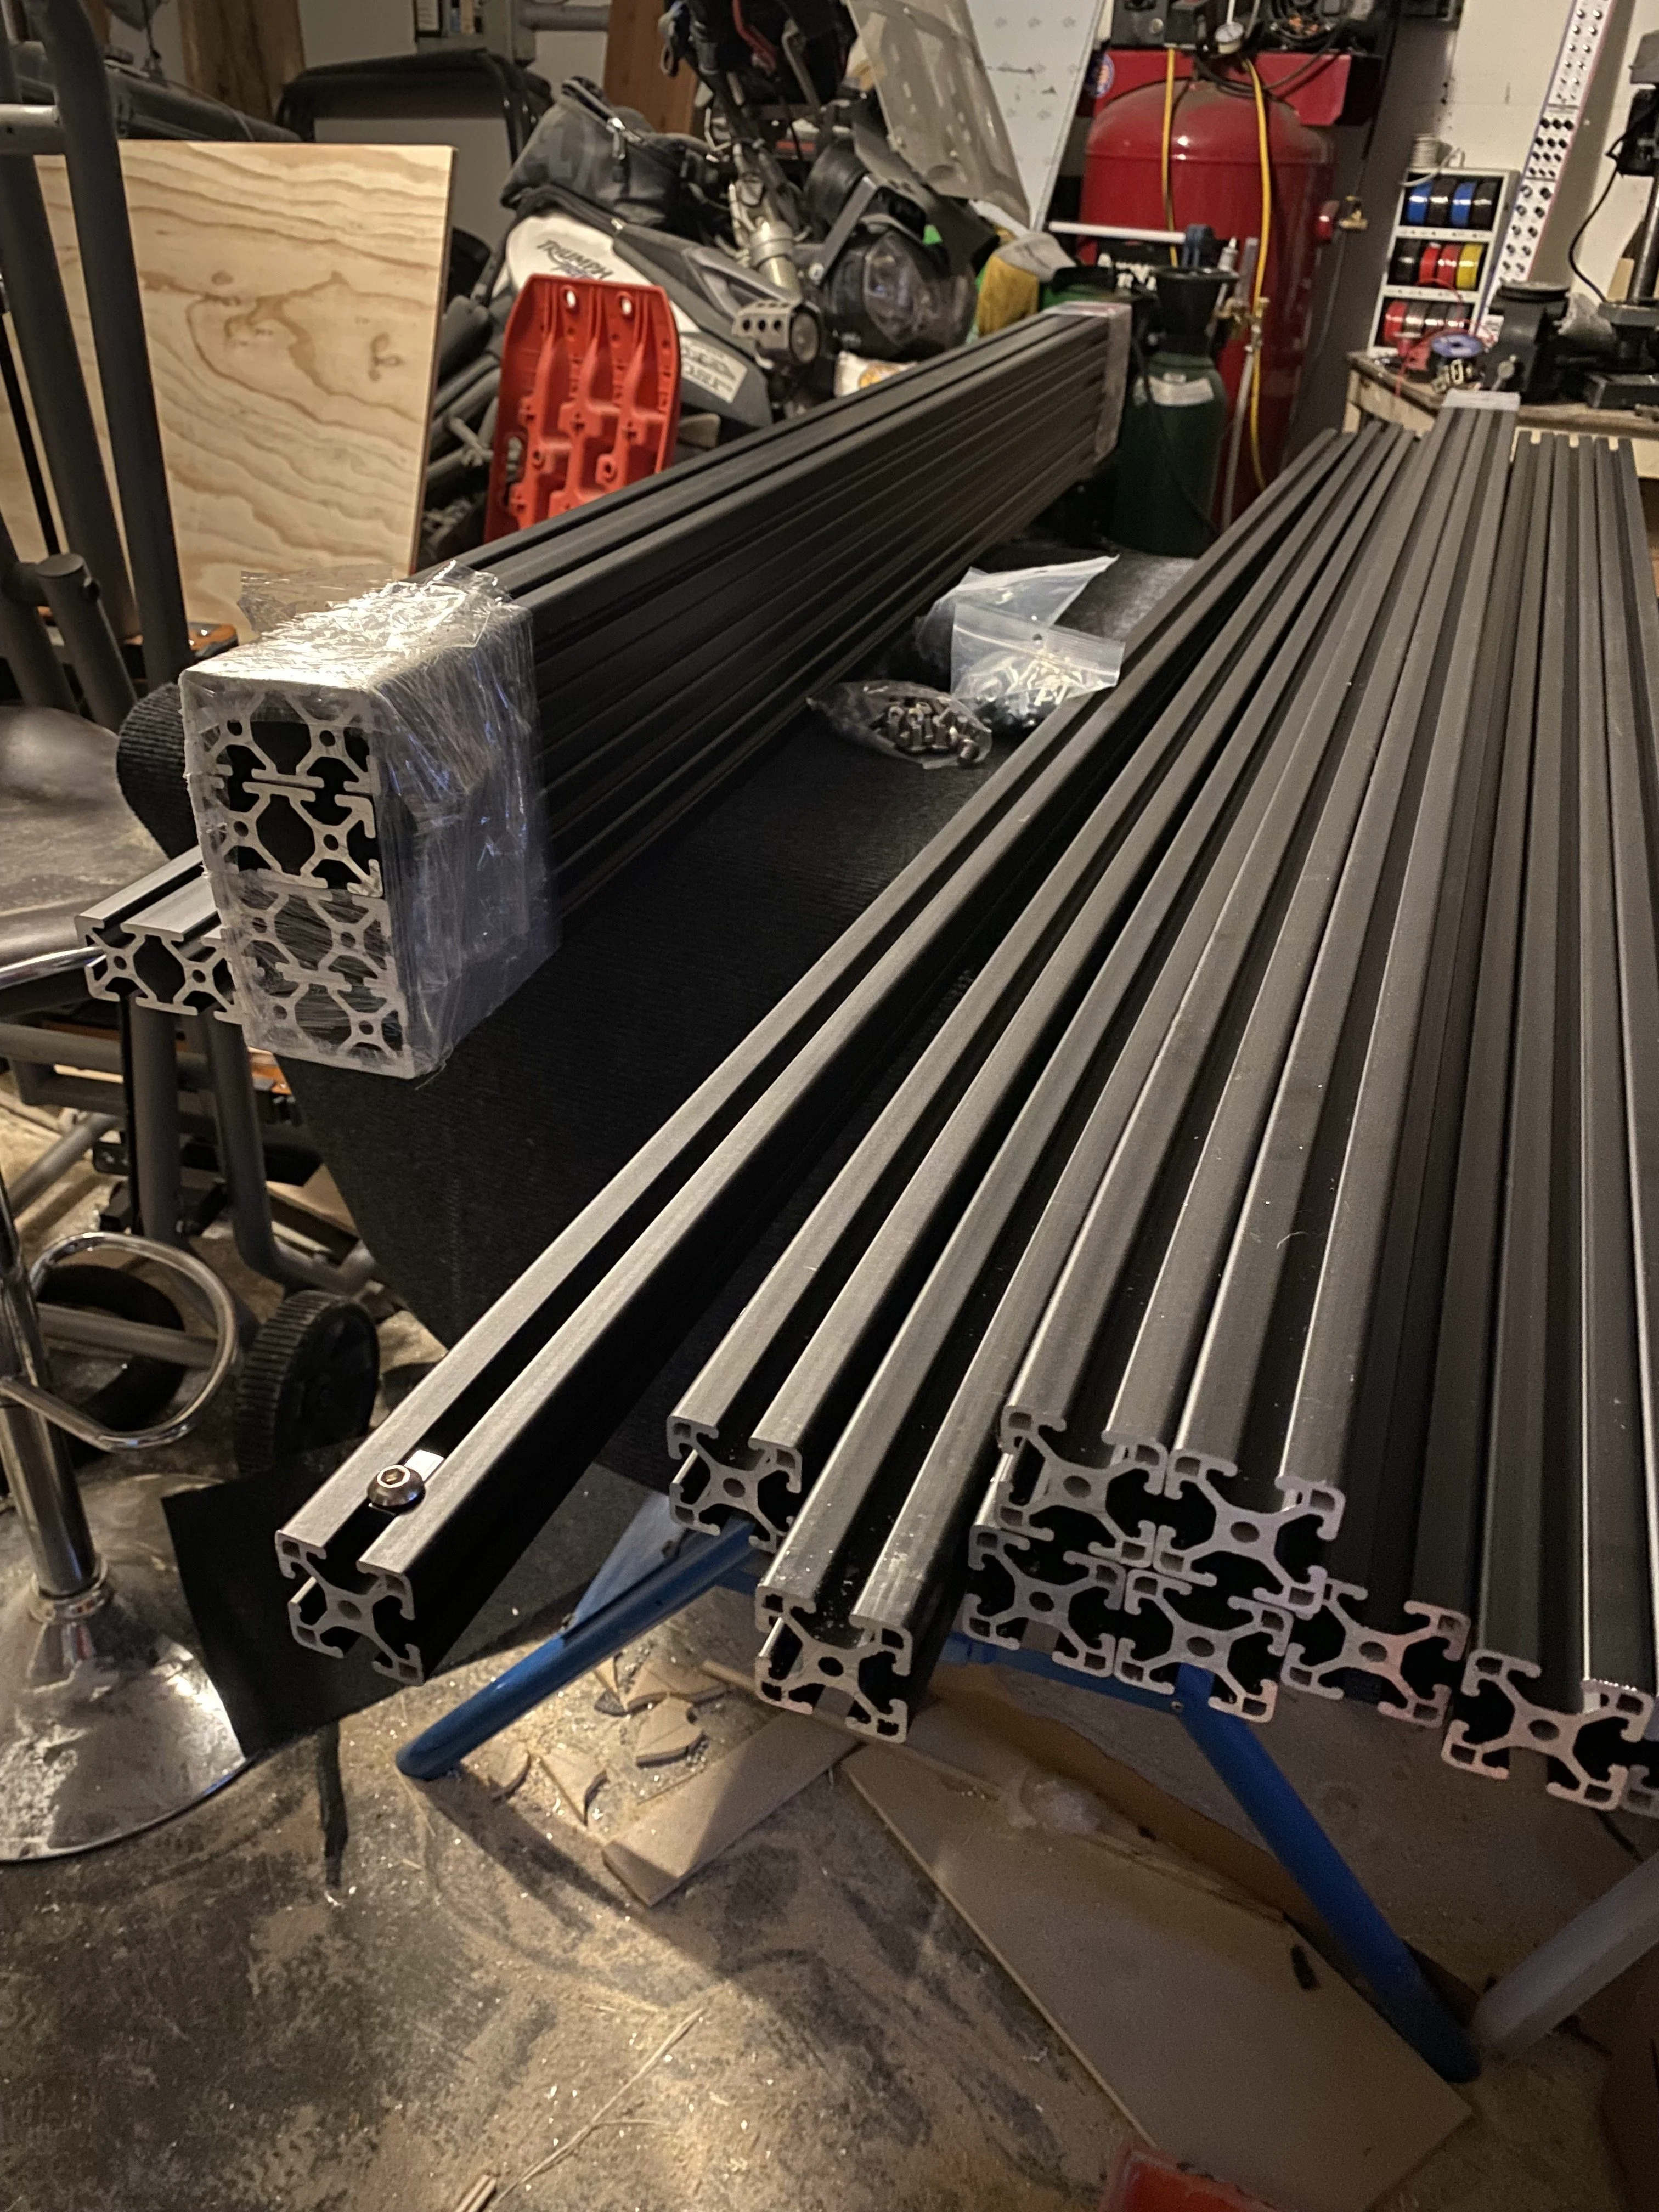
3) Look to a different material to build the cap. The solution I decided on was in the form of aluminum extrusion. It was the perfect mix of cost, versatility, strength, and speed of construction. I spent a lot of time designing & measuring on my iPad and learning about extrusion construction before pulling the trigger, but eventually I placed my order with a company called Faztek. This is the exact same product as 80/20 extrusions, which is the more popular extrusion company in the USA. As you can see below, I opted for the black anodized material; my thinking at the time was that by ordering black material I would save time and energy on painting and get a more "finished" look.
I will say that Extrusion is an absolute joy to work with, but it requires a different approach to fabrication than I've used in the past. Normally, I have a rough design in mind with a few very rough sketches, but I kind of build it organically -- measure, cut a piece, make sure it fits, repeat until done -- it's very much an iterative "build as you go" approach. Extrusion doesn't lend itself to that. You really do want to have your project fully designed on paper before diving in, down to every single fastener OR have a lot of extra fasteners and extrusions ($$) if you want to build as you go. It's easy to get into the zone of "build as you go", but then you find you've blocked off an extrusion channel that you need a T-slot nut in. Only happened a few times to me. There are specialized nuts to do this but they just cost more and when I made my initial order, I was so confident that I could take my time and avoid these errors so I didn't buy any. I was wrong about that! I also estimated my fastener counts instead of figuring it out precisely, and so I was short on some other fasteners too.
The biggest barrier to working with extrusion is the shipping costs—it's not the kind of thing you can run to the local Home Depot if you forgot a nut or a length of extrusion, so getting everything you need all at once will save you money and time. My $100 in extra fasteners has cost me an additional $100 in shipping (so double the price); that would have been easy to include in my initial order and come under the same shipping costs had I done this a bit differently.
Assembly
When researching this build, I didn't find many people who have made truck caps out of 80/20 or similar extrusions. I did see Ripcord's excellent wedge-camper build that utilized extrusion for the camper, but not for the frame. So, I recognize I was doing things a bit differently on Pac yet again. From what I could glean from our comrades in the Vanlife movement, the downsides of extrusion are primarily making sure you pick a profile that is strong enough for the application, that the cuts are precise, and that there is something that prevents vibration from rattling the fasteners loose.
I'm certain my design is strong enough; I used some engineering calculators to ensure the load-bearing material could support a 1000 lbs point load with less than 1/16th inch of deflection. For extra strength, every piece of extrusion is supported by another piece of extrusion beneath it - in other words, instead of being supported only by a fastener, any load-bearing surface is supported by another solid surface (i.e. a vertical extrusion support) so the weight goes into the truck tub. The fasteners are all 5/16 bolts which have a shear strength north of 2000 lbs, but this gives an extra bit of support. Each fastener is secured with red thread locker, and each fastener and tapped hole is thoroughly cleaned with brake cleaner to make sure the thread locker works. I'm using the JB weld brand of red thread locker, and I'm confident these fasteners will not be coming out—I realized I made an error (missed a T-nut) about an hour after one assembly and tried to take it apart to put the nut in, and the end result was a broken hex key. The Red JB Weld holds very strongly.
Here's some photos of the canopy coming together:
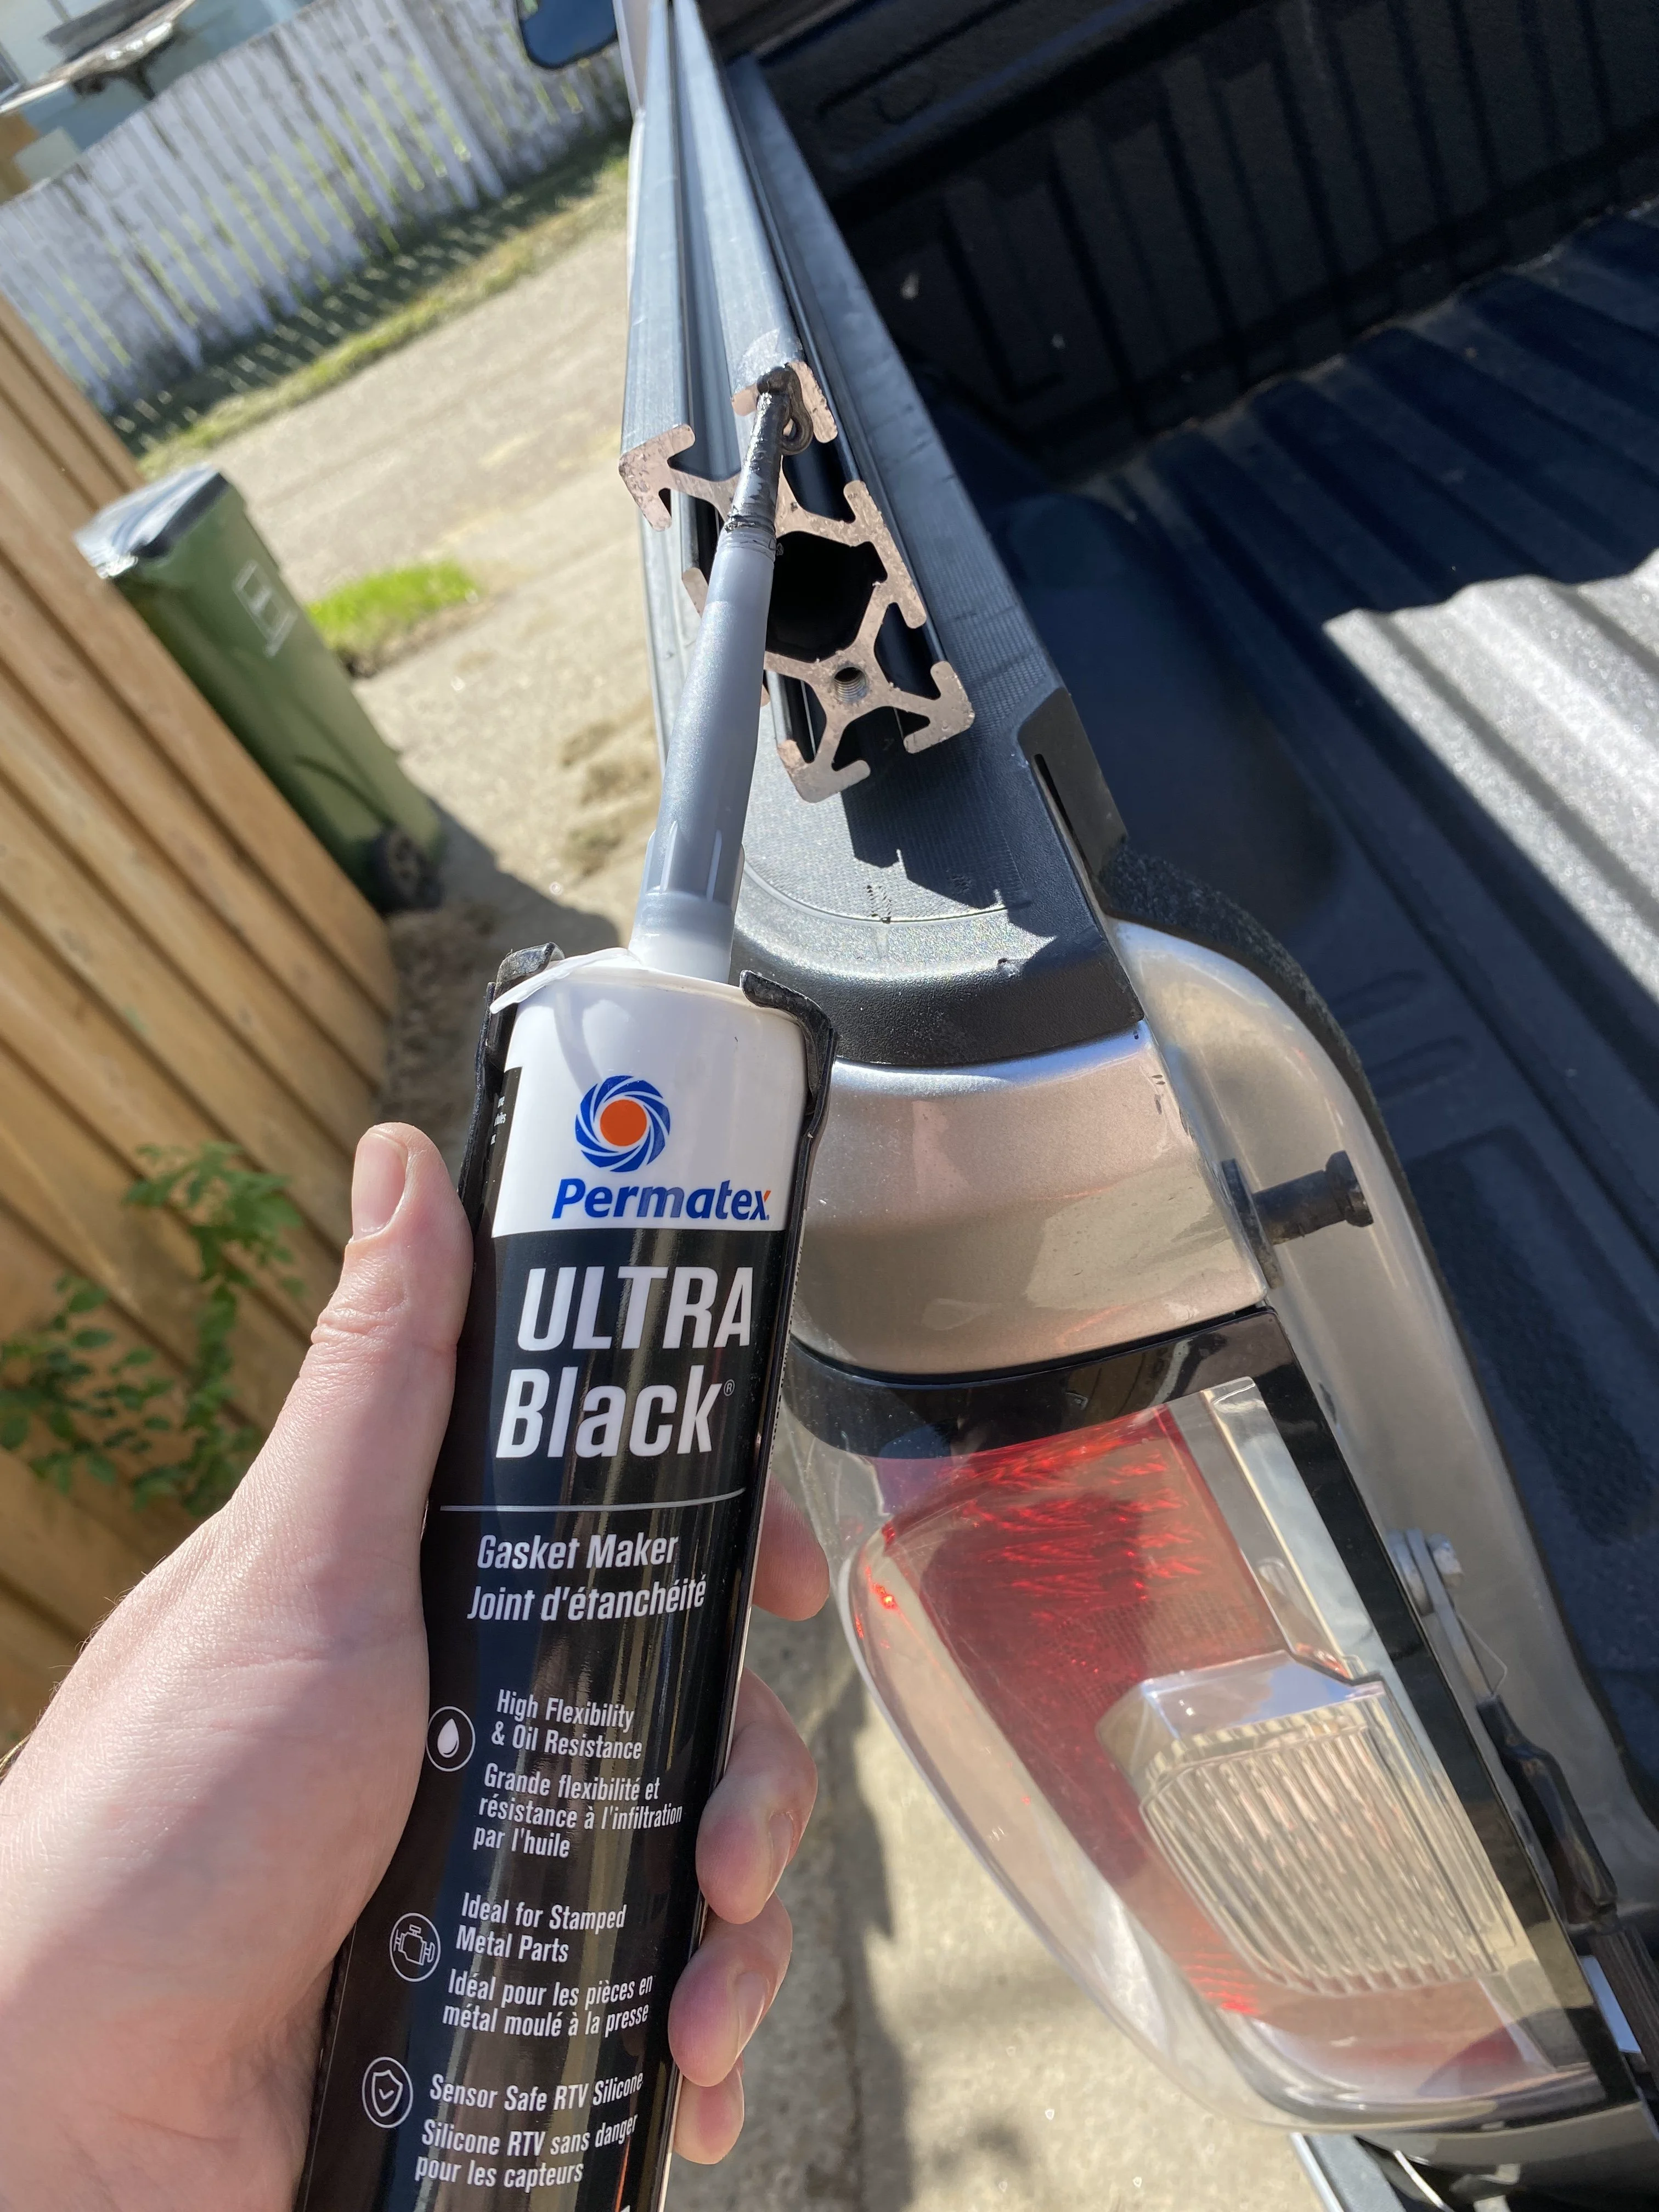
Every joint is sealed with gasket maker to enhance waterproofness (more on this another day as I have a whole solution for this problem of water/dustproofing).
..webp)
I had to manually tap the extrusion ends. This was a fair bit of work. If you dial in your design and know the exact lengths of the spans you need, you can get Faztek to tap these ends for you for $1.00 each. That's well worth it if you can swing it, because the majority of my time was spent tapping these holes; I decided against having Faztek do the machining because I wanted to trim the spans to a precise length myself (more of that "build as you go" approach, which as I've said, doesn't work well with this material). It's not hard to tap these ends - just takes time! I've also ordered a tool called a "Drill Tap" which is supposed to make this go quicker, but it arrives Saturday so I'll report back then if it's any good.
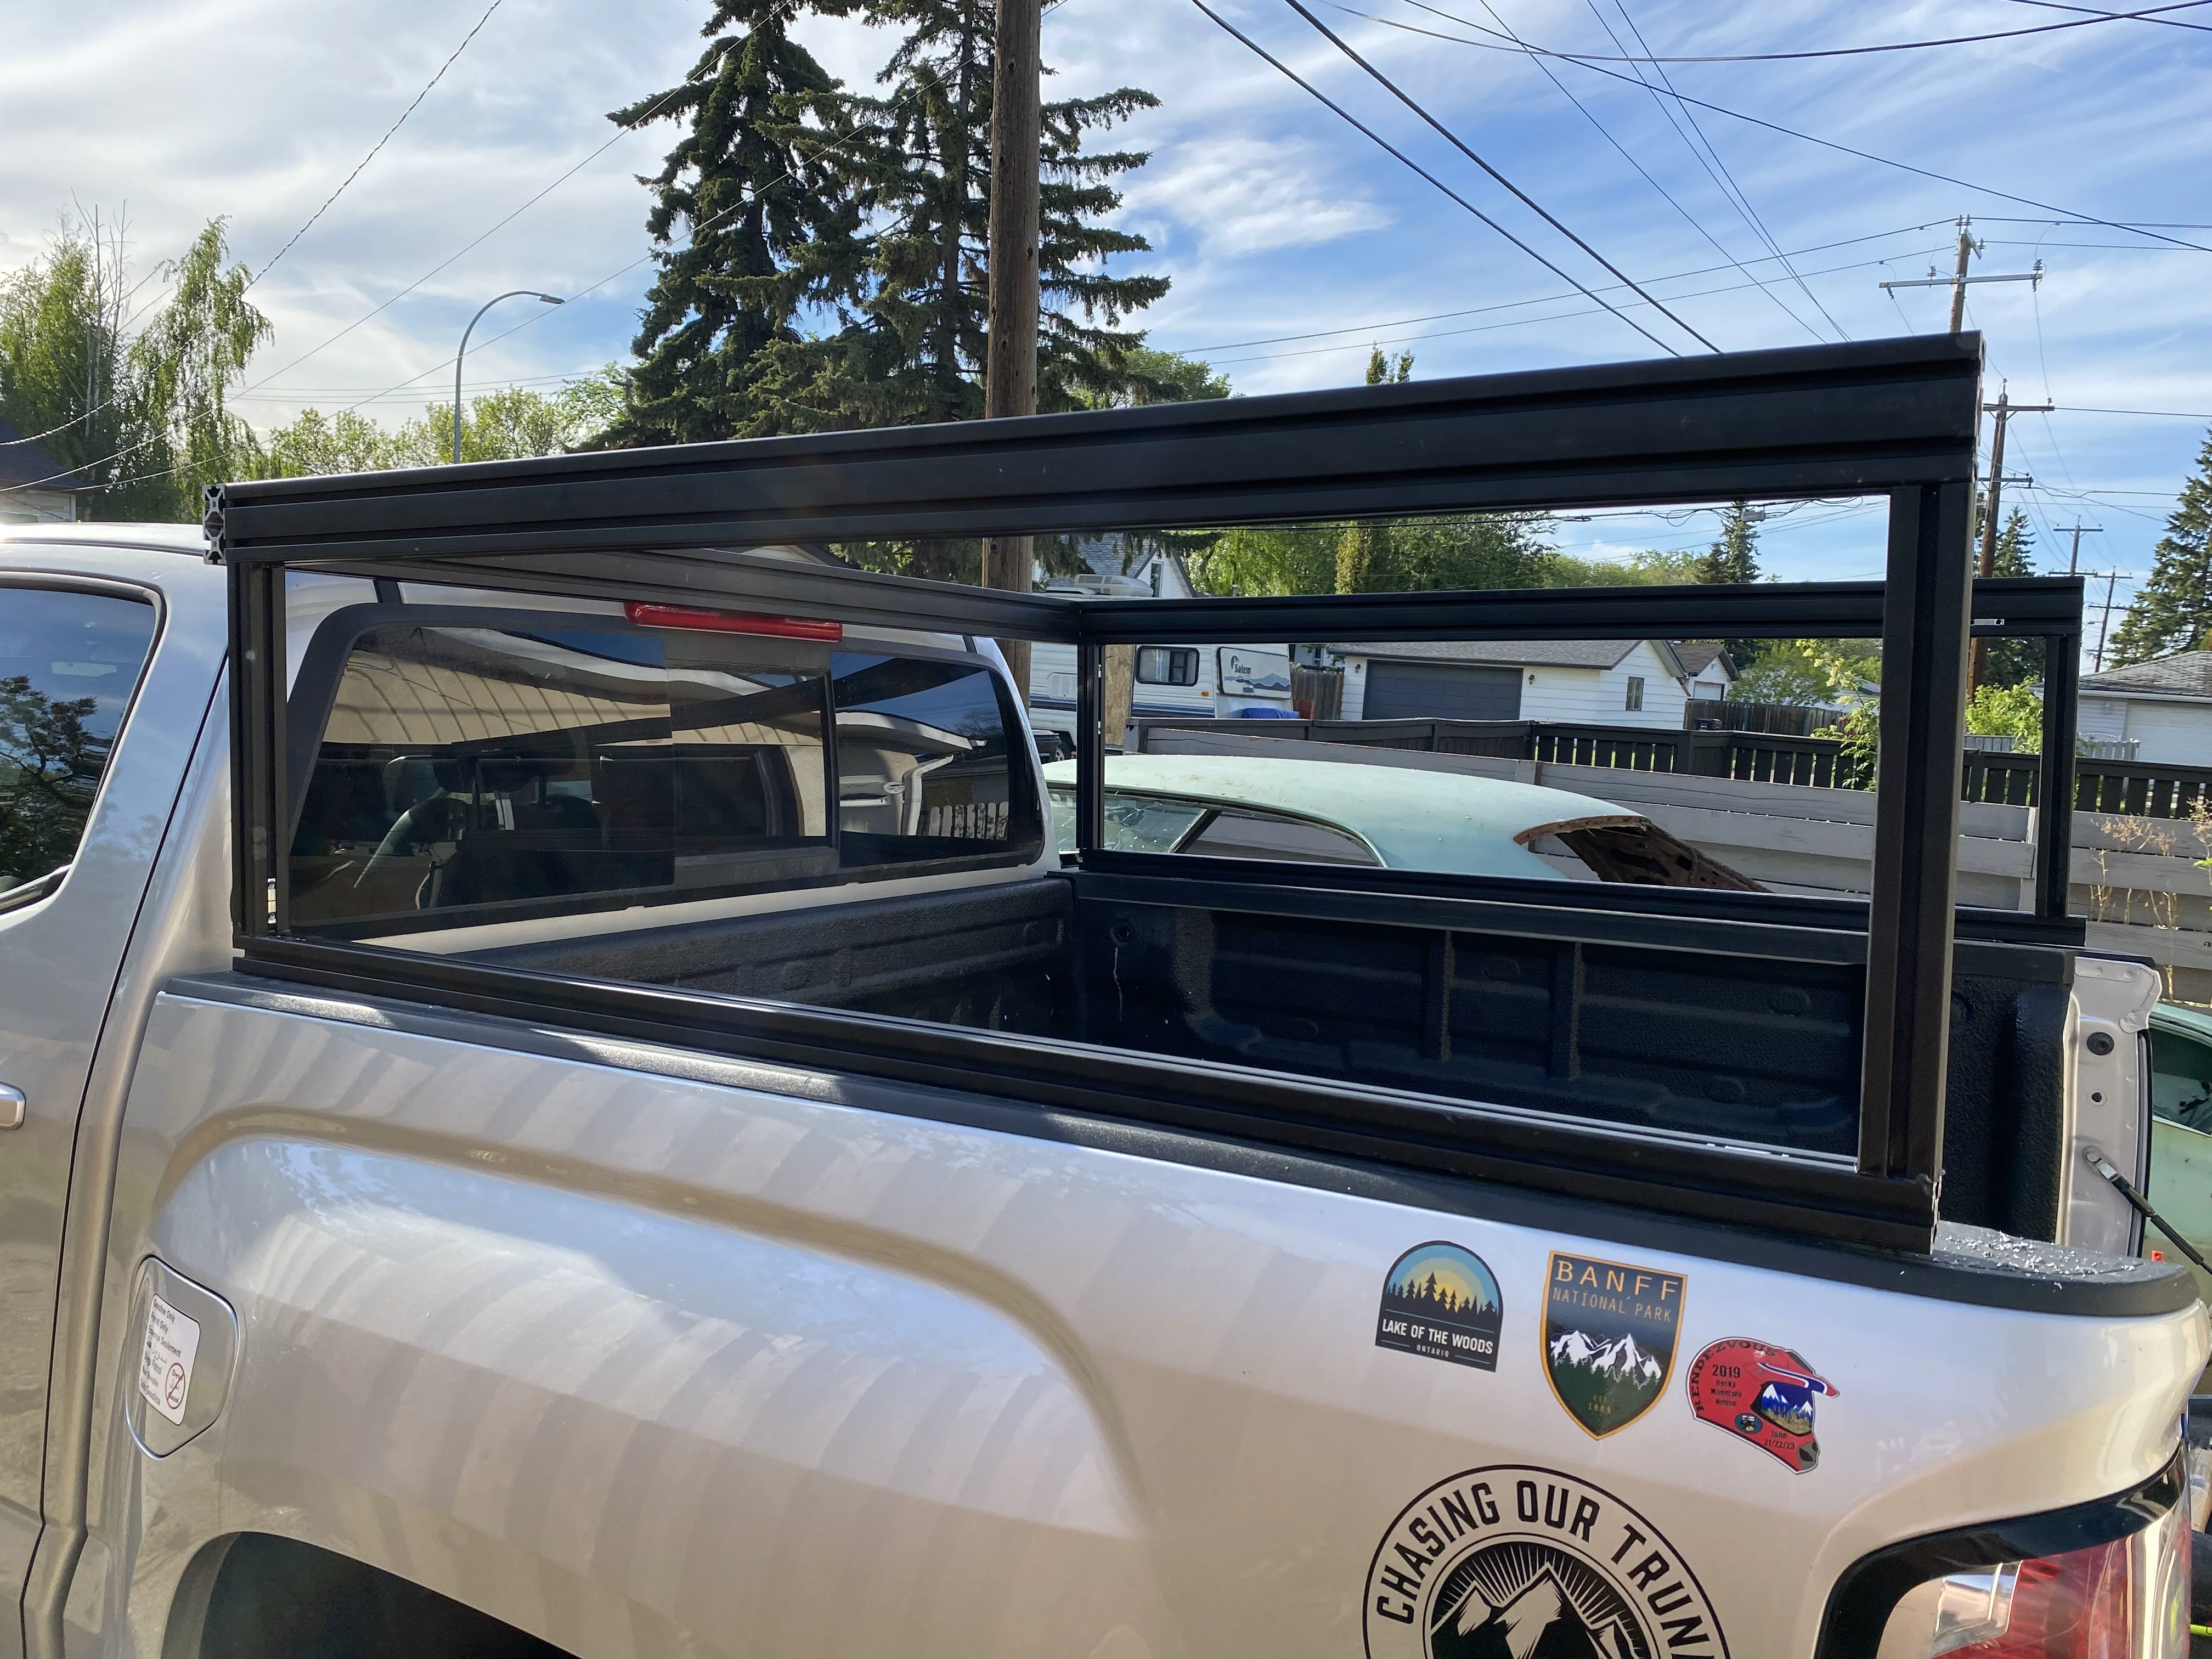
Testing to see if it fits.
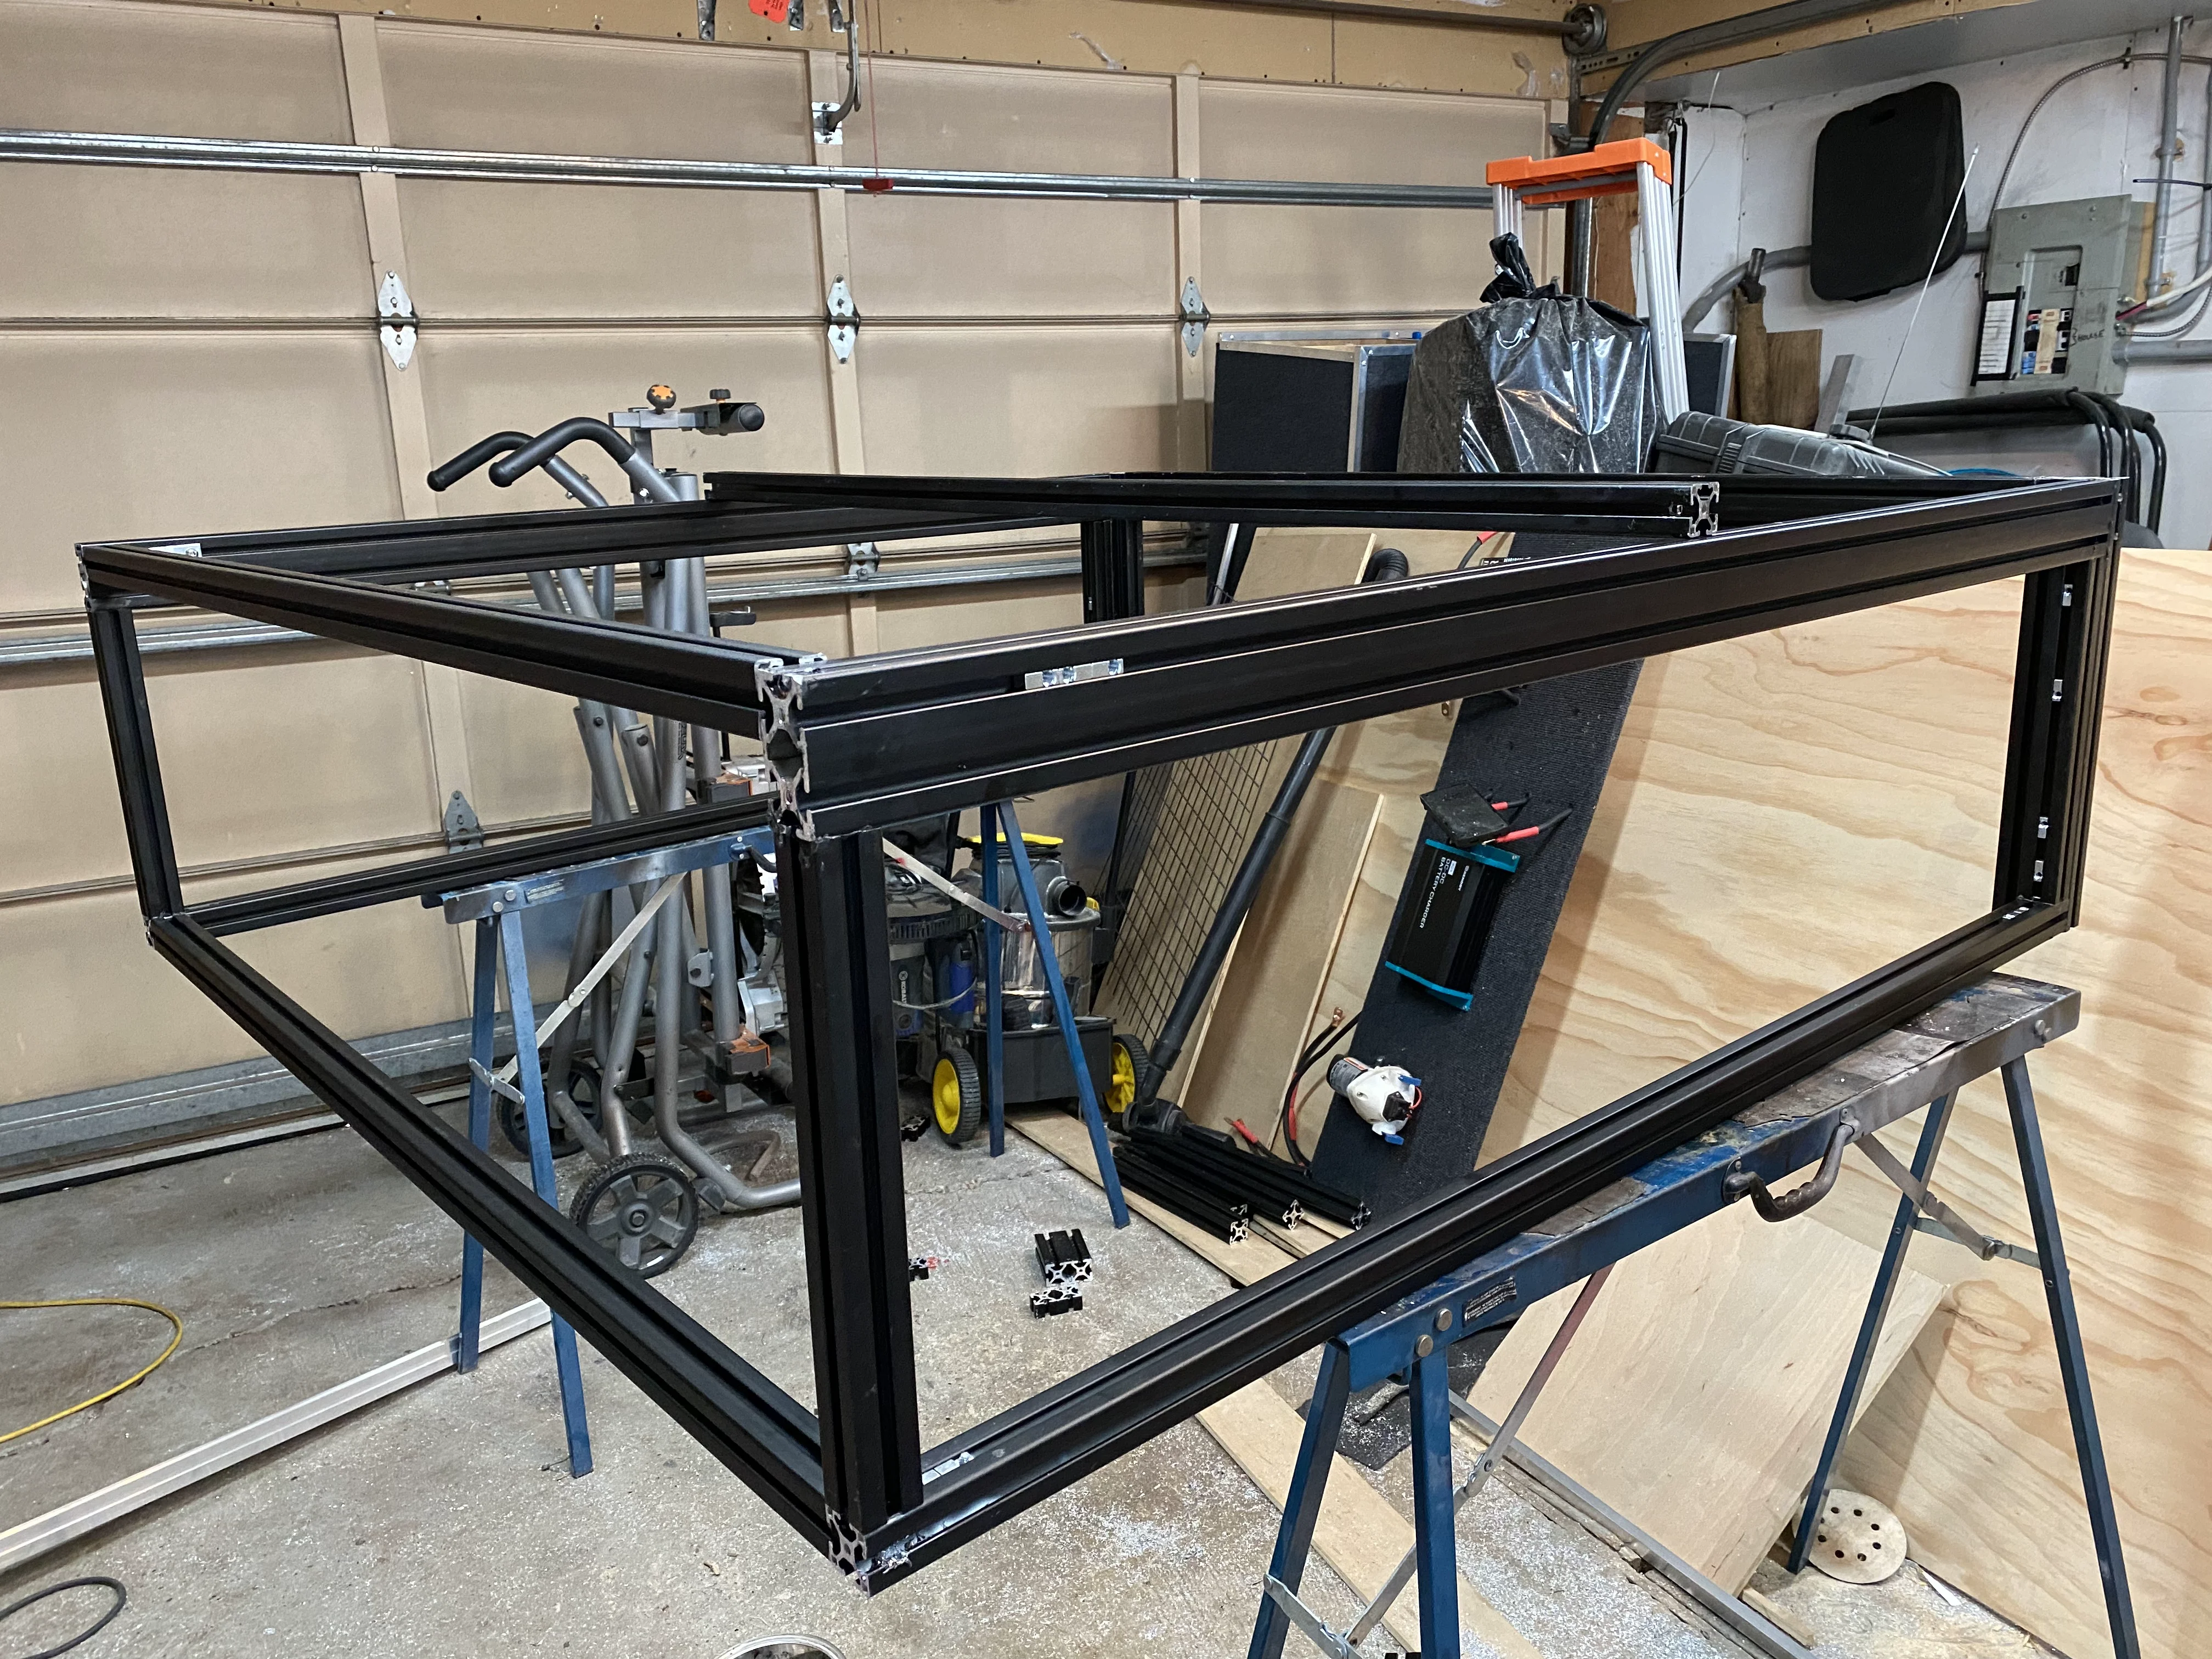
This went together fast - from a bundle of extrusion to the assembled frame in the above photo was only about a solid day of work in the garage, and I was going slowly as I've never worked with this material before. I made a few mistakes—in one case I cut a piece too short, and as I mentioned there are a few extrusion channels that I need to wait for my "drop in" t-nuts to arrive because I blocked them off before installing all the nuts, but overall it was very easy. If I were to build another one, I think I can go from parts to full canopy in a day or less. Now, however, I'm just waiting on parts to arrive in the mail. My roof panels arrive next week, and once Faztek gets me my new order of T-nuts I should be able to finish this up. Stay tuned in about two more weeks for another update.
Progress on the Cap
Indeed there has been! And thank you for the kind words. This project has been more about making it happen and less about documenting as my time is limited, but here's an update on what has happened so far.
Now that the drawers were done and the electrical was run, it was time to finish up the shell of the cap so that I could get started on the electrical.
I sealed all the panels; here is the bead for the front bulkhead:

The roof panels slide into the T-slot; I have gasket material to stop them from rattling and will install that tonight or tomorrow. On the top, more sealant in the cracks to ensure no water can get in.

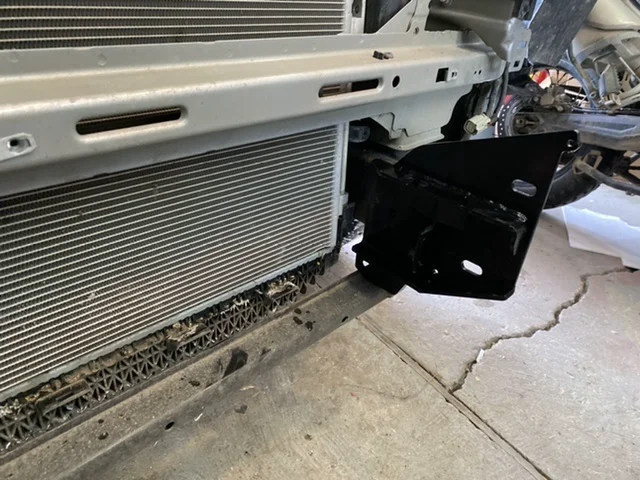
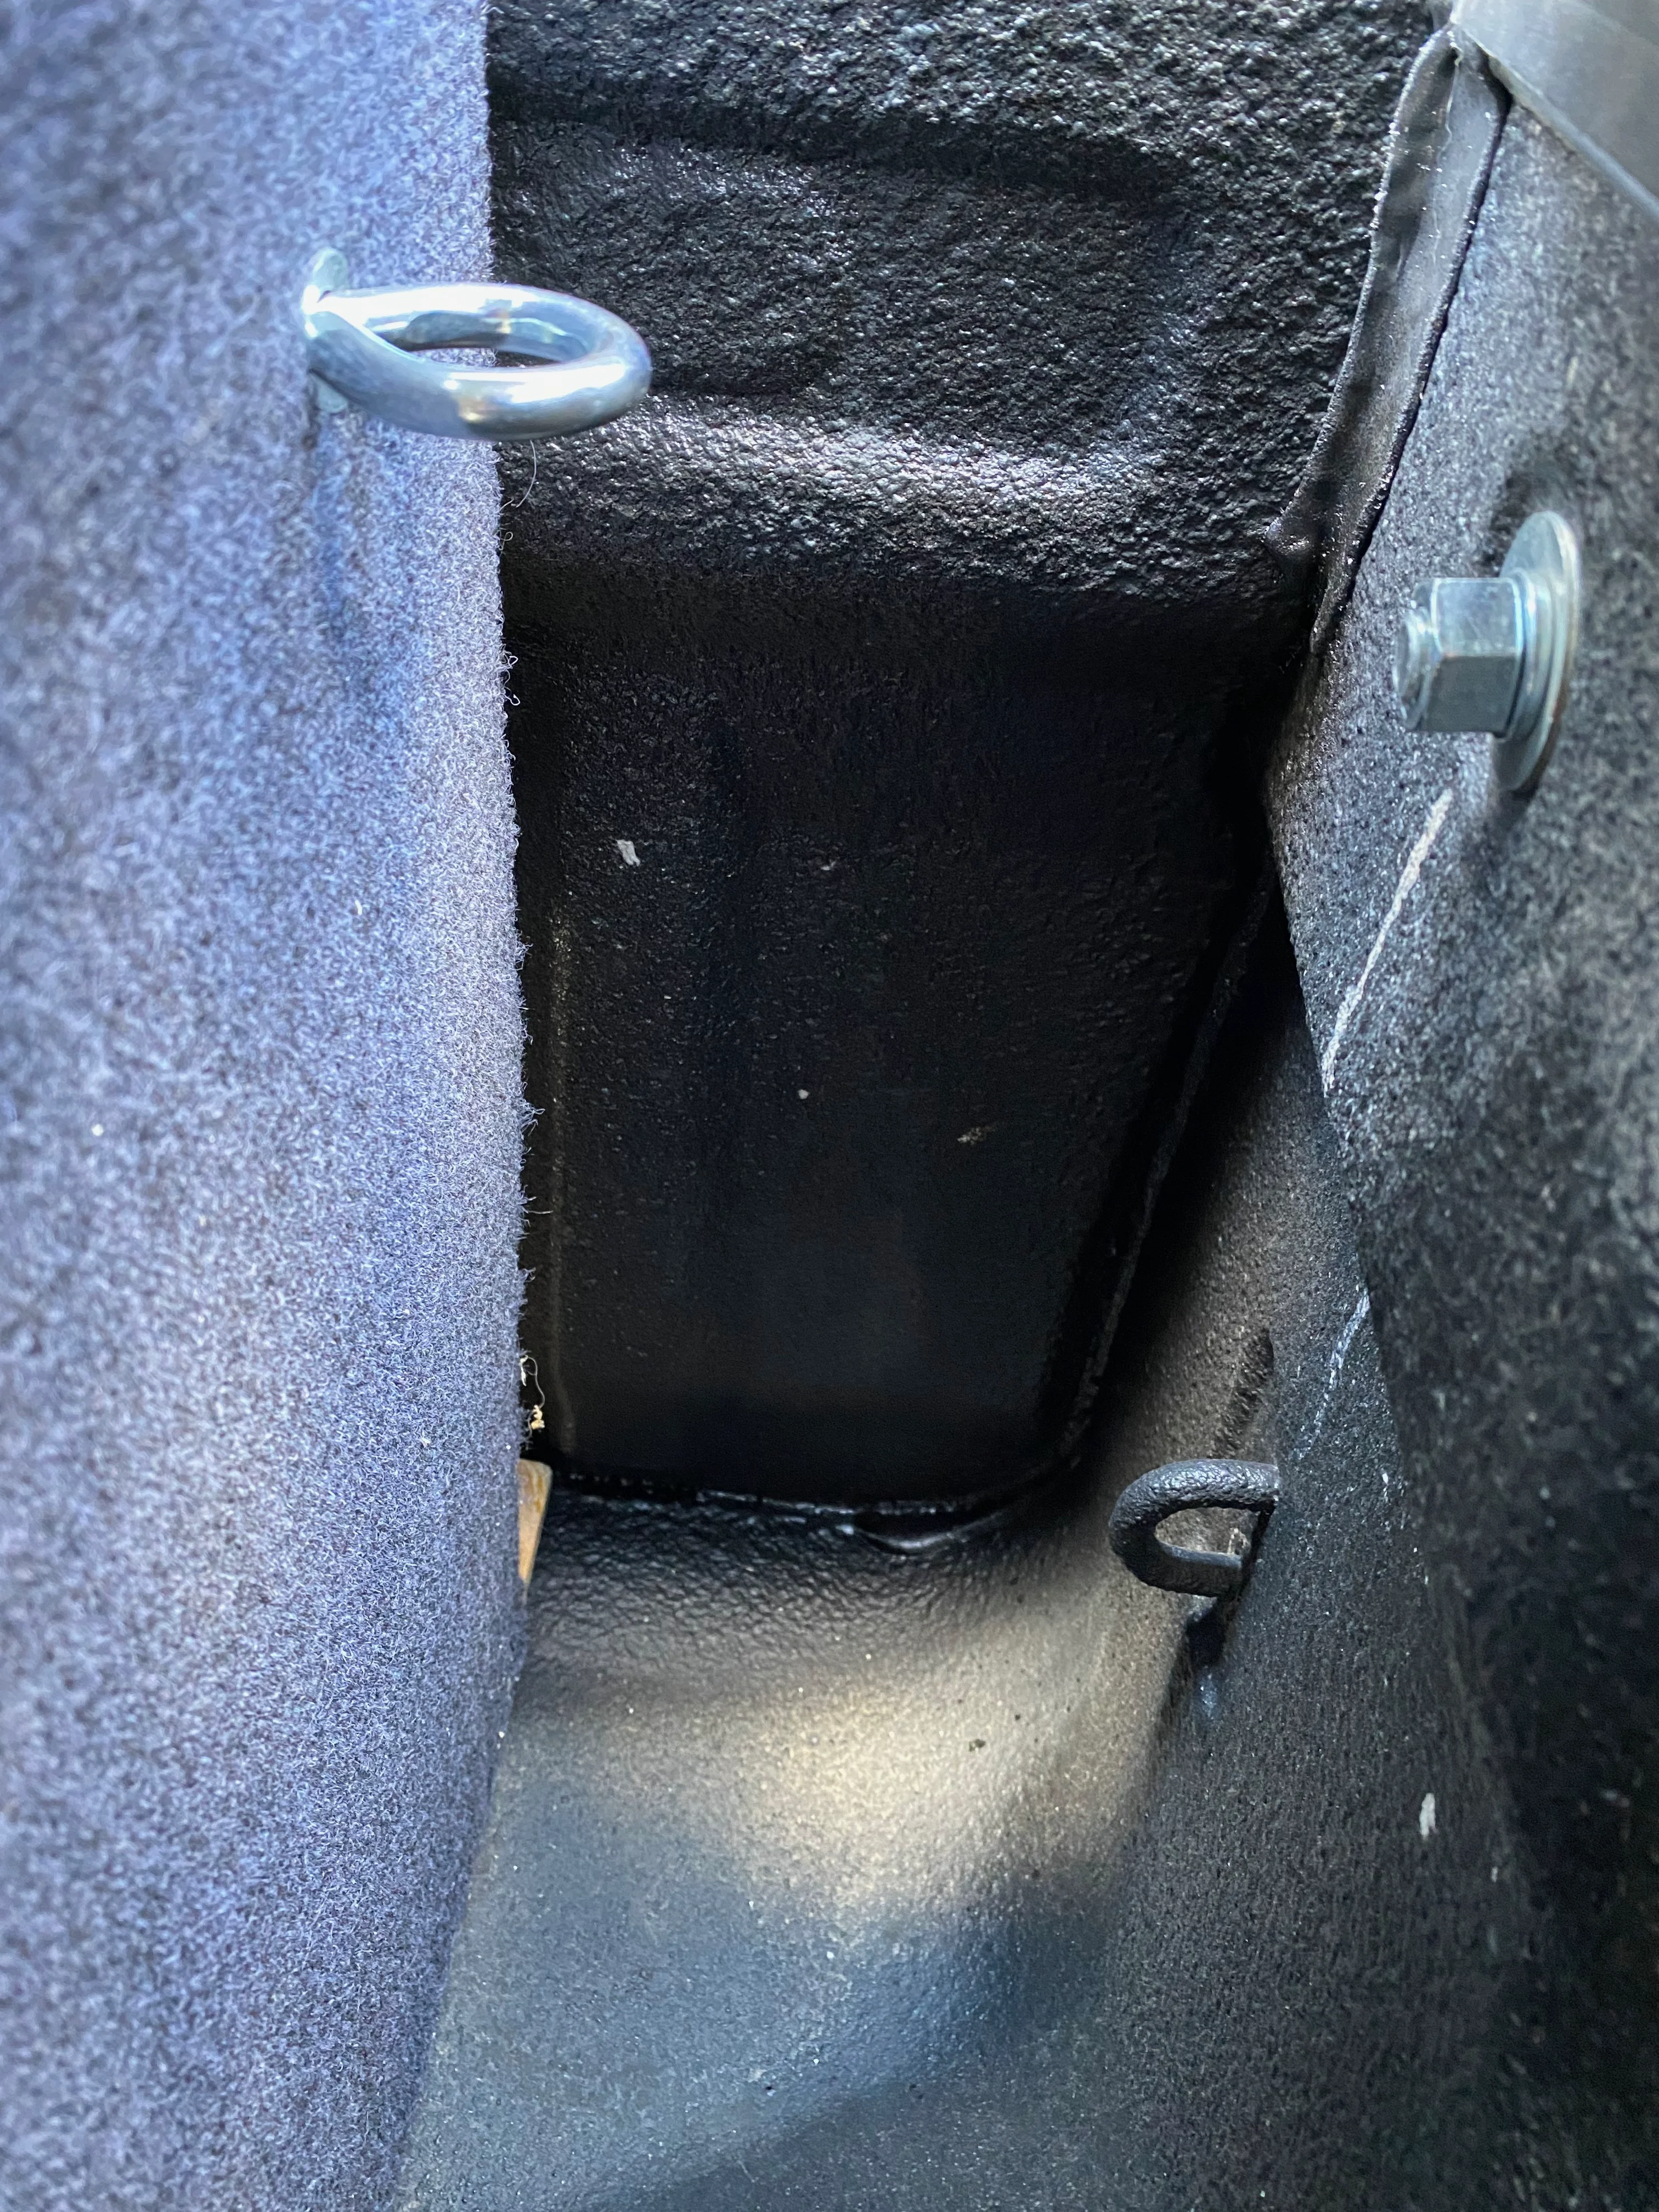
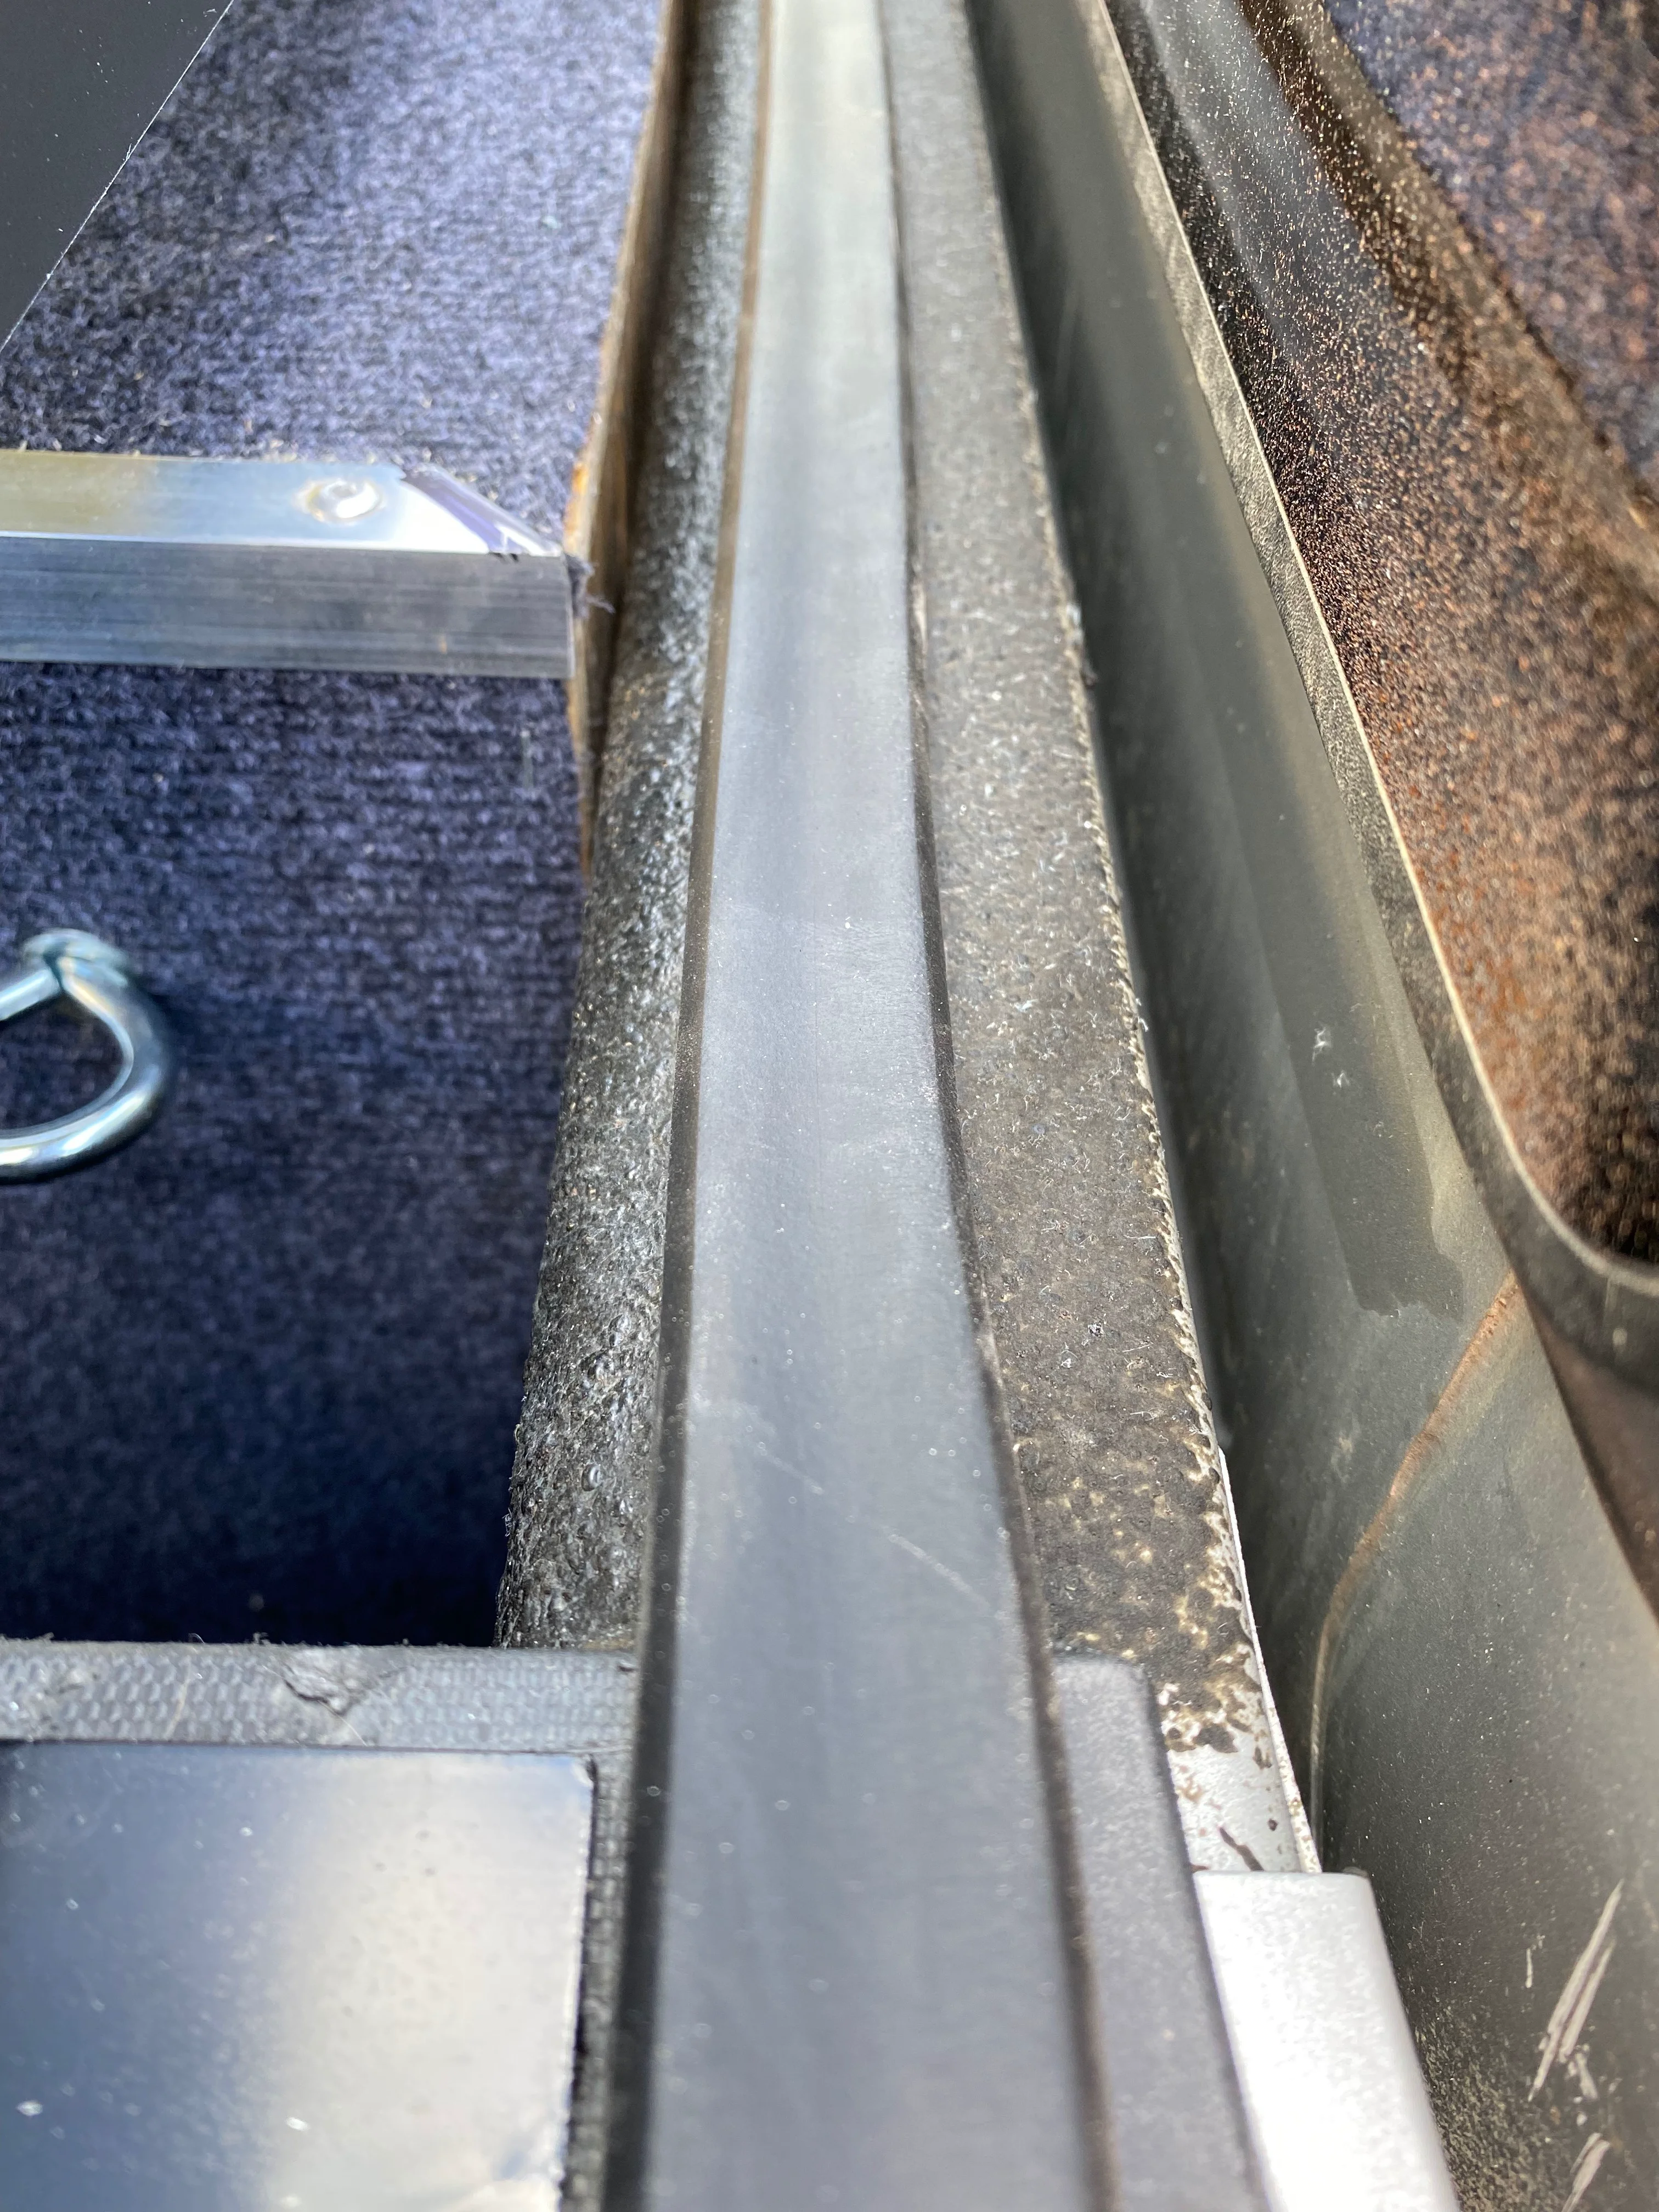
To attach the drawer unit, I used eye bolts with S-hooks and turnbuckles. This then attaches to the factory tie-down. In the below photo, the nut on the right of the pic is part of the cap mounting system. I used a similar system to the Back Racks, which use a bit of angle iron and some threaded rod; the angle iron bolts to the existing eye in the tub, and the threaded rod then comes up out of the bed cap and through a piece of angle iron that runs the length of the bed rail. That is affixed in 4 more places using fender washers, and the cap T-track bolts into it.
The below photo shows one of the doors. I may modify these doors in the future and have them cover the entire side of the cap; this was the easier way to attach it as the T-track was handy, but I think having doors cover the entire side would look aesthetically a bit better. Also, during this test fit I realized I didn't love the look of the silver hinges so I decided to paint them.
Originally, I used edge trim weather stripping but it proved to be a bit too bulky. Instead I decided to go with double bulb seal stuck to the extrusion itself.
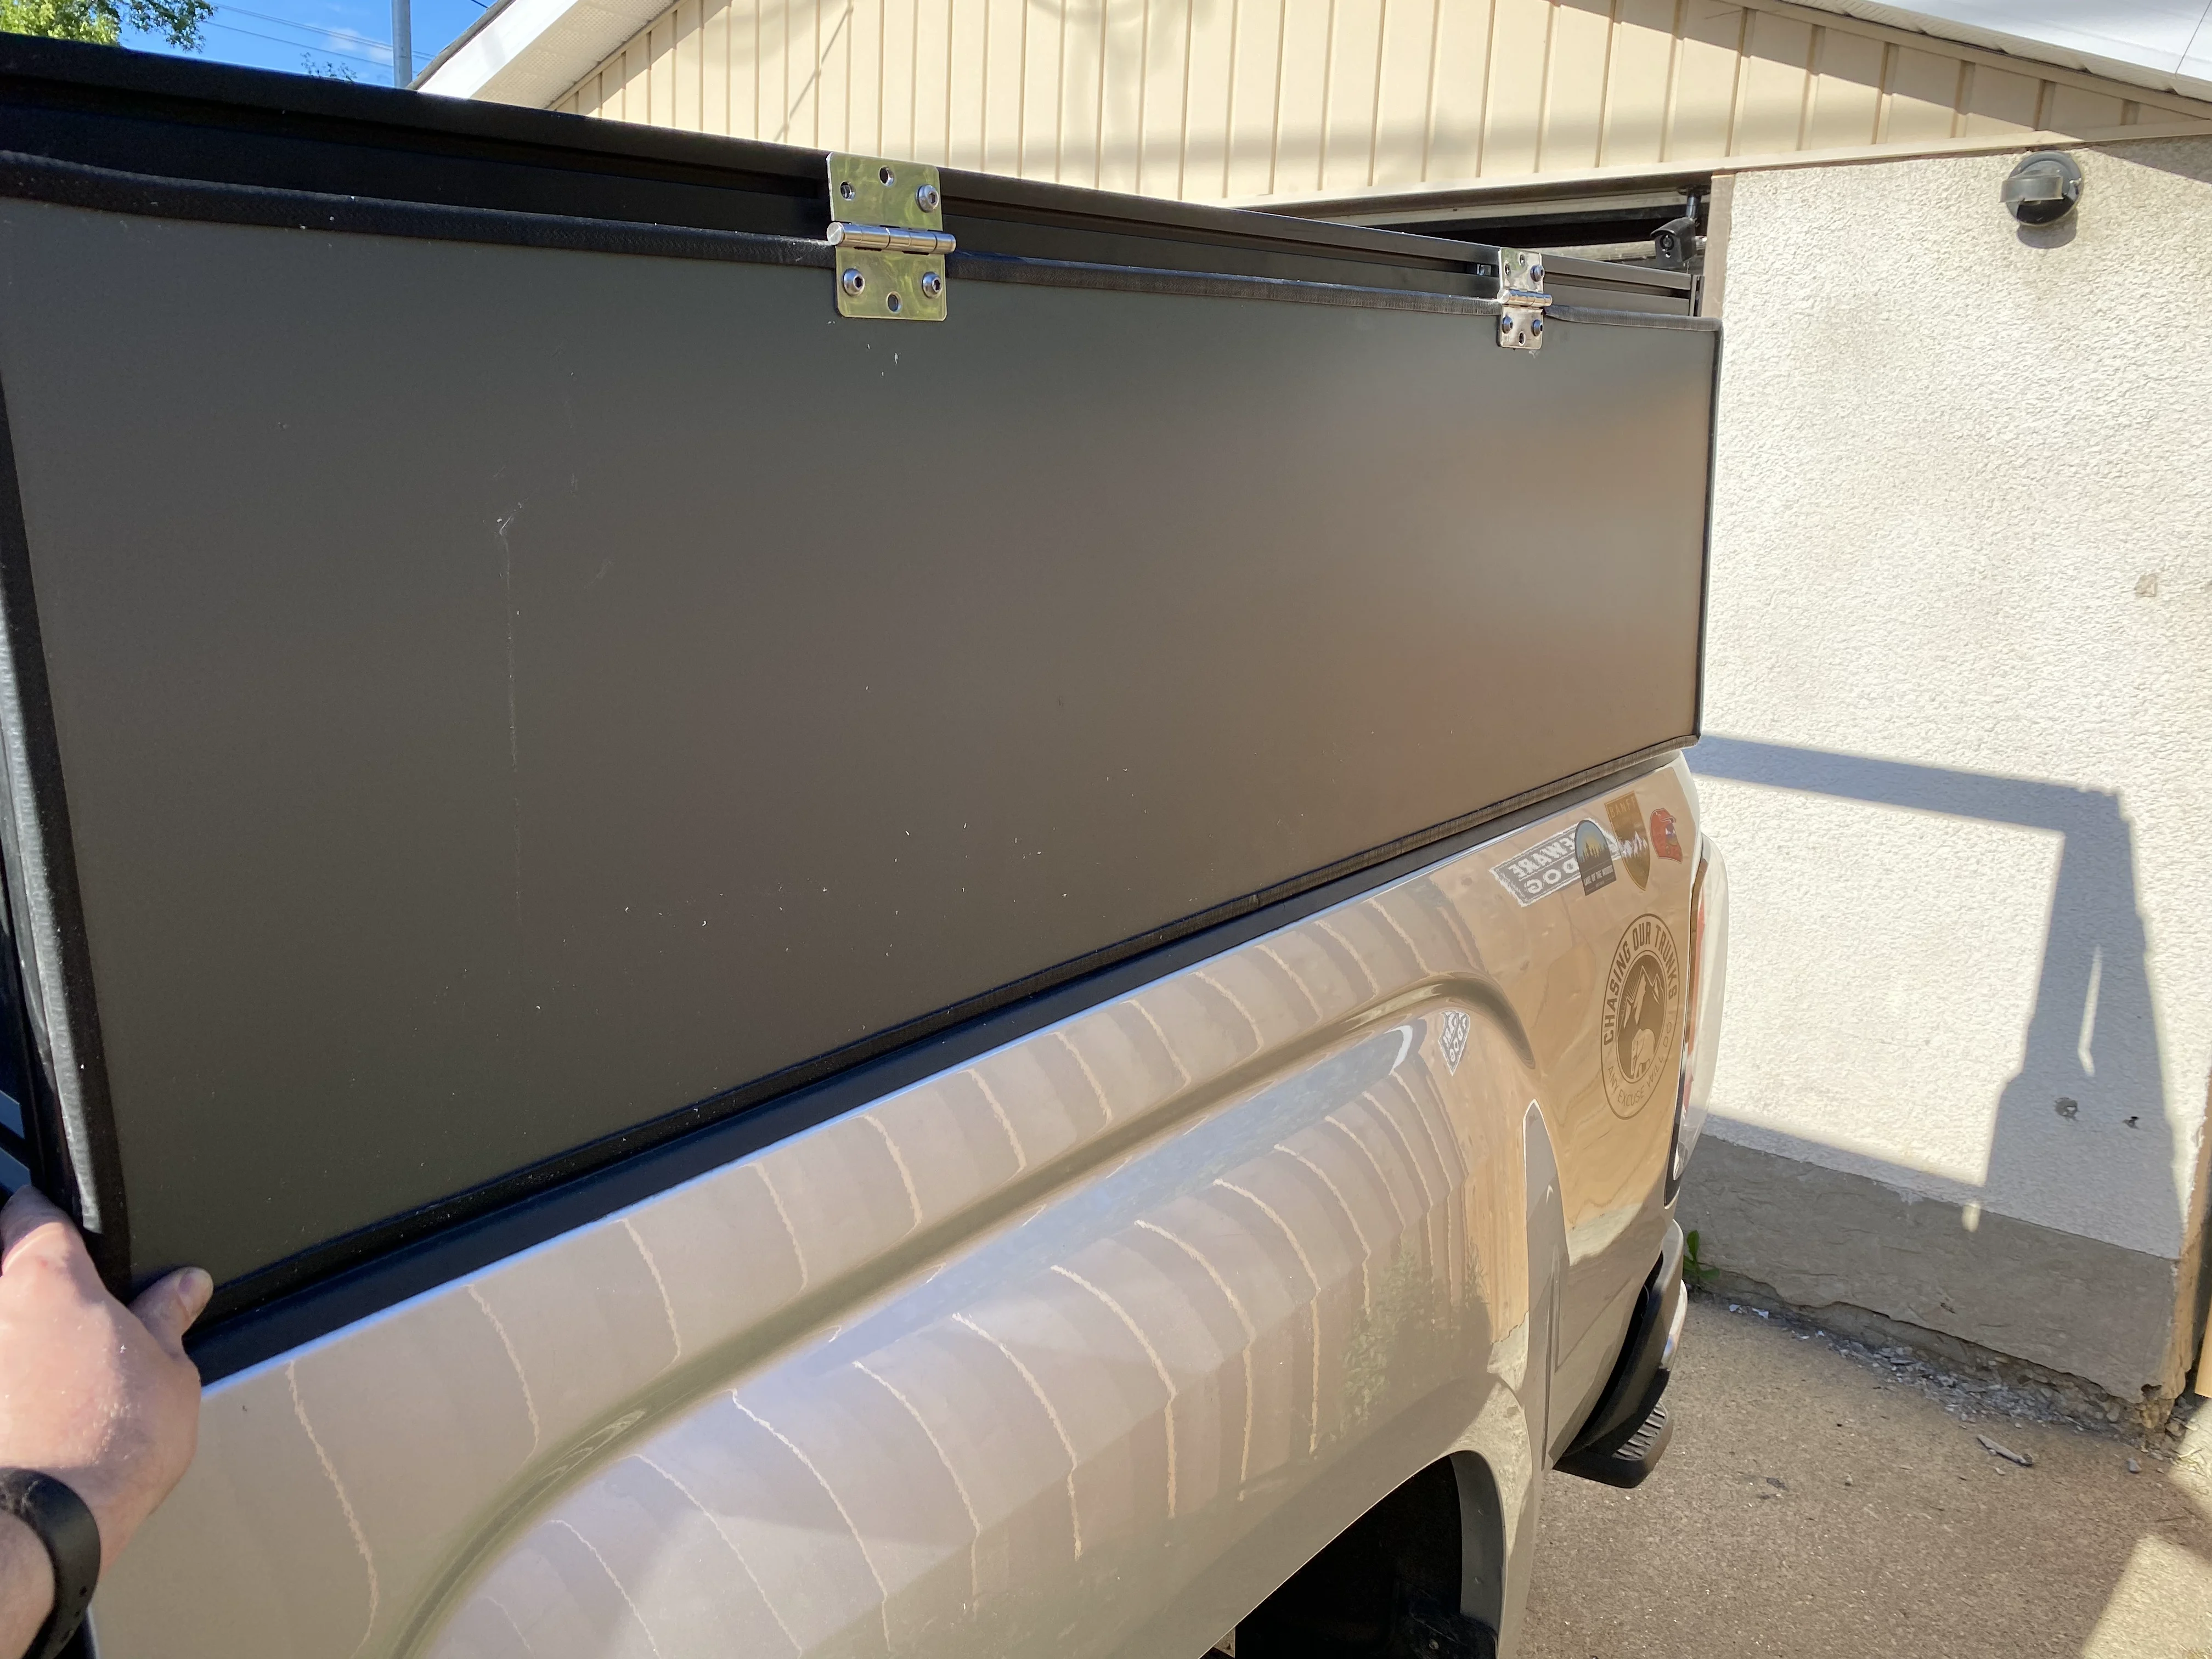
Example of the double bulb seal; you can also see the backs of the latches on the side doors. I used the Southco Washdown Latches from McMaster Carr—a bit of a beast to acquire here in Canada but they are really good quality.
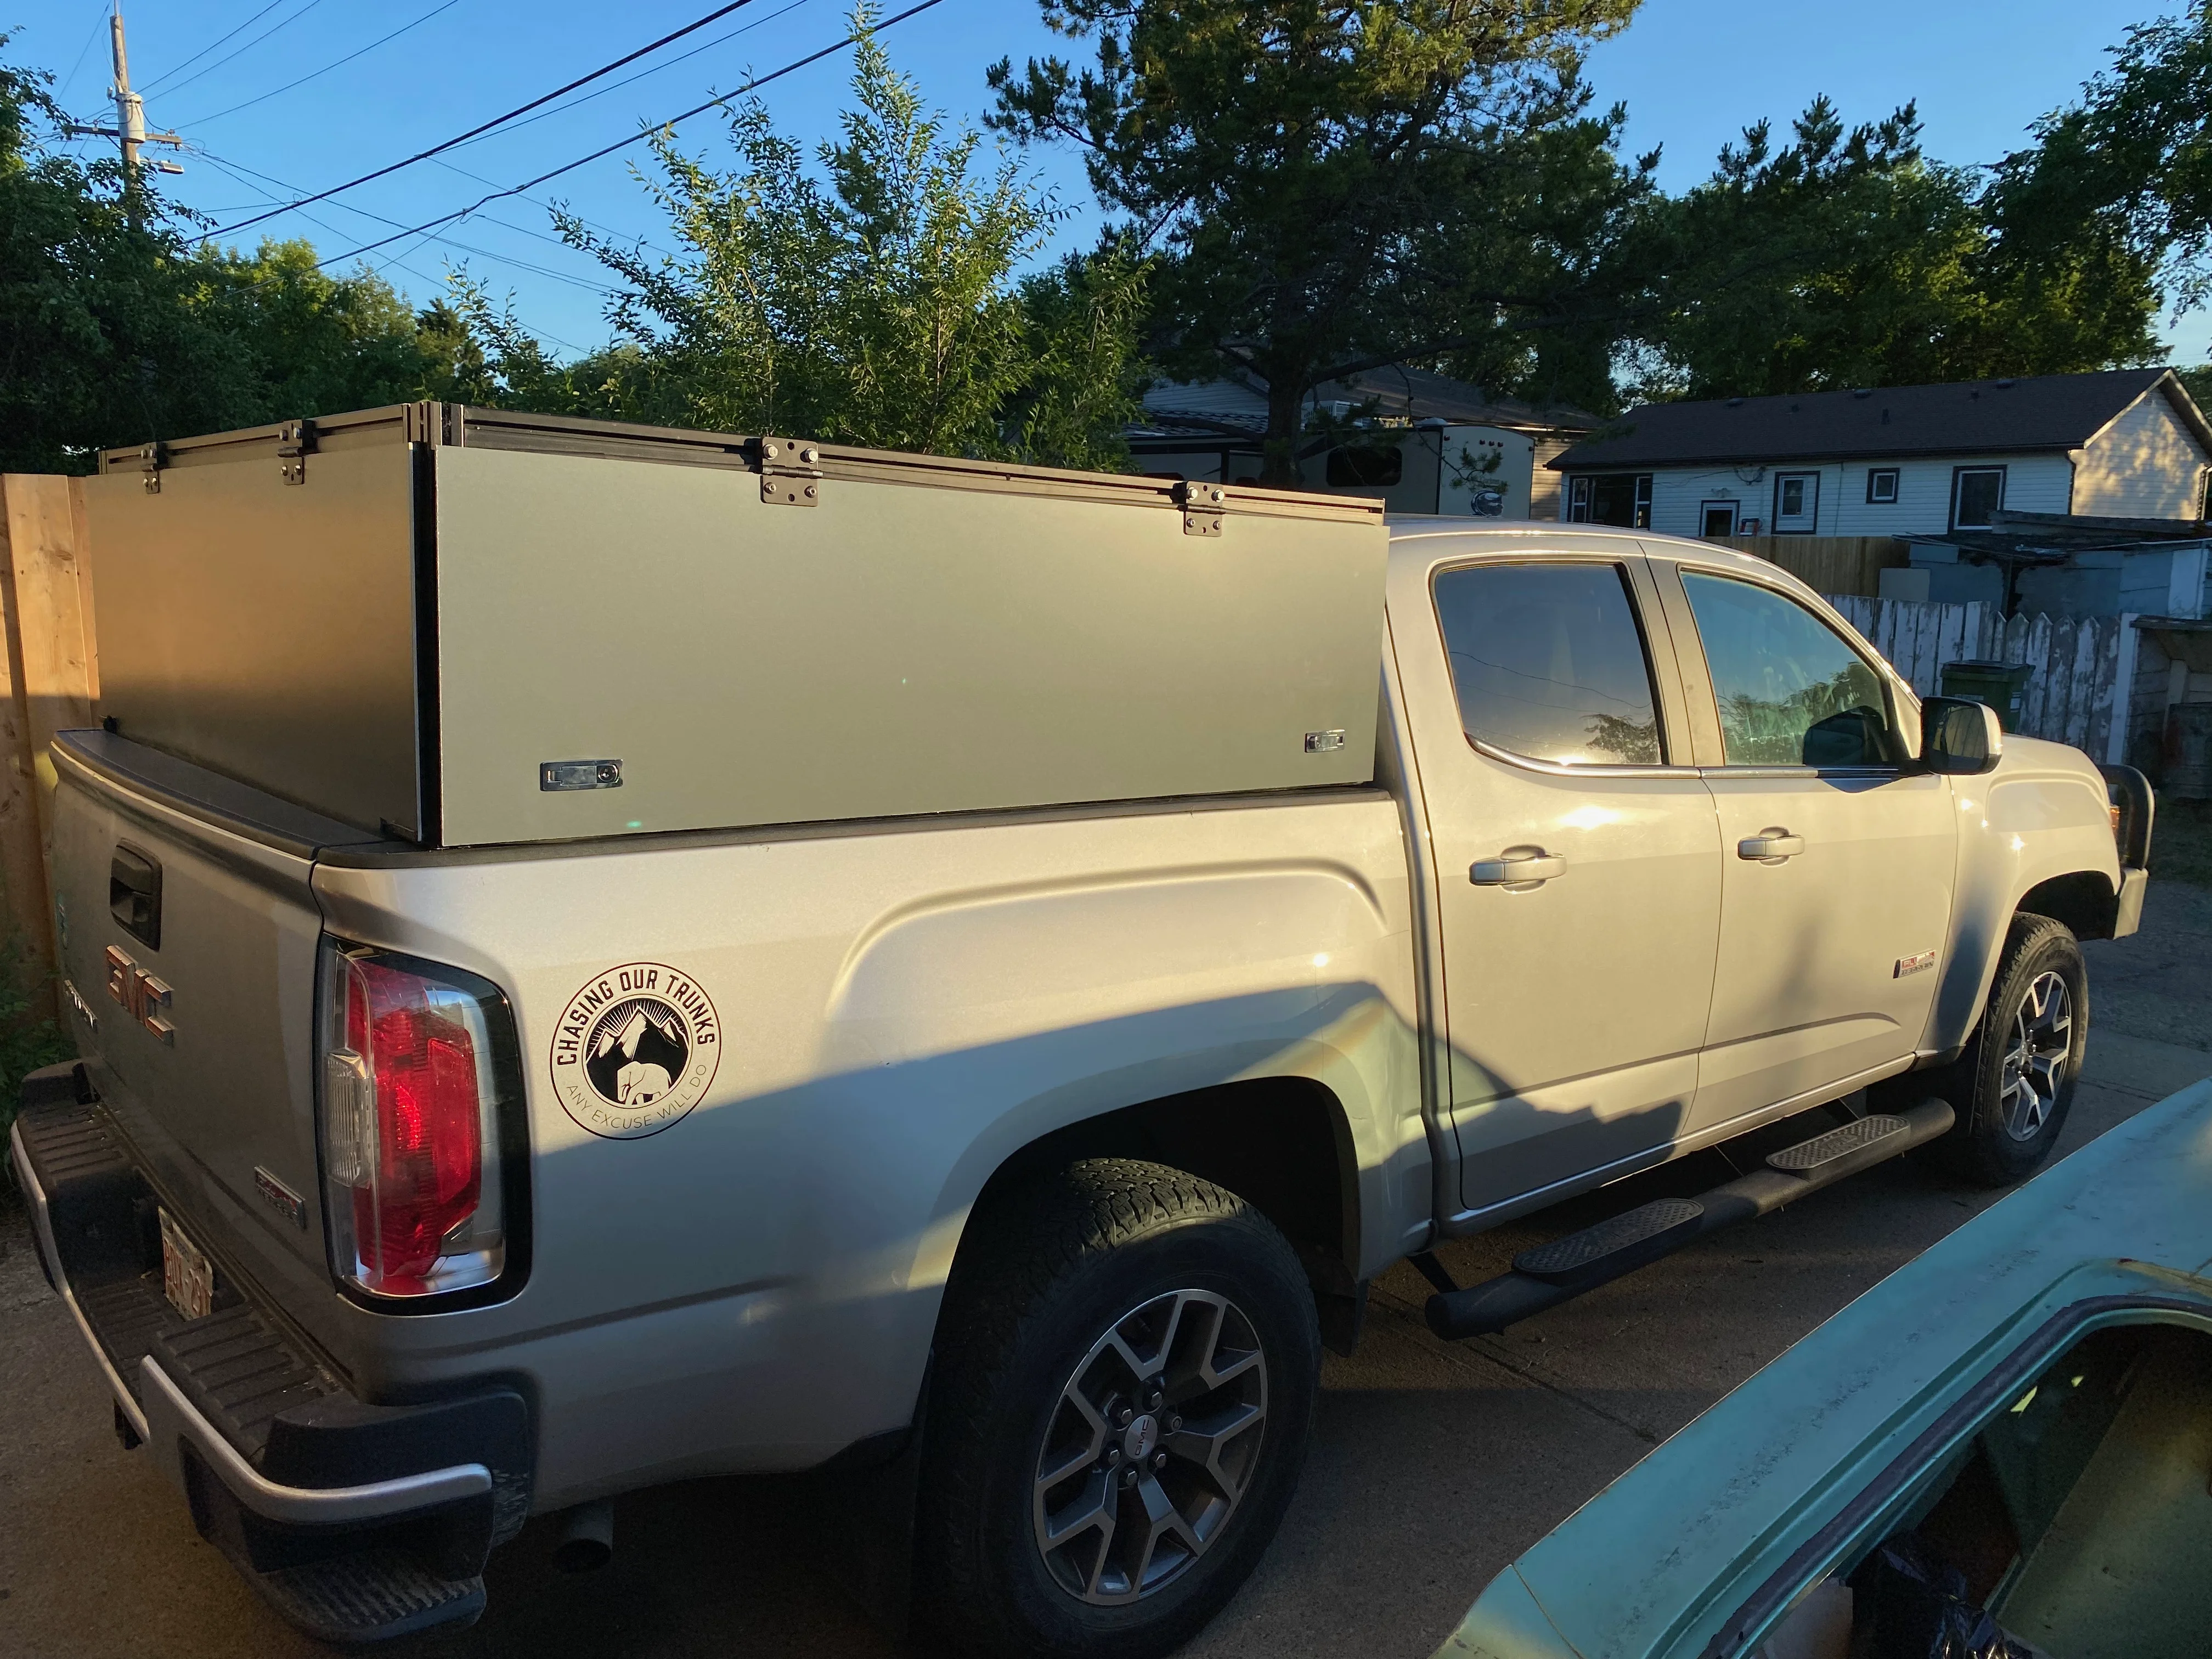
And here it is in it's "Dried in" state. Still a lot more work to do though!
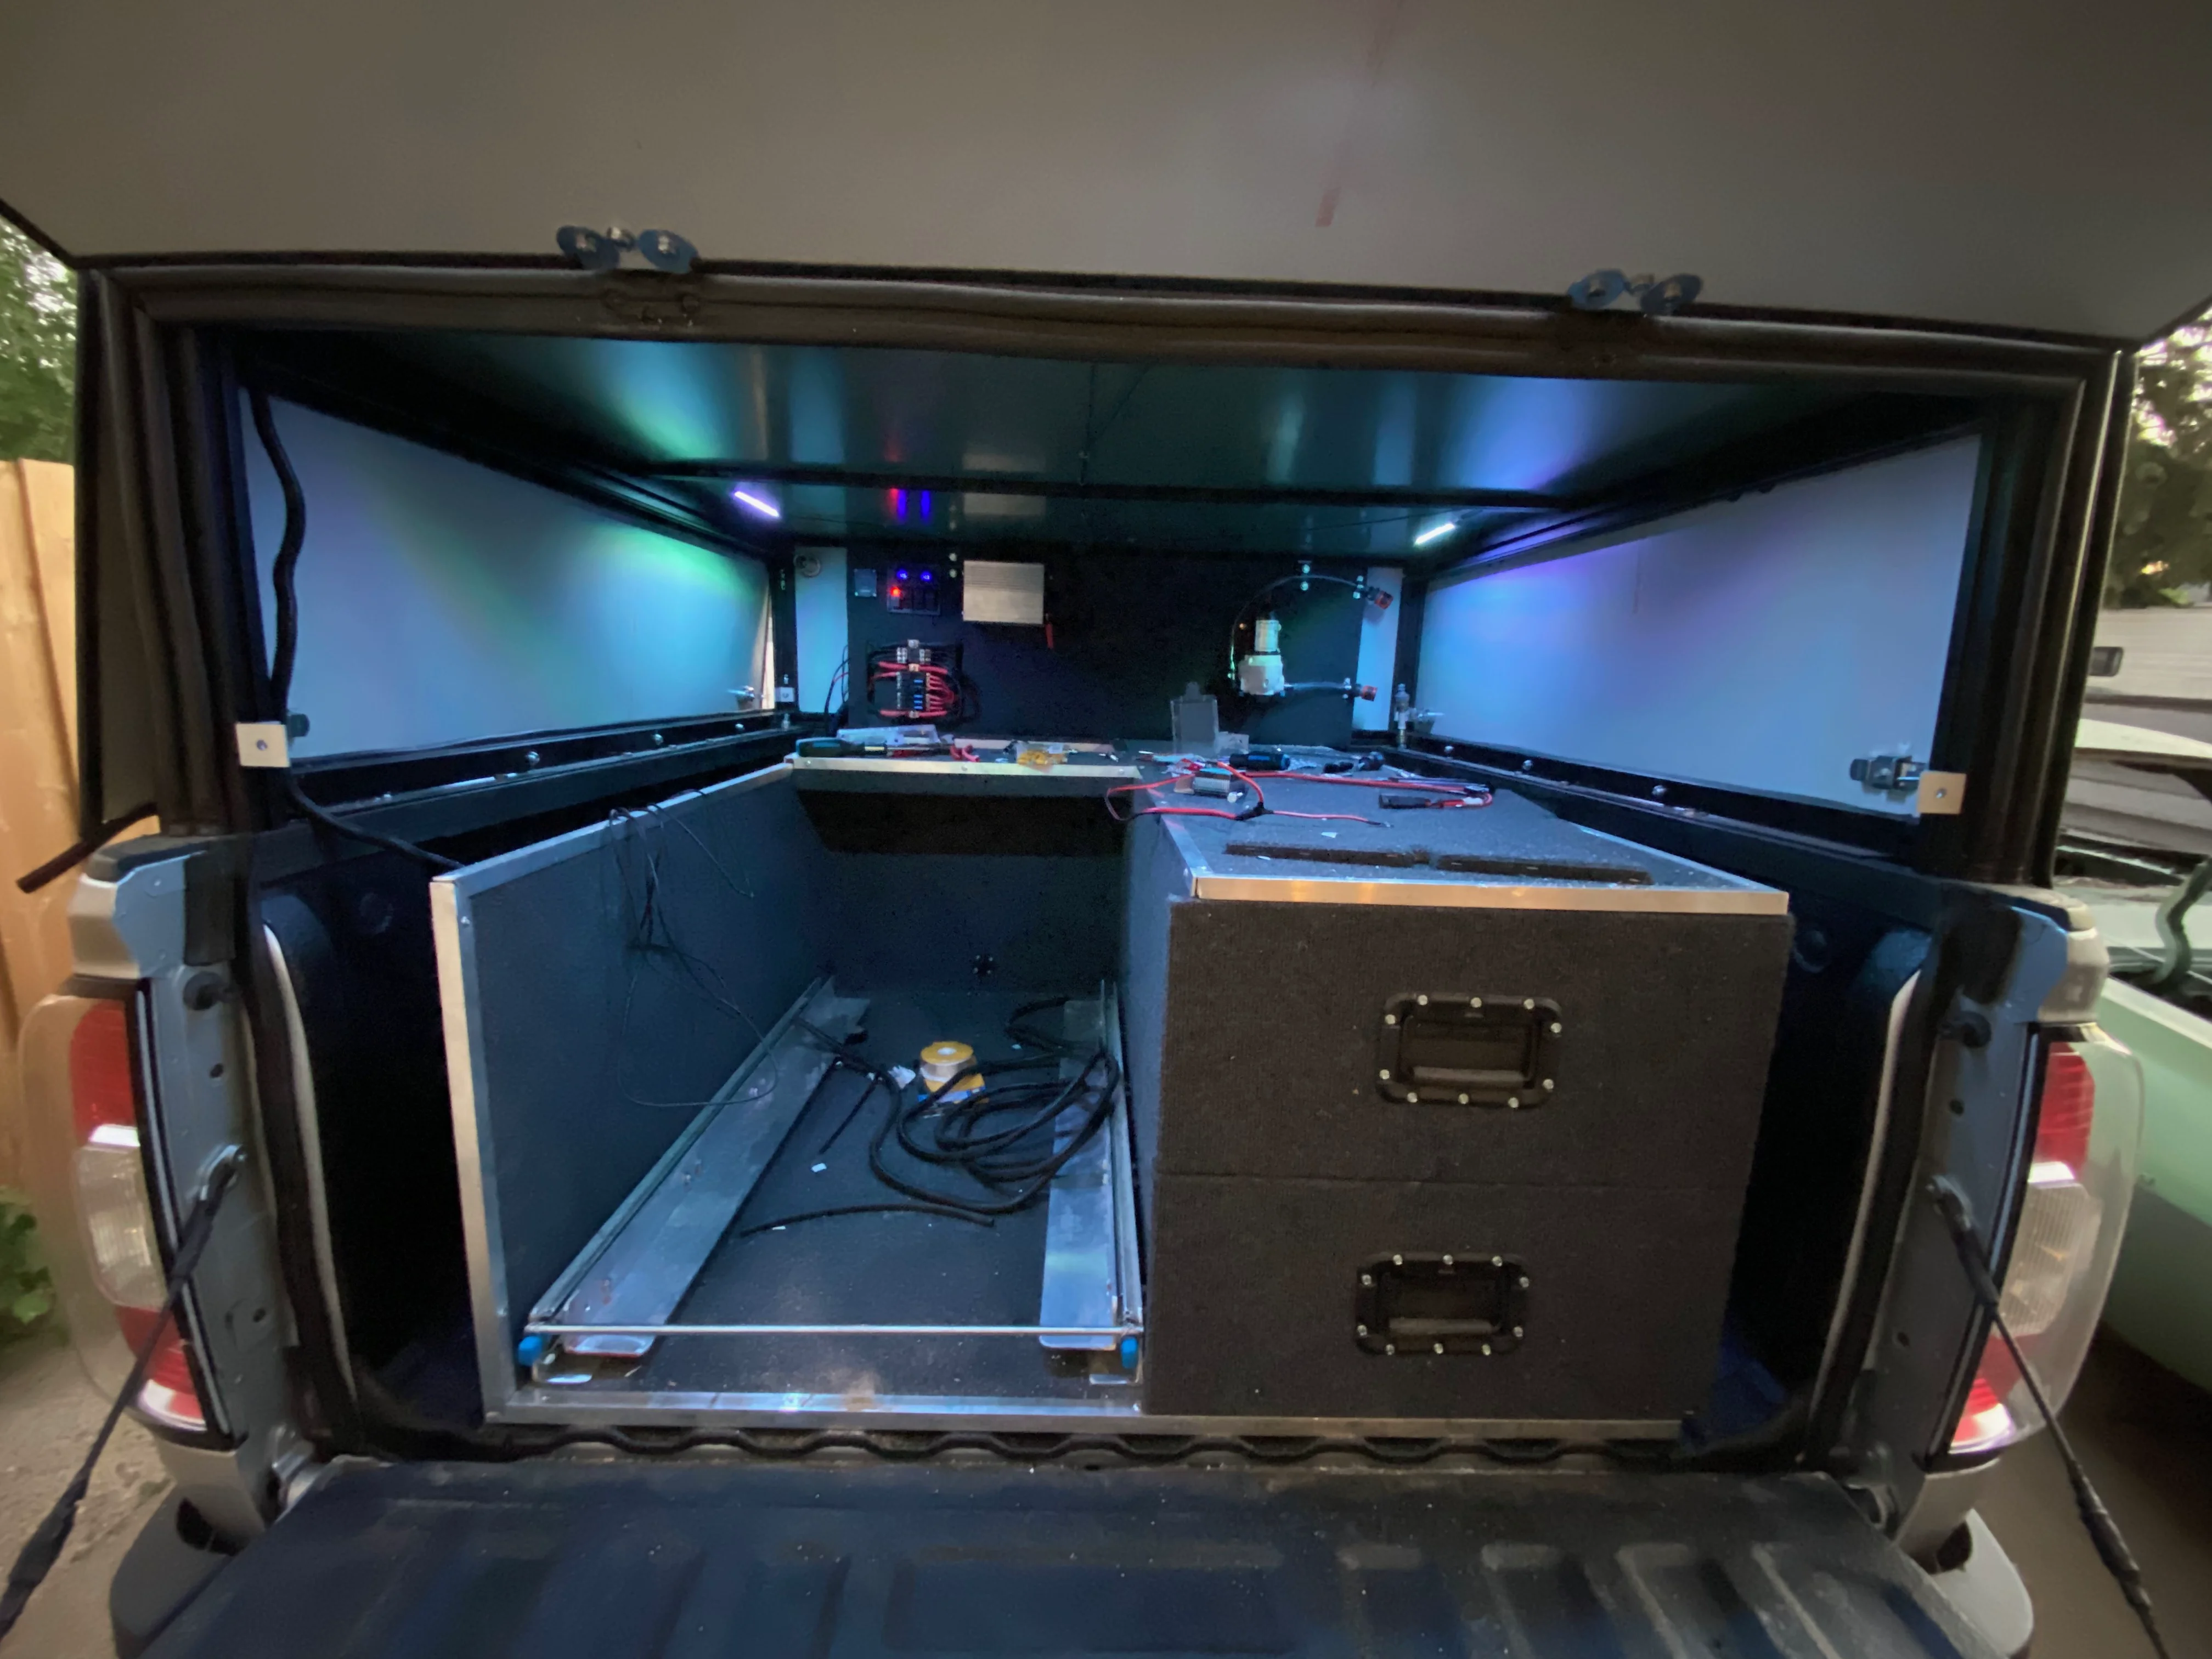
Electrical Panel Rebuild
I also had to make up a new electrical panel, but I was able to finish up the wiring so I now have lights, water, a 600w inverter, and my fridge on a switch with one switch to spare.
The fuse panel needs a cover which I have; I just didn't put it on yet. I decided to rebuild my board as my DC to DC charger didn't need to be there, and this allows better access to the switches. The DC to DC was moved down to share the same box as the battery. There's also a master shut-off in the battery box (the red knob) which kills power to the entire house just in case I'm needing to work on accessories.
 which kills power to the entire house just in case I'm needing to work on accessories. .webp)
The LEDs are stick-ons from Amazon and they can change colour from white to orange or red, so depending on the time of day and bug situation, I can still have light without attracting too many critters.
Close up of my switch panel. I have no idea why one Voltmeter was reading 12.3 and one was reading 12.4! The switches are red except the far right hand one; that one is blue and activates the water pump.

Tailgate Modification
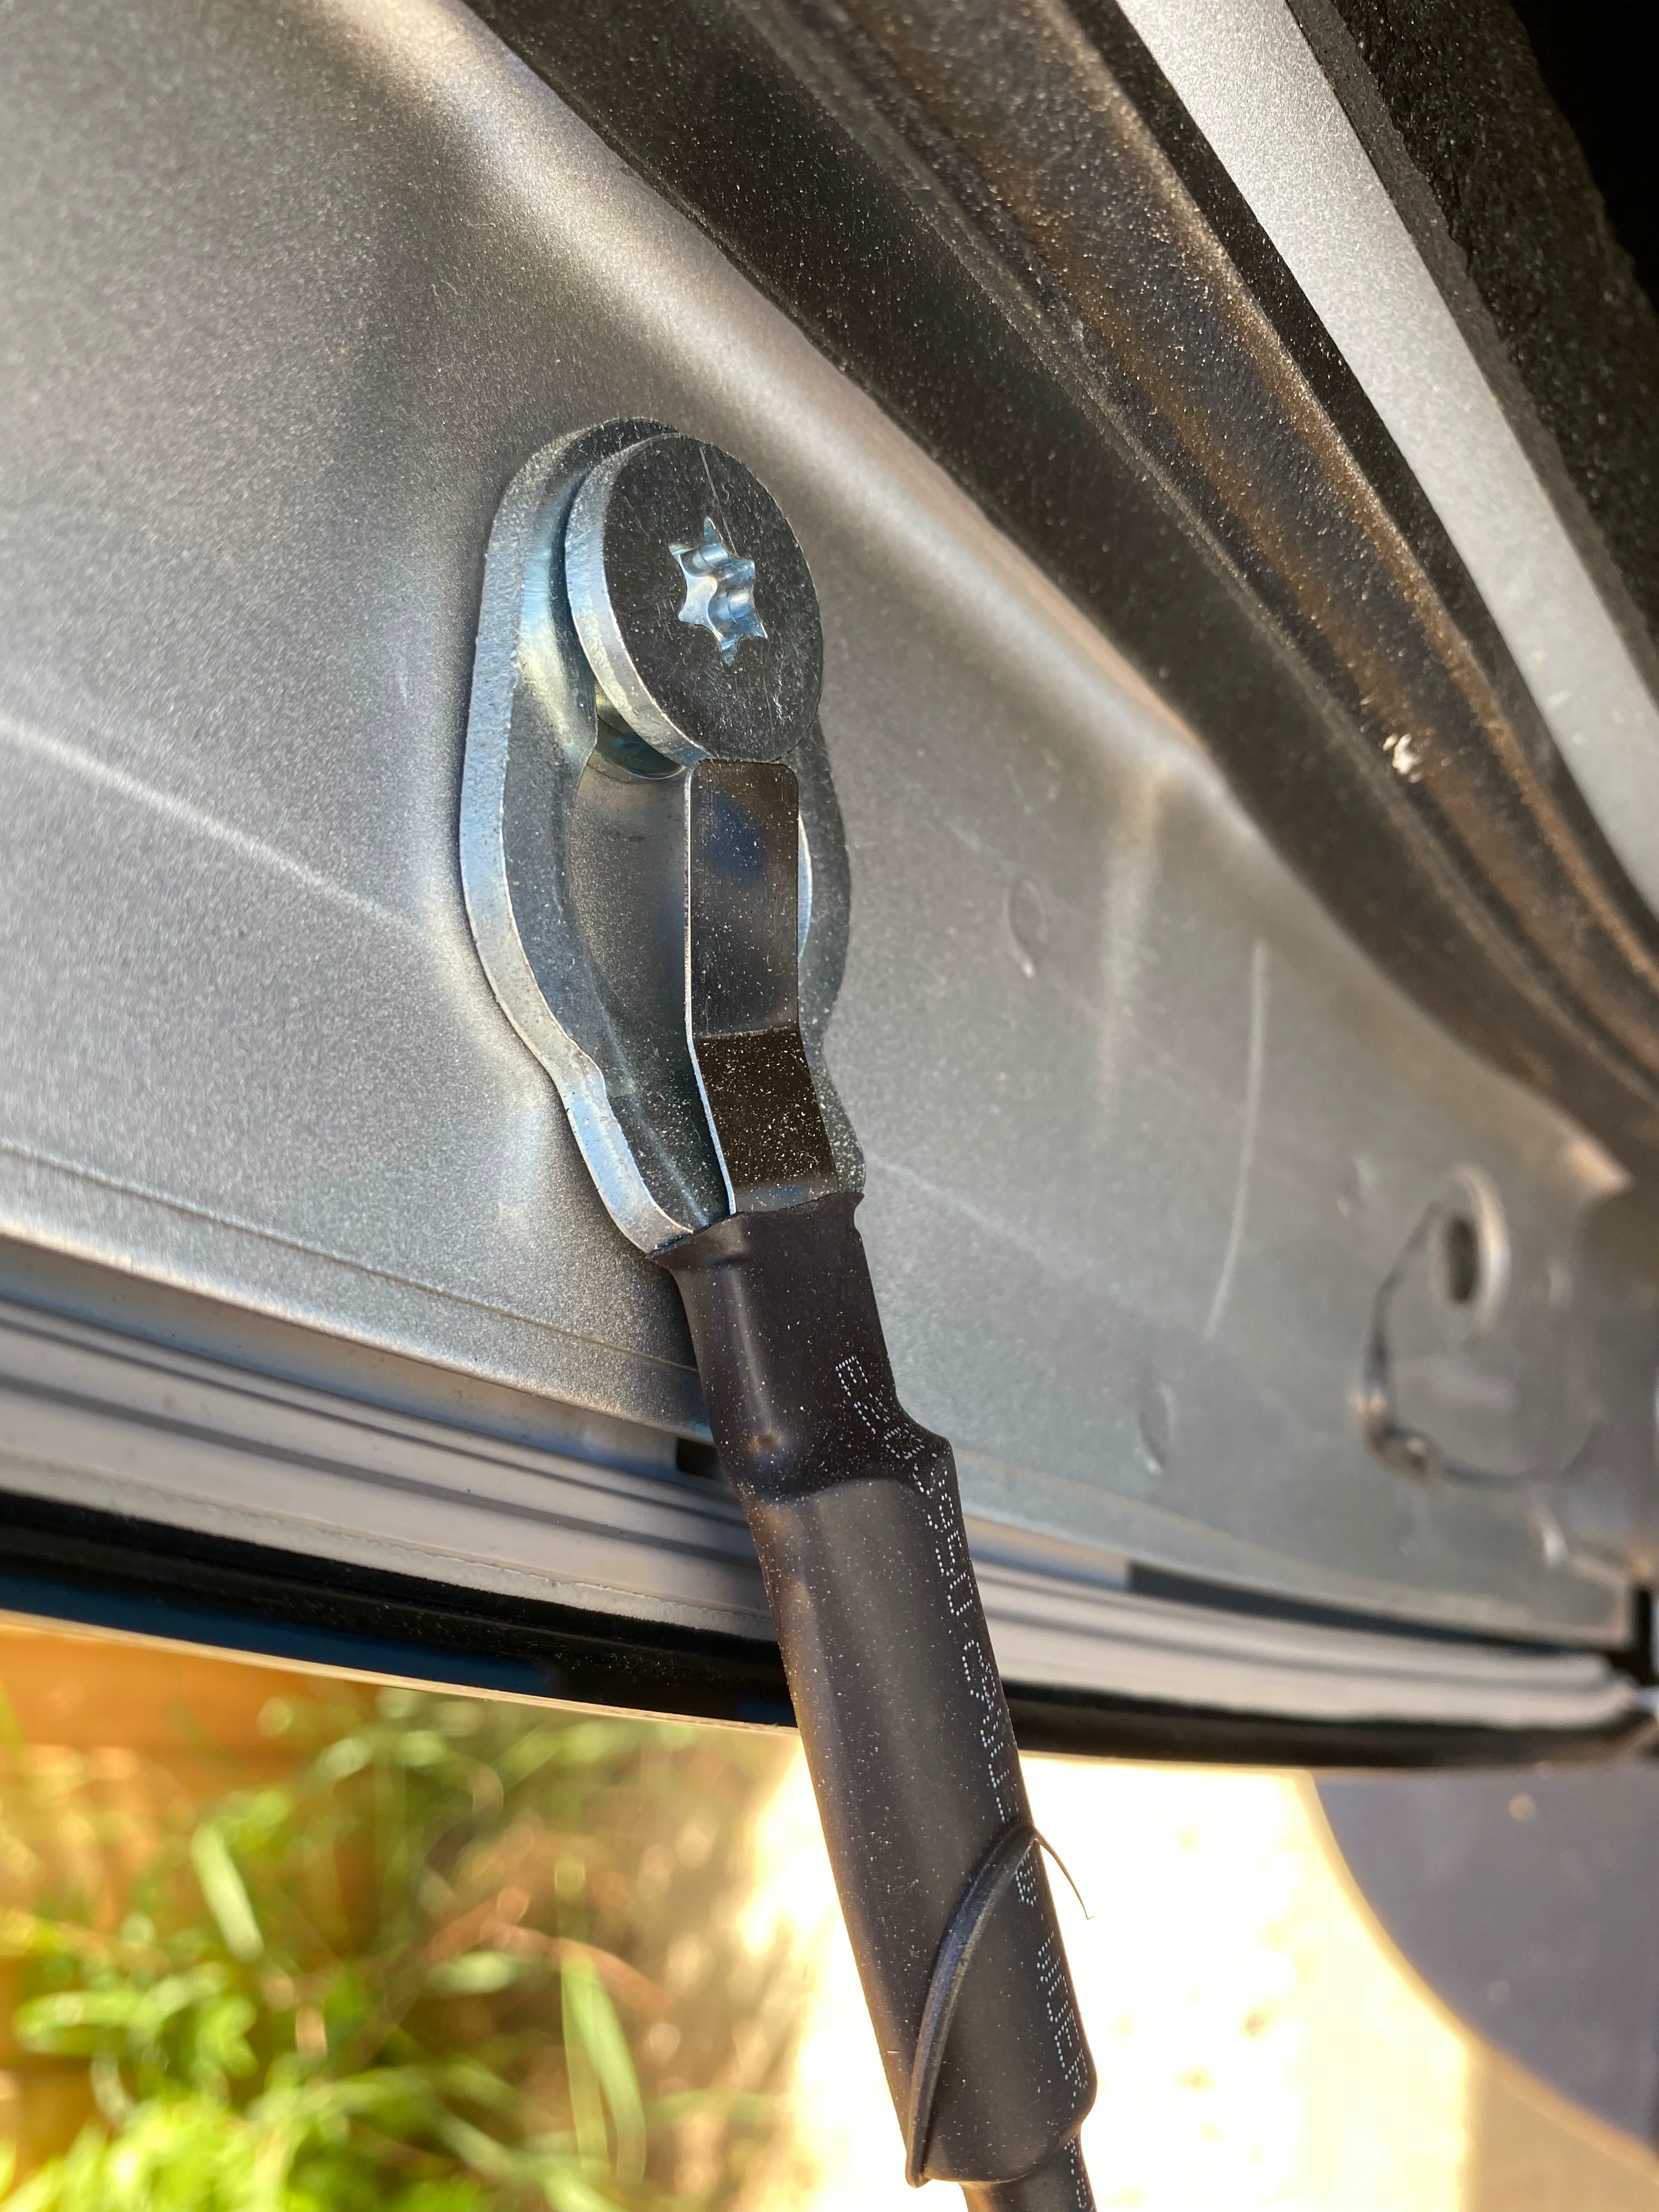
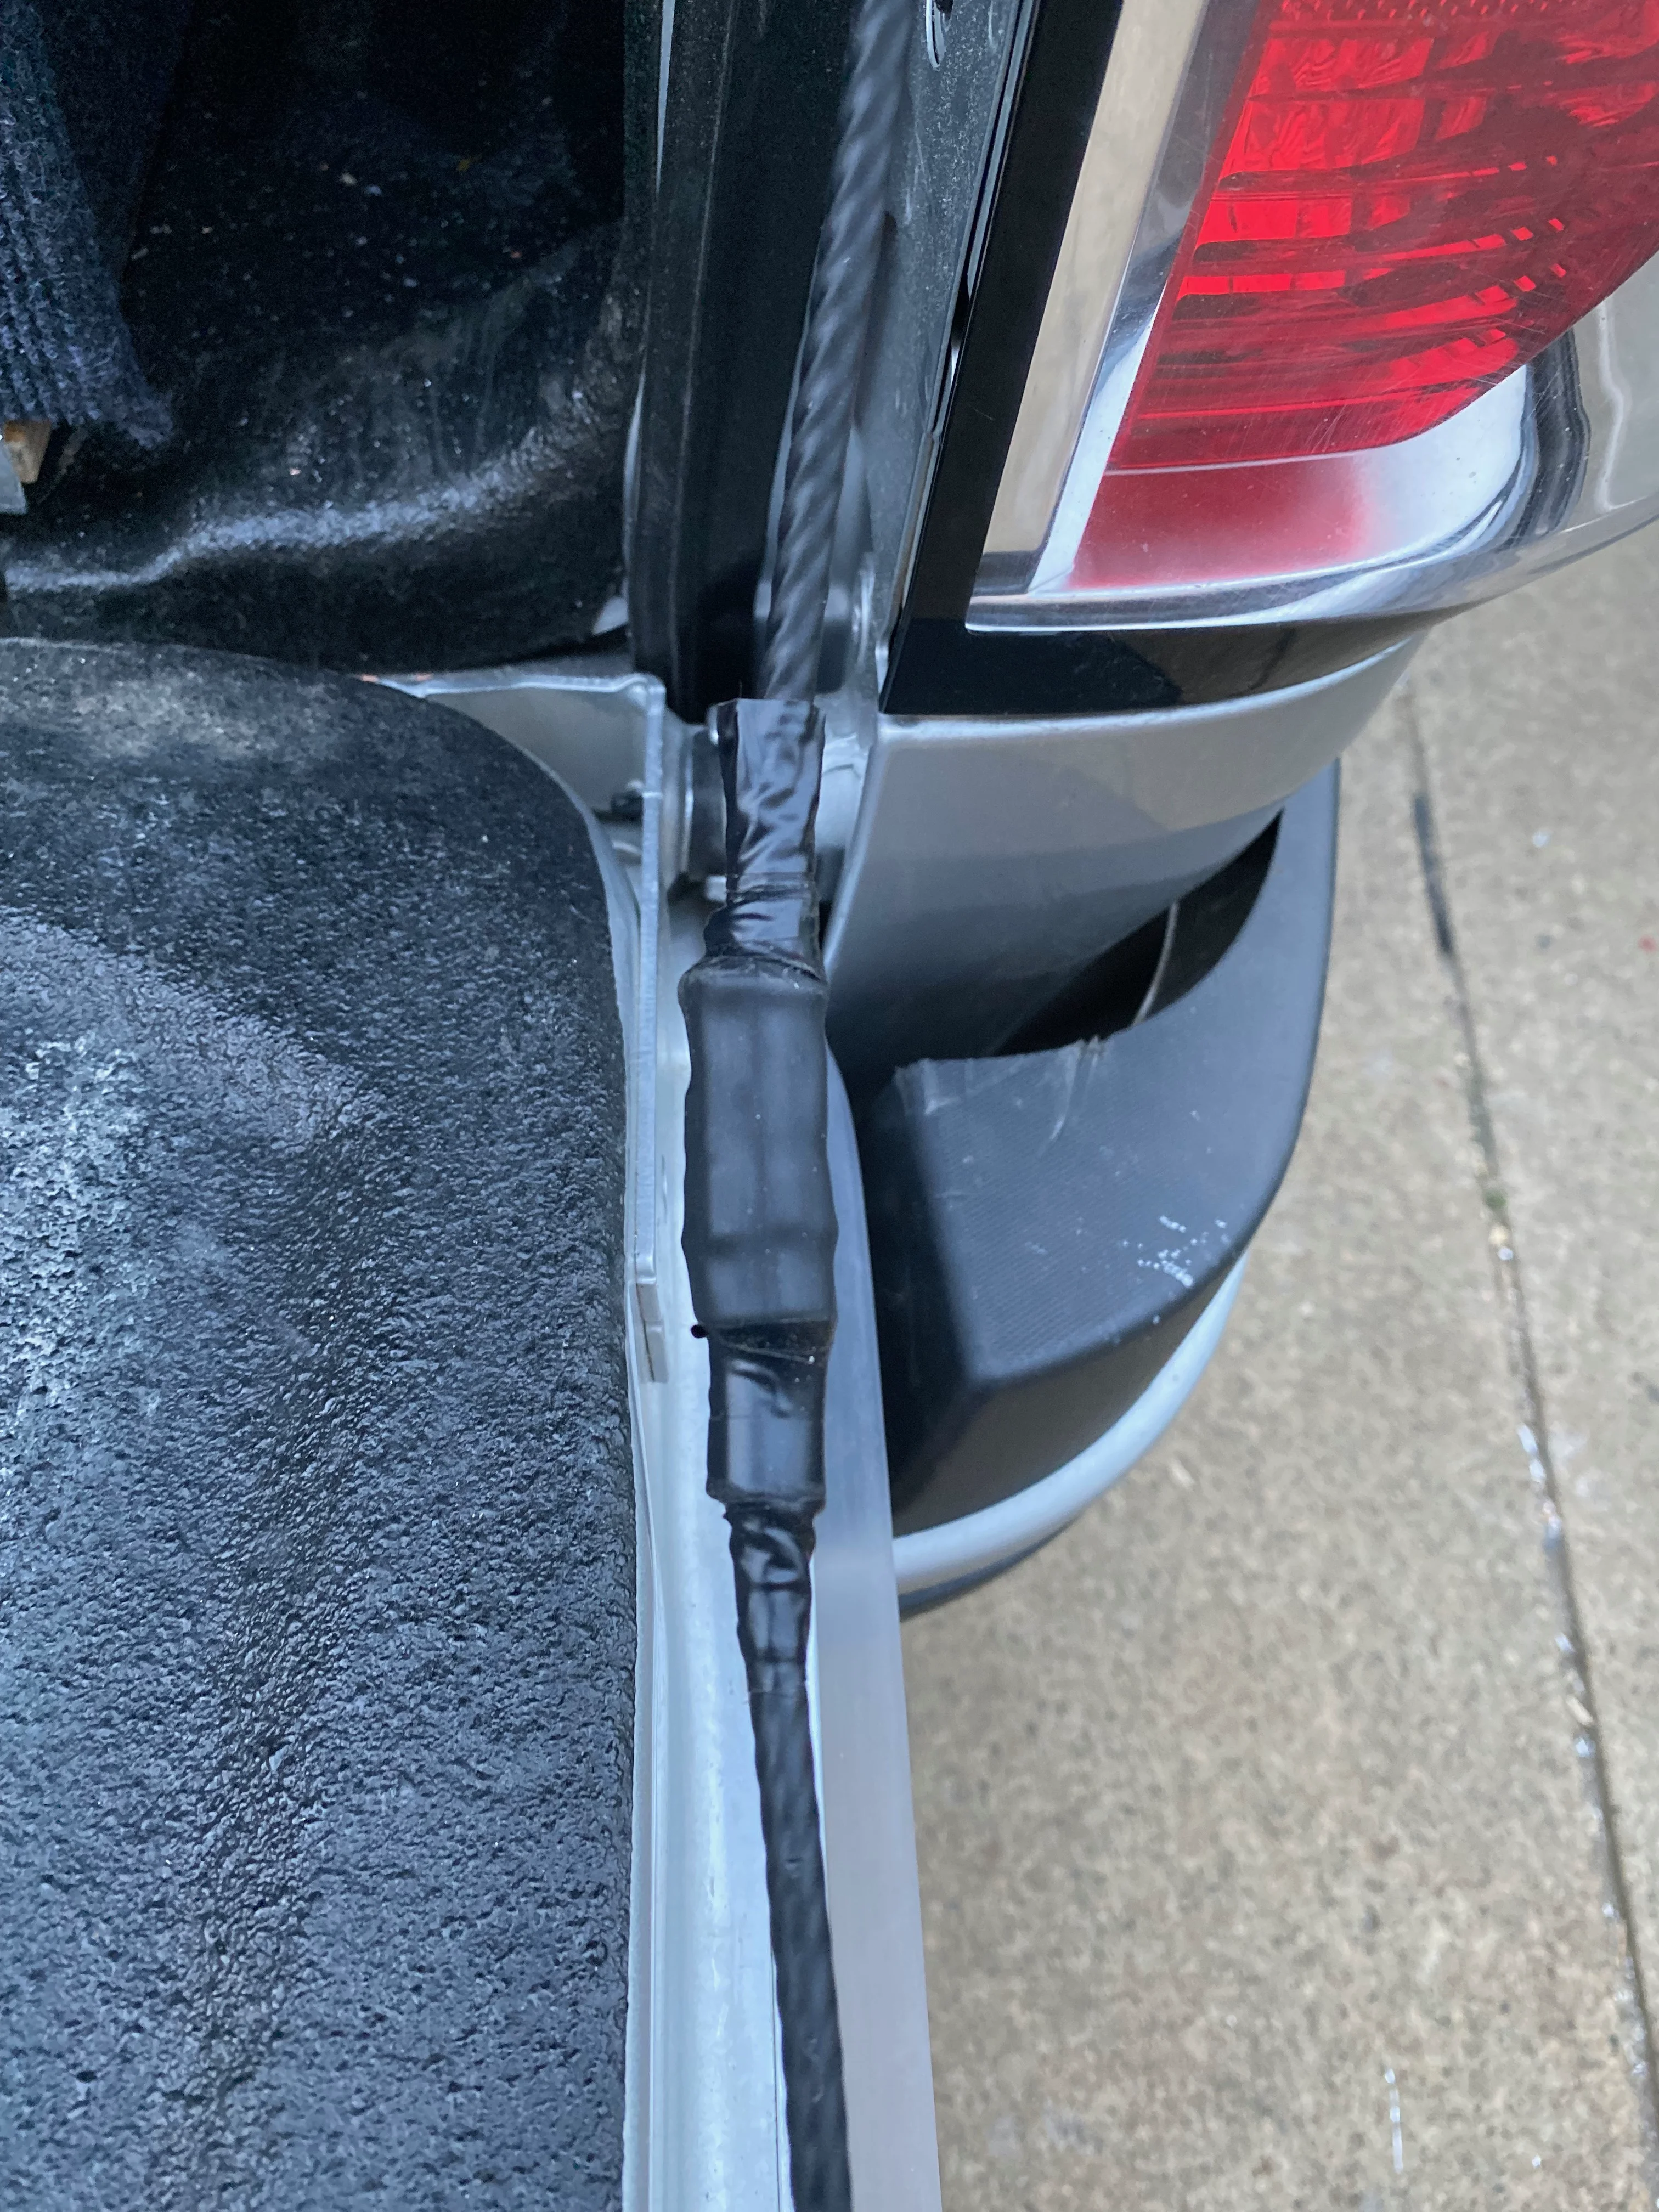
I also had to fix the tailgate. On Colorados/Canyons, the tailgate doesn't open to 90 degrees; it only opens to about 80 degrees fully. That means that I'd need to build my drawer unit higher to pass over it, which I didn't want to do as that wasn't maximizing space. Instead, I decided to modify the tailgate. I initially assumed that my tailgate straps were faulty because honestly it seems like one was just an inch or so short, but when I checked, it would appear that this angled tailgate is by design. So I went shopping. I checked my full size truck to see if they would work, but the full size GMs have shorter tailgate cables than the mid-sizers. The closest replacements I could find are from a mid-1990s Dodge, but the bolts were identical and it threaded in no problem.
I celebrated my success, then realized that the Dodge cables were actually a bit too long. Rather than keep trying to find the appropriate length, I decided to bite the bullet and just modify the dodge ones. I cut them and then crimped them back together, and the tailgate now works at 90 degrees.
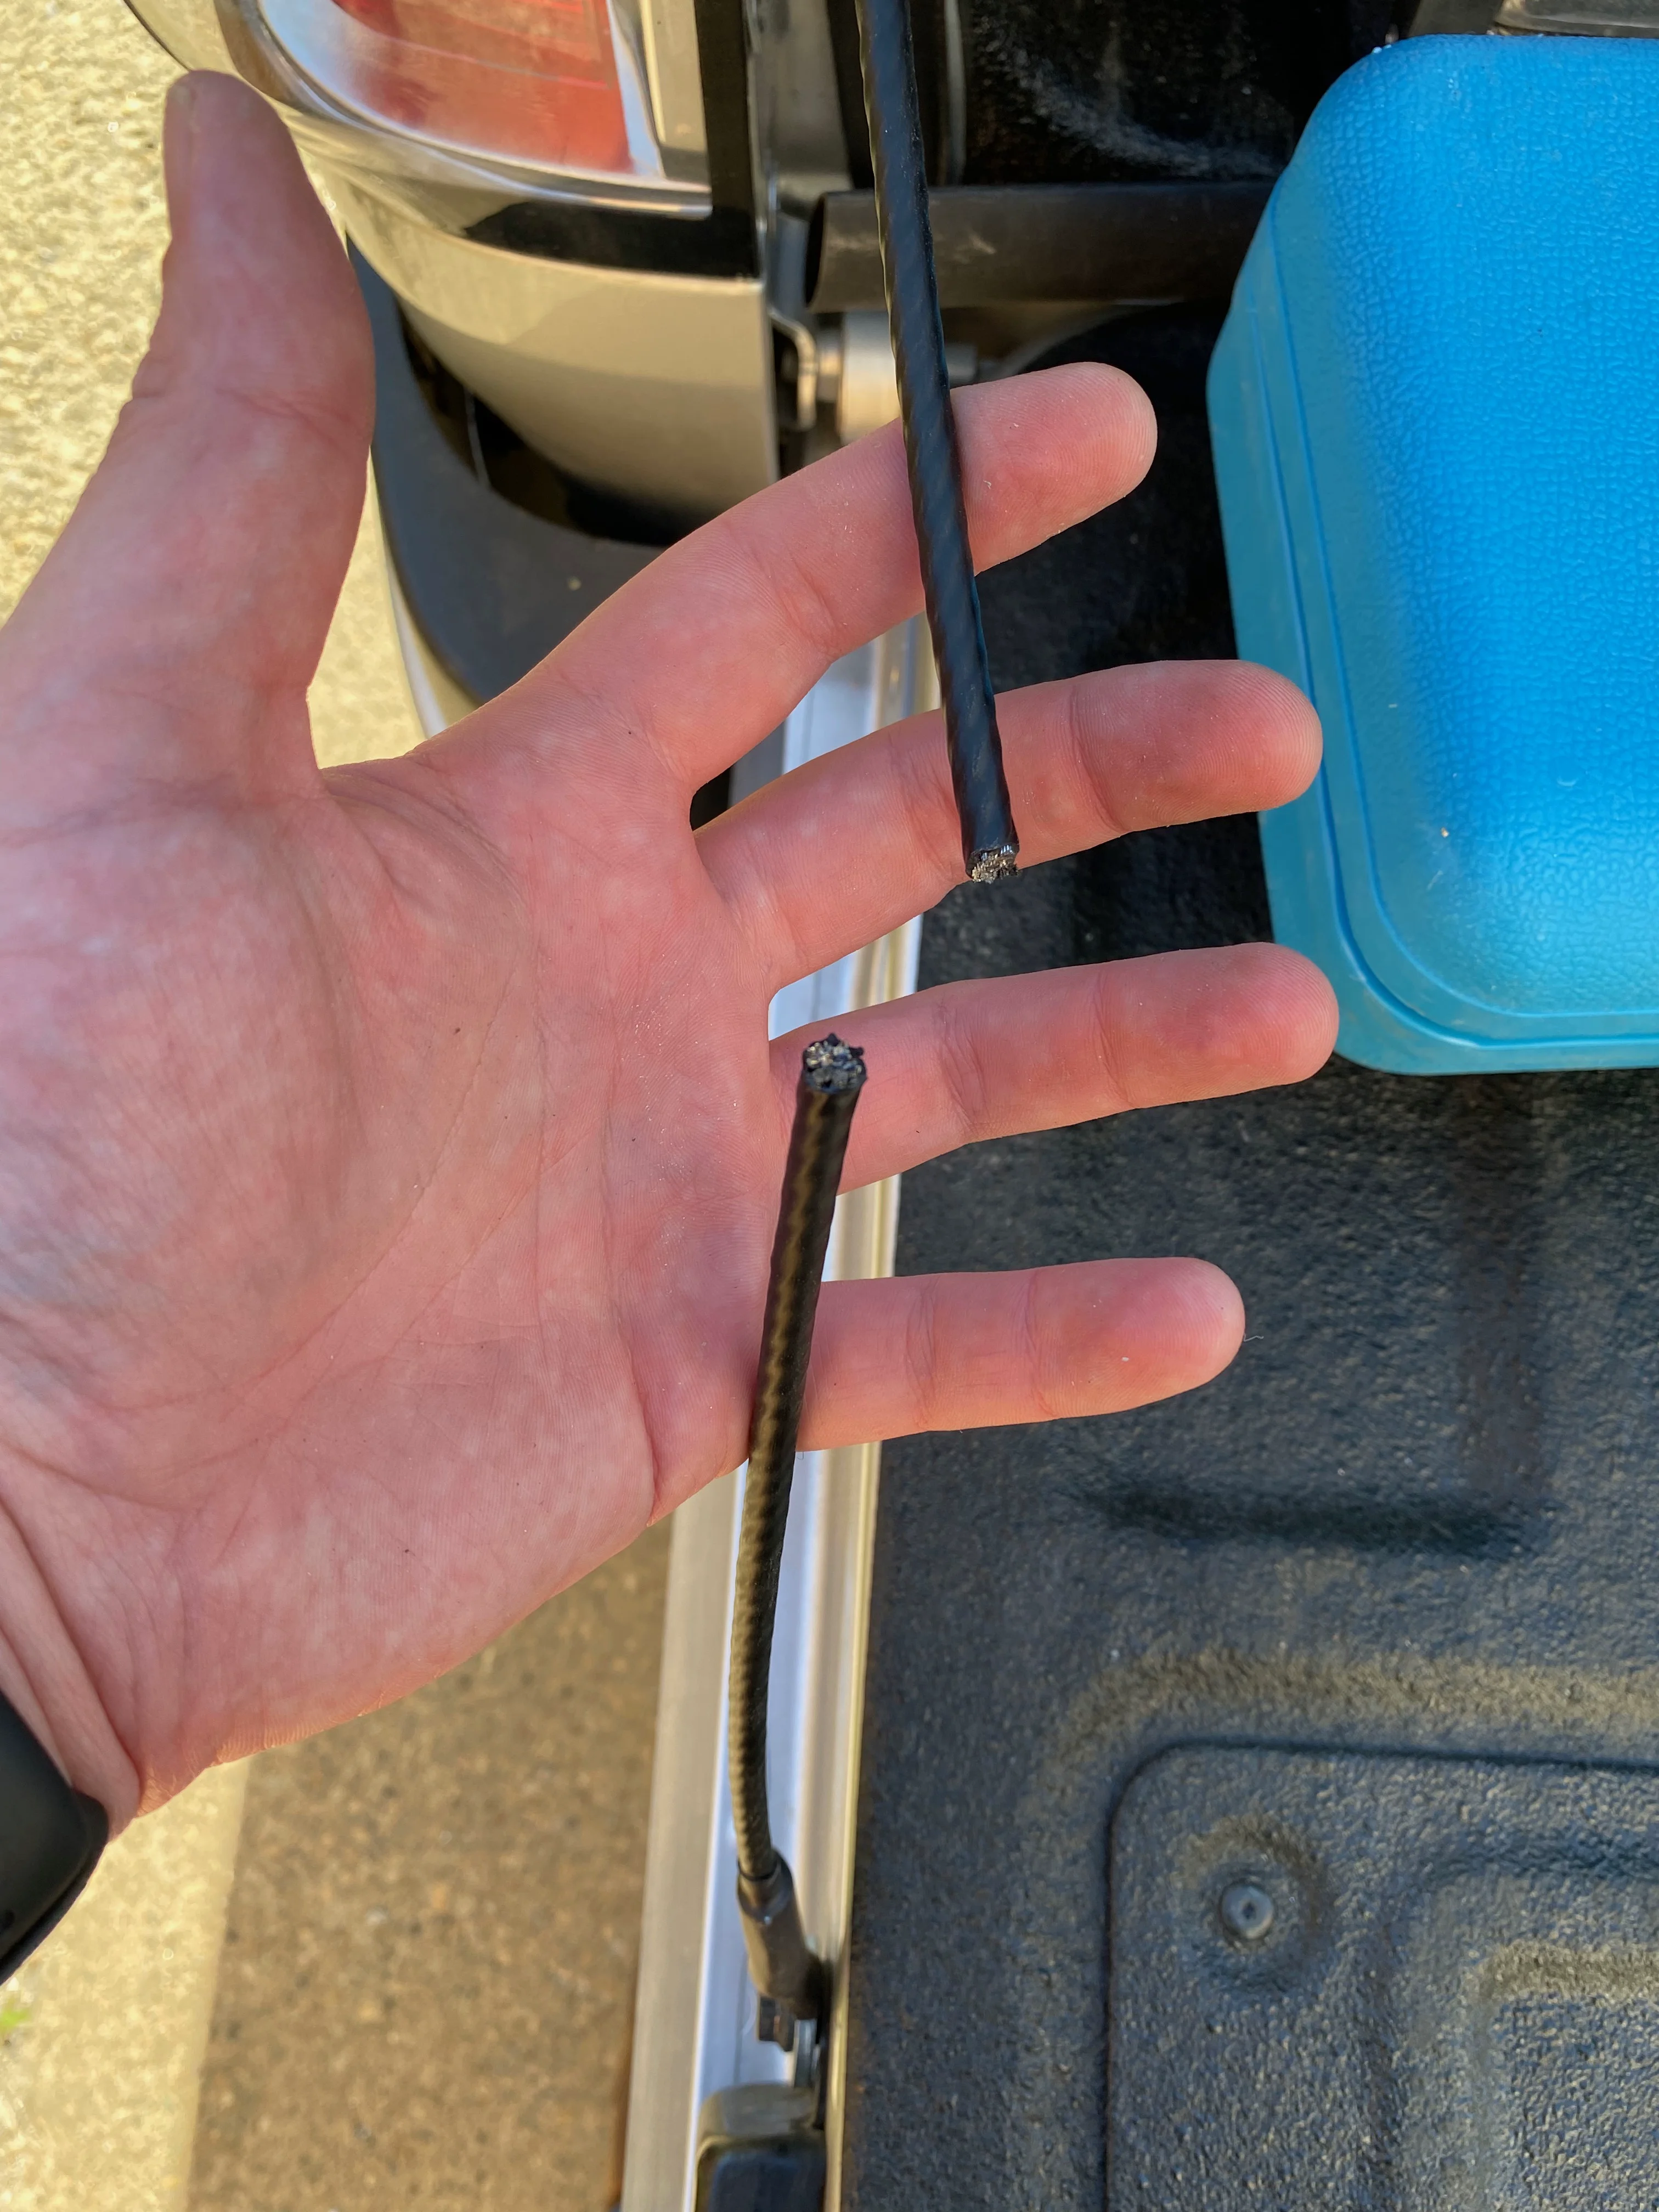
The bolts on the GM had different head sizes so the Dodge straps slipped off, but the dodge bolts were the same thread so it was easy to swap them.
The aluminum crimp is then covered with some heat shrink tubing. The heat shrink that fits over the crimp is too big to shrink enough to the wire, so the electrical tape is temporary. Once the summer is over, I'll be taking the crimps off and re-doing them with better shrink wrap.
There were a lot of little jobs that got done over the weekend, including getting the dust prevention system installed and set up and sealing the tub, but I'll do another post just on that once I get some better photos.
Part 12: Water & Dust Proofing the Tub
This was my biggest concern with the move from a wagon to a truck. I don't like dust and dirt getting on my gear—it's a massive pain because once dust gets on stuff, you grab that stuff, and then everything just has a bit of grime and dirt on it and instead of things "being clean" I find it's a constant effort of "chasing clean". I'm no germaphobe either—but when spending weeks or months at a time travelling, I'd rather not spend half my day wiping things down.
The wisdom of the internet is that it's nearly impossible to properly seal a tub. They just aren't designed for it and the manufacturing process leaves holes all over the place that need to be sealed. Here is the approach that I took:
- For the roof, I am using Faztek gaskets on the bottom to force the roof panels up against the upper lip of the extrusion slot. Before installing the gasket, my plan is to pump sealant into that upper crease so that when the panel is forced up, it makes a good seal against the extrusion.
- As you'll see in my previous post, for the doors I used double bulb weather stripping with superglued corners.
- For the truck bed itself, there were a few steps I took:
- Seal any holes in the floor with silicone.
- Pop off the plastic bed rail caps and give a generous coating of Fluid Film underneath. This protects the metal and provides a bit of a seal, as the plastic is clamped down tight onto the edge due to the cap and thus shouldn't leak. I may need to revisit this.
- I used a bulb seal on the front bulkhead
I then used Butyl Tape (came with one of the seals I got) and stuffed it into any big cracks. You can see it in the top right of this photo:
 and stuffed it into any big cracks. You can see it in the top right of this photo-.webp)
I then put a generous coat of Gorilla Spray Sealant anywhere that I was worried about; it blends in fairly well with the existing truck bed liner

With all of that, I'm confident I did as good as anyone on sealing the tub; there may be a need for a bit more but time will tell. But again—no matter how good a job I do, I'll never be totally water and Dustproof. Why is that?
The Positive Pressure System (PPS)
After much reading and research, the problem appears to be caused by the Venturi effect of driving through the world. The air whipping past the cap on the road causes a pressure differential inside versus outside, and that causes dirt and dust to actually be sucked up into all these nooks and crannies. The solution is to worry less about sealing things, and worry more about addressing this pressure variance. If you can create a situation where the pressure inside the cap is greater than outside, the air will be escaping through the holes instead of being sucked in (along with the dust).
There are a few ways to create such a system. I've heard of some people fitting compressors to keep a positive variance inside a canopy, but these work best on fully sealed units—i.e. welded Deck and Canopy systems - and since mine isn't that, a compressor solution would be a lot of duty cycles in my case and might not even work; I'd have to figure out CFM necessary to create the variance, power it, etc. and that just seemed not worth the effort. The Aussies often fit passive vents to their canopies, but these parts were expensive and bulky; I couldn't figure a good place to mount one on my canopy that would work. So, I improvised.
I settled on this device right here—it's a tub drain, one of the "push to open" style. It's perfect for this - it's already waterproof, after all! When driving in dusty climates, this can be popped open to create positive pressure in the cap. We can also close it if conditions require it.
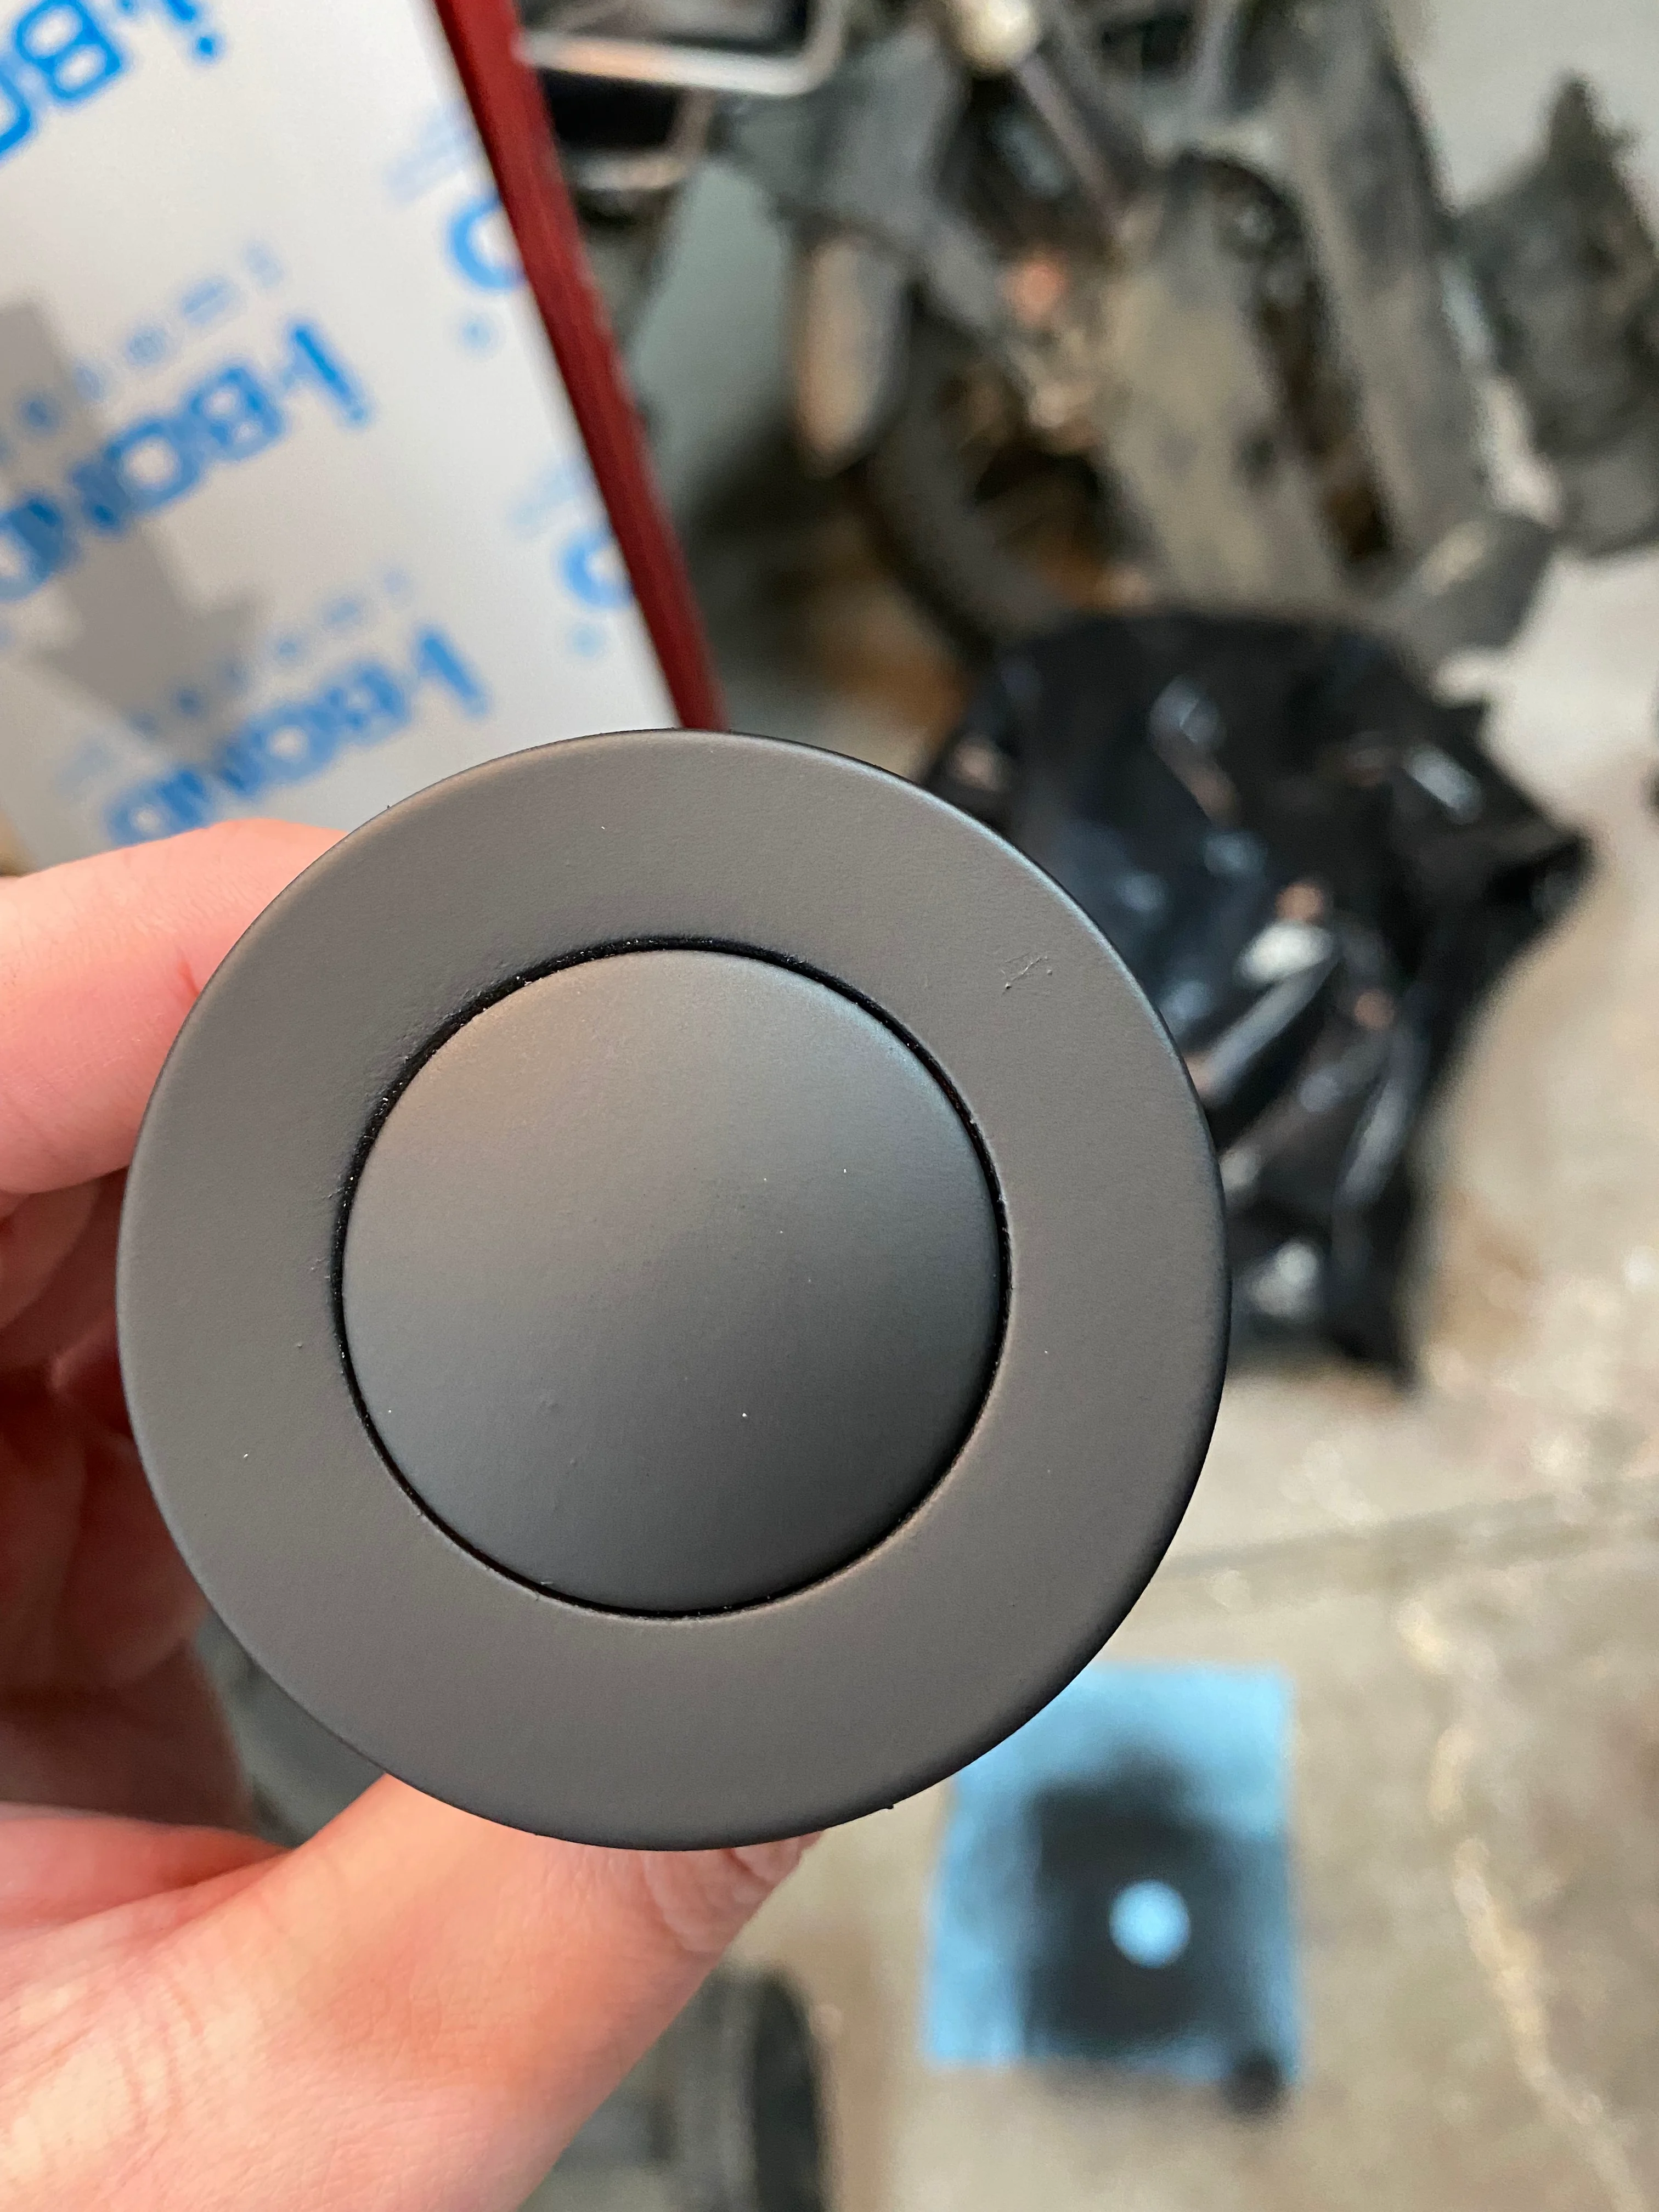
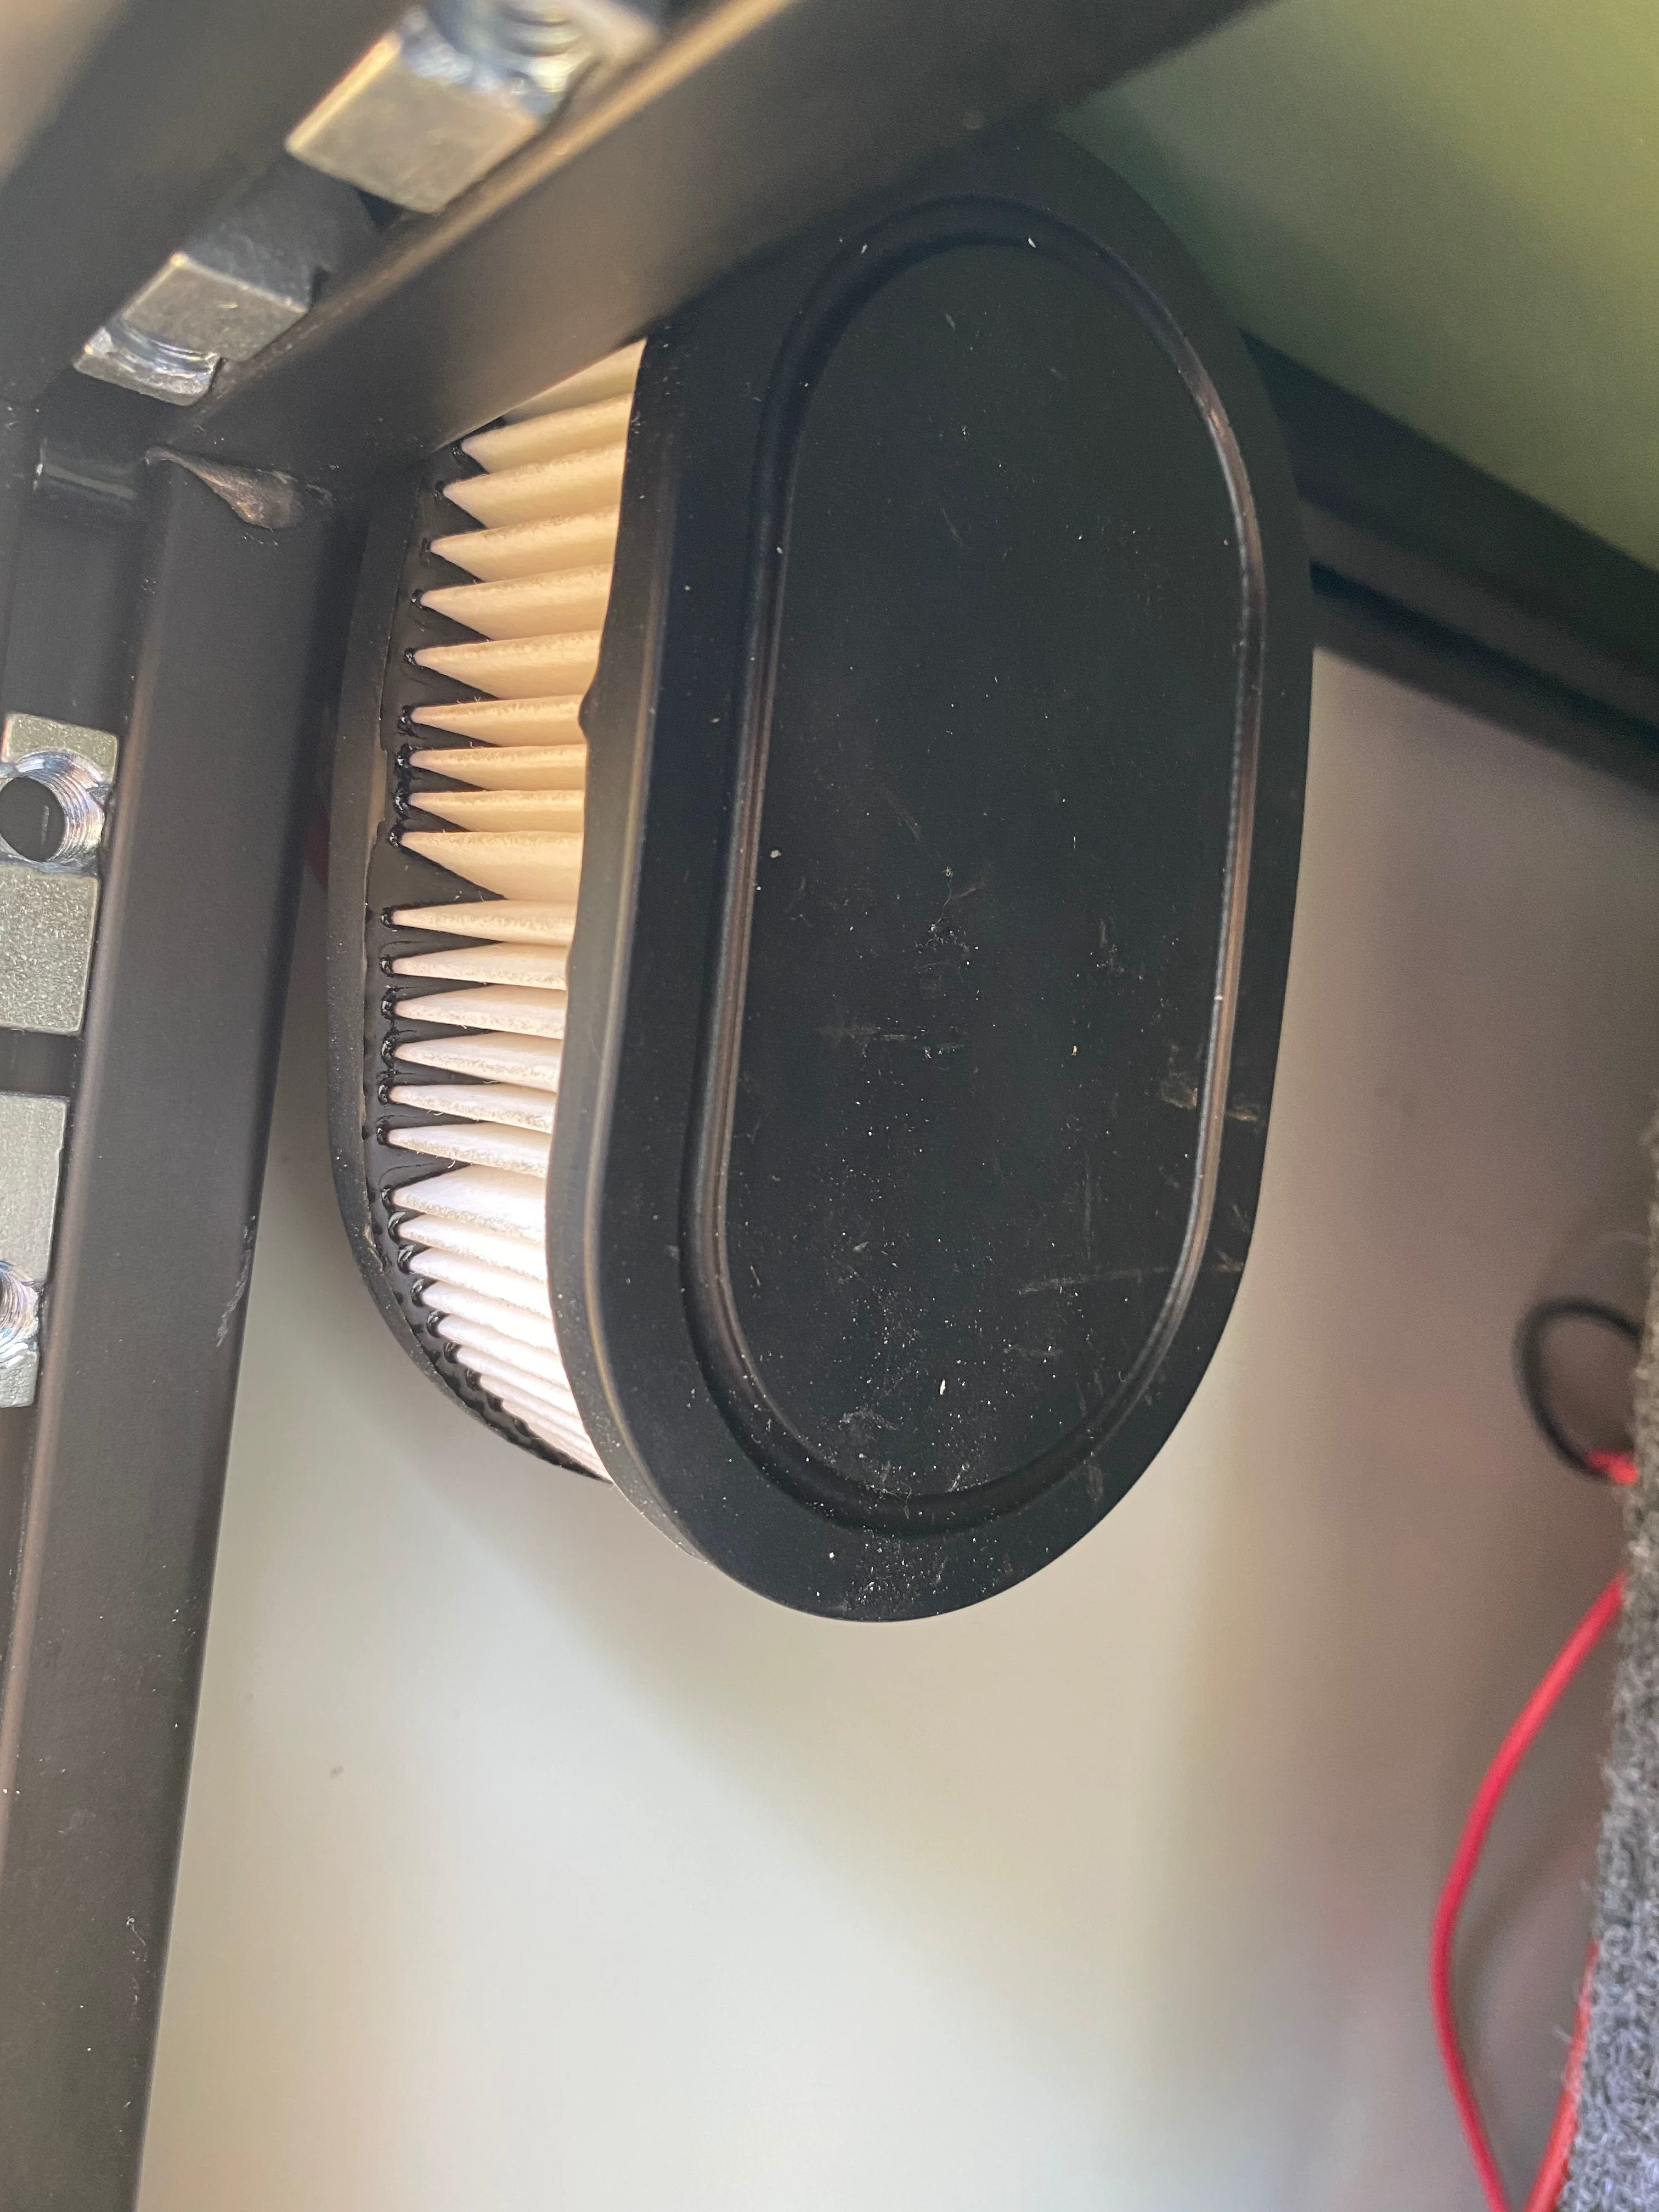
It's installed on the drivers side corner; this should get clean air being rammed right through it from the side of the truck. And, like having a snorkel, this should be high enough up for the air to be relatively dust free. In case it's not, though (as in, in case we get stuck behind someone else), I've also fitted a filter inside; this is just a lawn mower filter from Home Depot.
, I've also fitted a filter inside; this is just a lawn mower filter from Home Depot.webp)
PPS Open (Positive Pressure System)
.webp)
The back of the drain is standard plumbing sizes and is threaded inside and out; this should make it fairly easy to adapt virtually any sized filter to it should I need to. In fact, I'd be willing to bet that an oiled Unifilter stuffed in the drain would work perfectly fine.
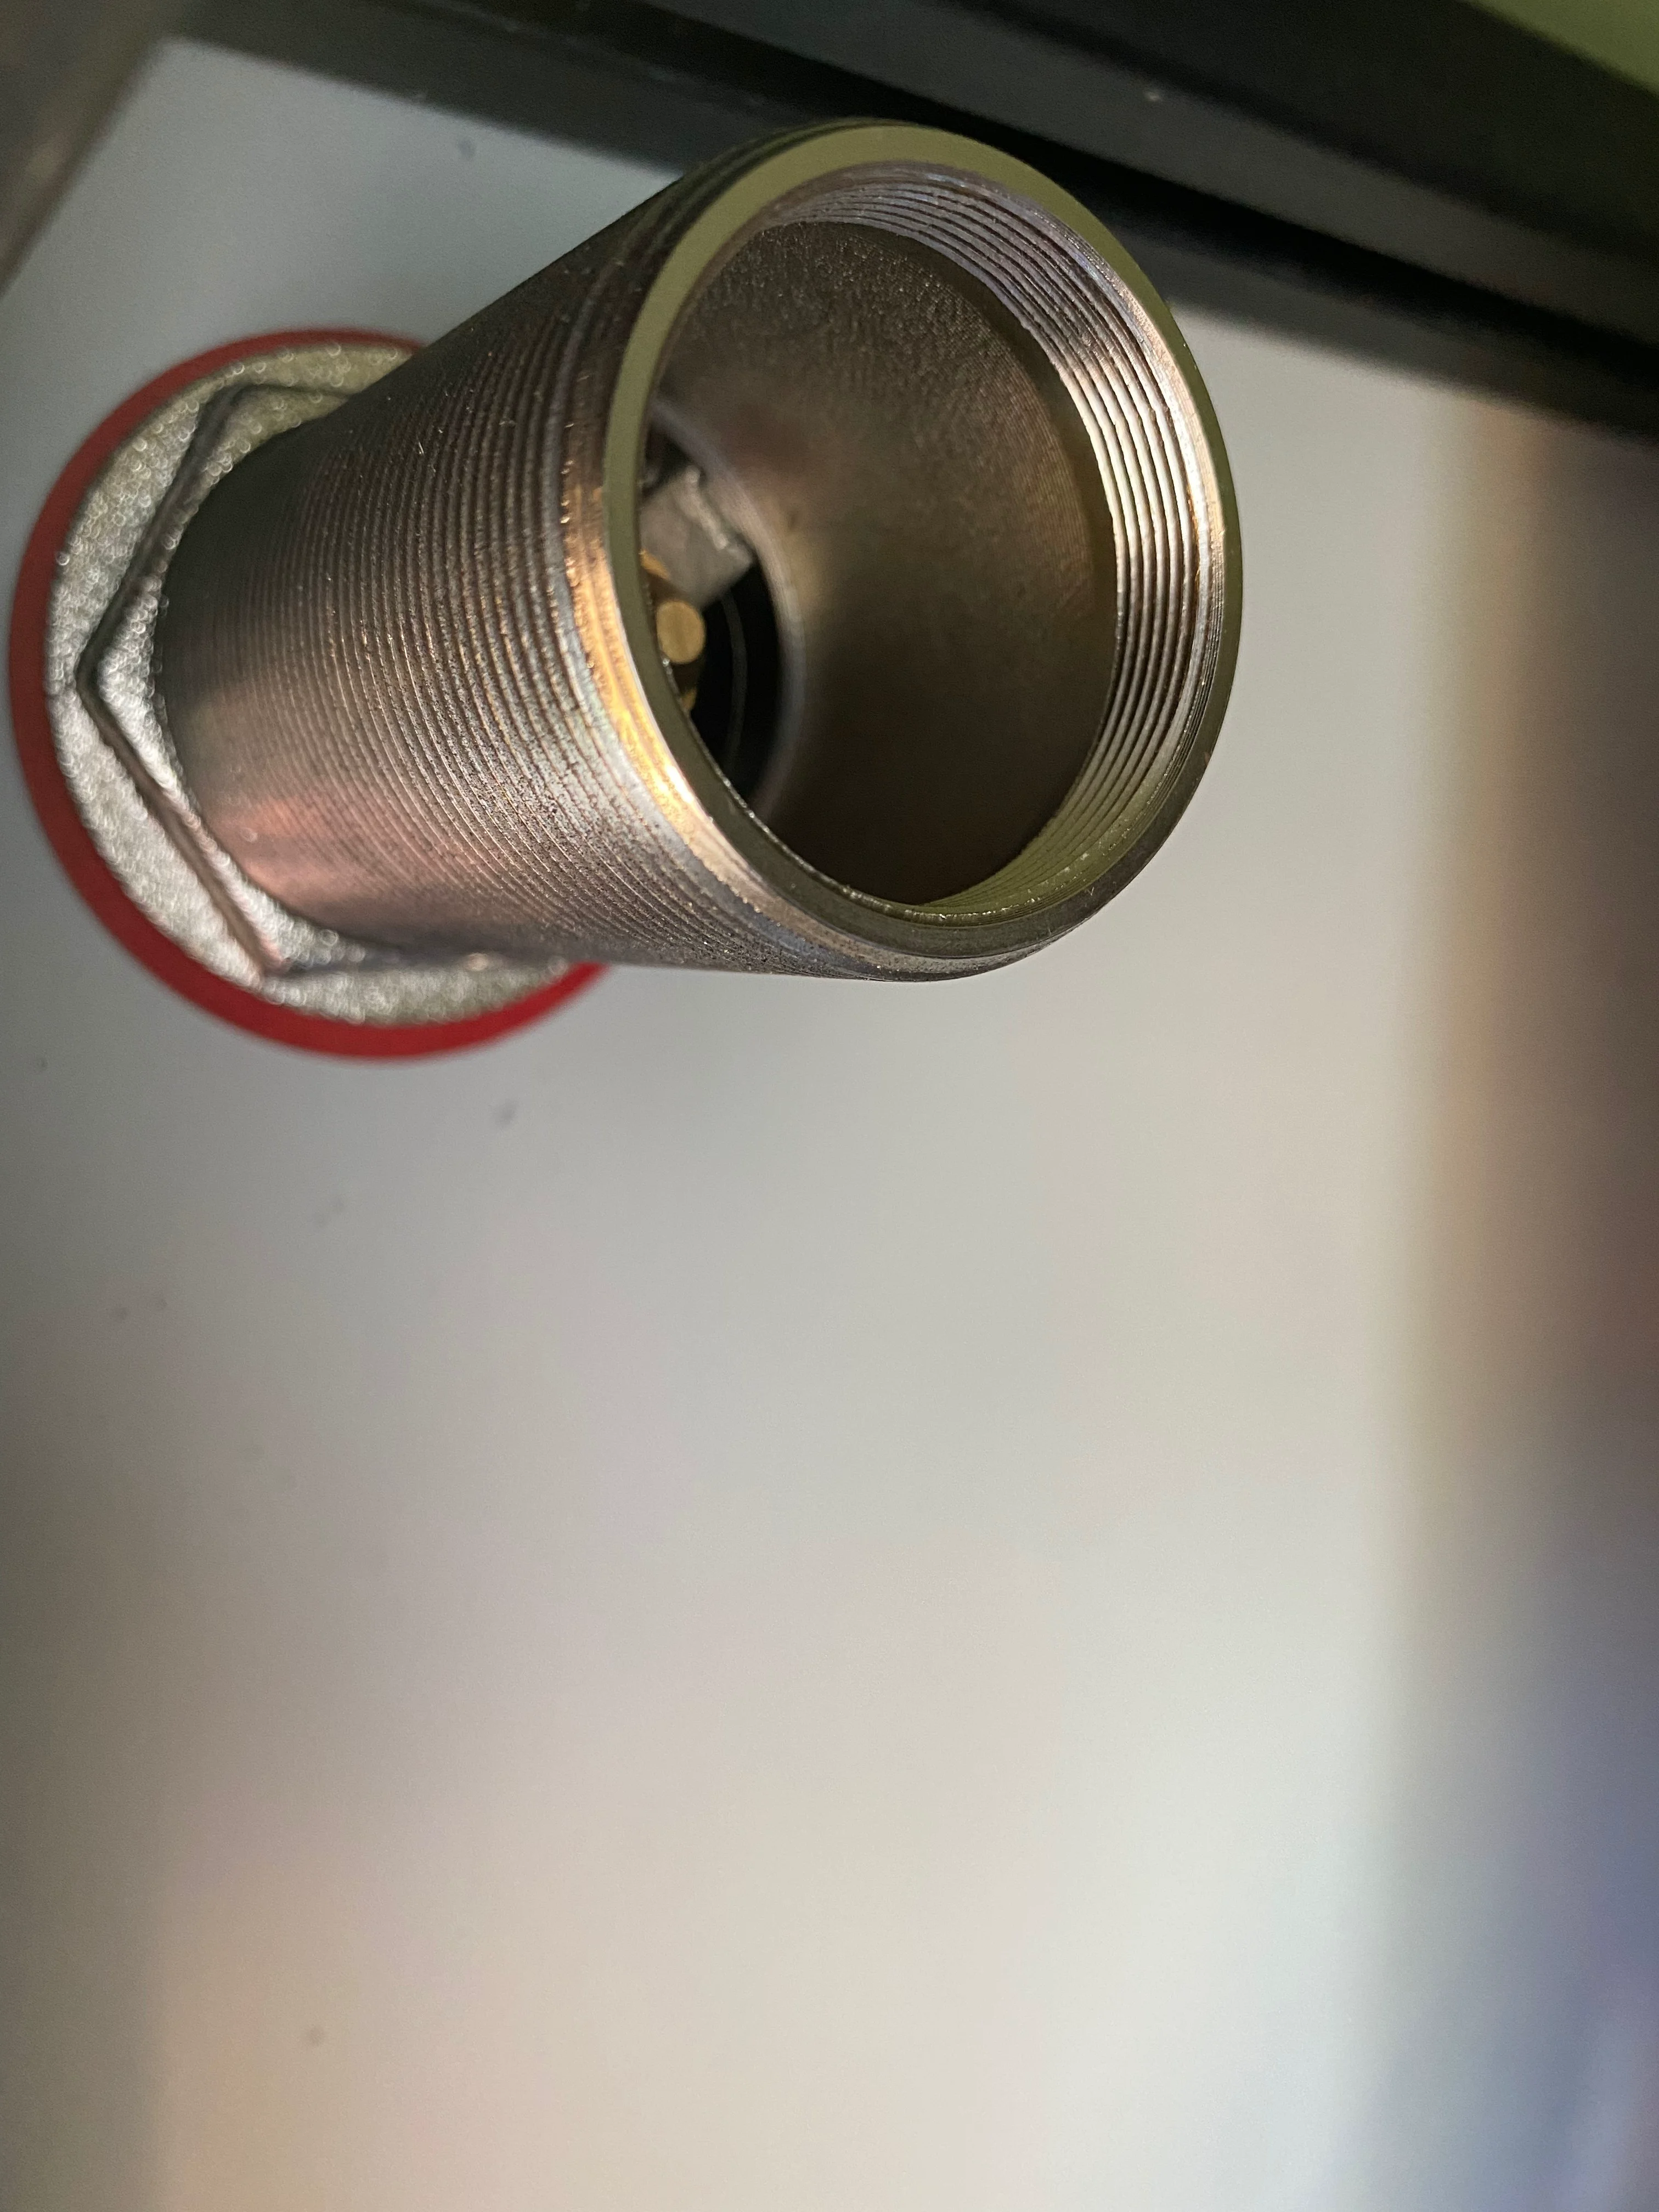
But this was on sale at HD for just a couple of bucks so I couldn't really say no.
With all of that, I should have a relatively dry and dust-free tub. I'll post back and let you all know how it goes.
Part 13: The First Big Adventure: 30 Days, 9000 Kilometers
It's been a fun July, and I can safely say that the truck worked out great. Myself, my wife, two German Shepherds, and our 15 month old child just spent the last month touring Canada and living out of this rig. There were definitely some things to improve but overall it worked out great.
In terms of what else I did, the above posts sum it up—I was in a rush to finish it, though, so I did a bunch of smaller projects in early July and I didn't do a good job photographing as we wanted to hit the road.
Final Preparations
First, I made a dog box. I did a rear seat delete of the larger portion of the split rear bench; this left a single seat remaining for the car seat and freed up 2/3rds of the area for my dogs. I used mostly scrap extrusion for this, and it was a simple matter of bolting together a frame and bolting a carpeted piece of wood down on top. A piano hinge allows me access to the storage underneath, and the dogs have plenty of room to lie down in multiple positions. The dog box structure is secured via the bolts that originally held the seat down, so in the event of an accident the box itself will stay put. There is an upright barrier between the dog box and the car seat, so the dogs can't inadvertently jump on my child when en route.
Second, I mounted the tent. I made cross bars with some additional extrusions, and mounted both the tent and awning to those pieces.
Third, I added some door supports. I was going to use gas struts, but instead opted for "old fashioned" steel rods.
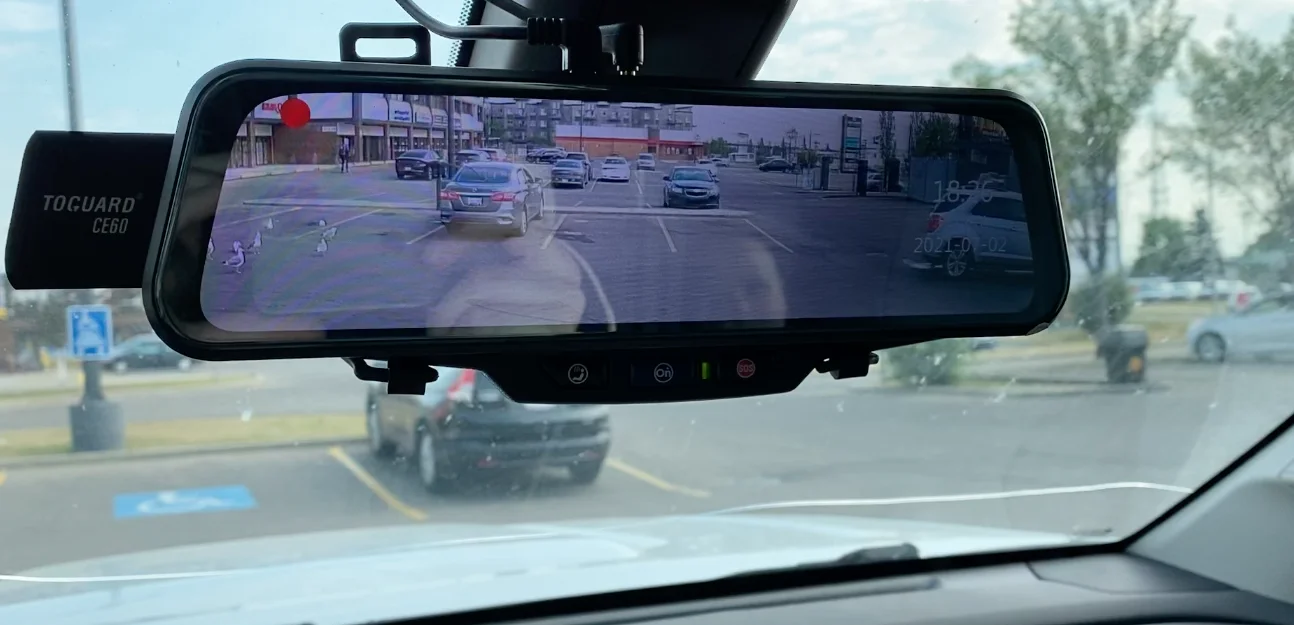
Fourth, I added a few safety features—a rear view mirror camera that doubles as a dash cam. This was the best thing I did, because a few hours outside Thunder Bay, Ontario, I was between two transport trucks and all of us had to stop suddenly. The truck in front of me had black smoke and squealing tires; I had to stomp on my brakes too, and my years on my motorbike has given me a habit of always looking in my mirrors to see what's coming whenever I stop. Sure enough, another transport truck was bearing down on us, also with smoke pouring out of his locked up wheels. I had enough time to gun my truck's motor and pull alongside the truck in front of us. The second truck came to a complete stop about 4 feet off the bumper of the bigger truck—we'd be sandwiched between them if not for this video rear camera.
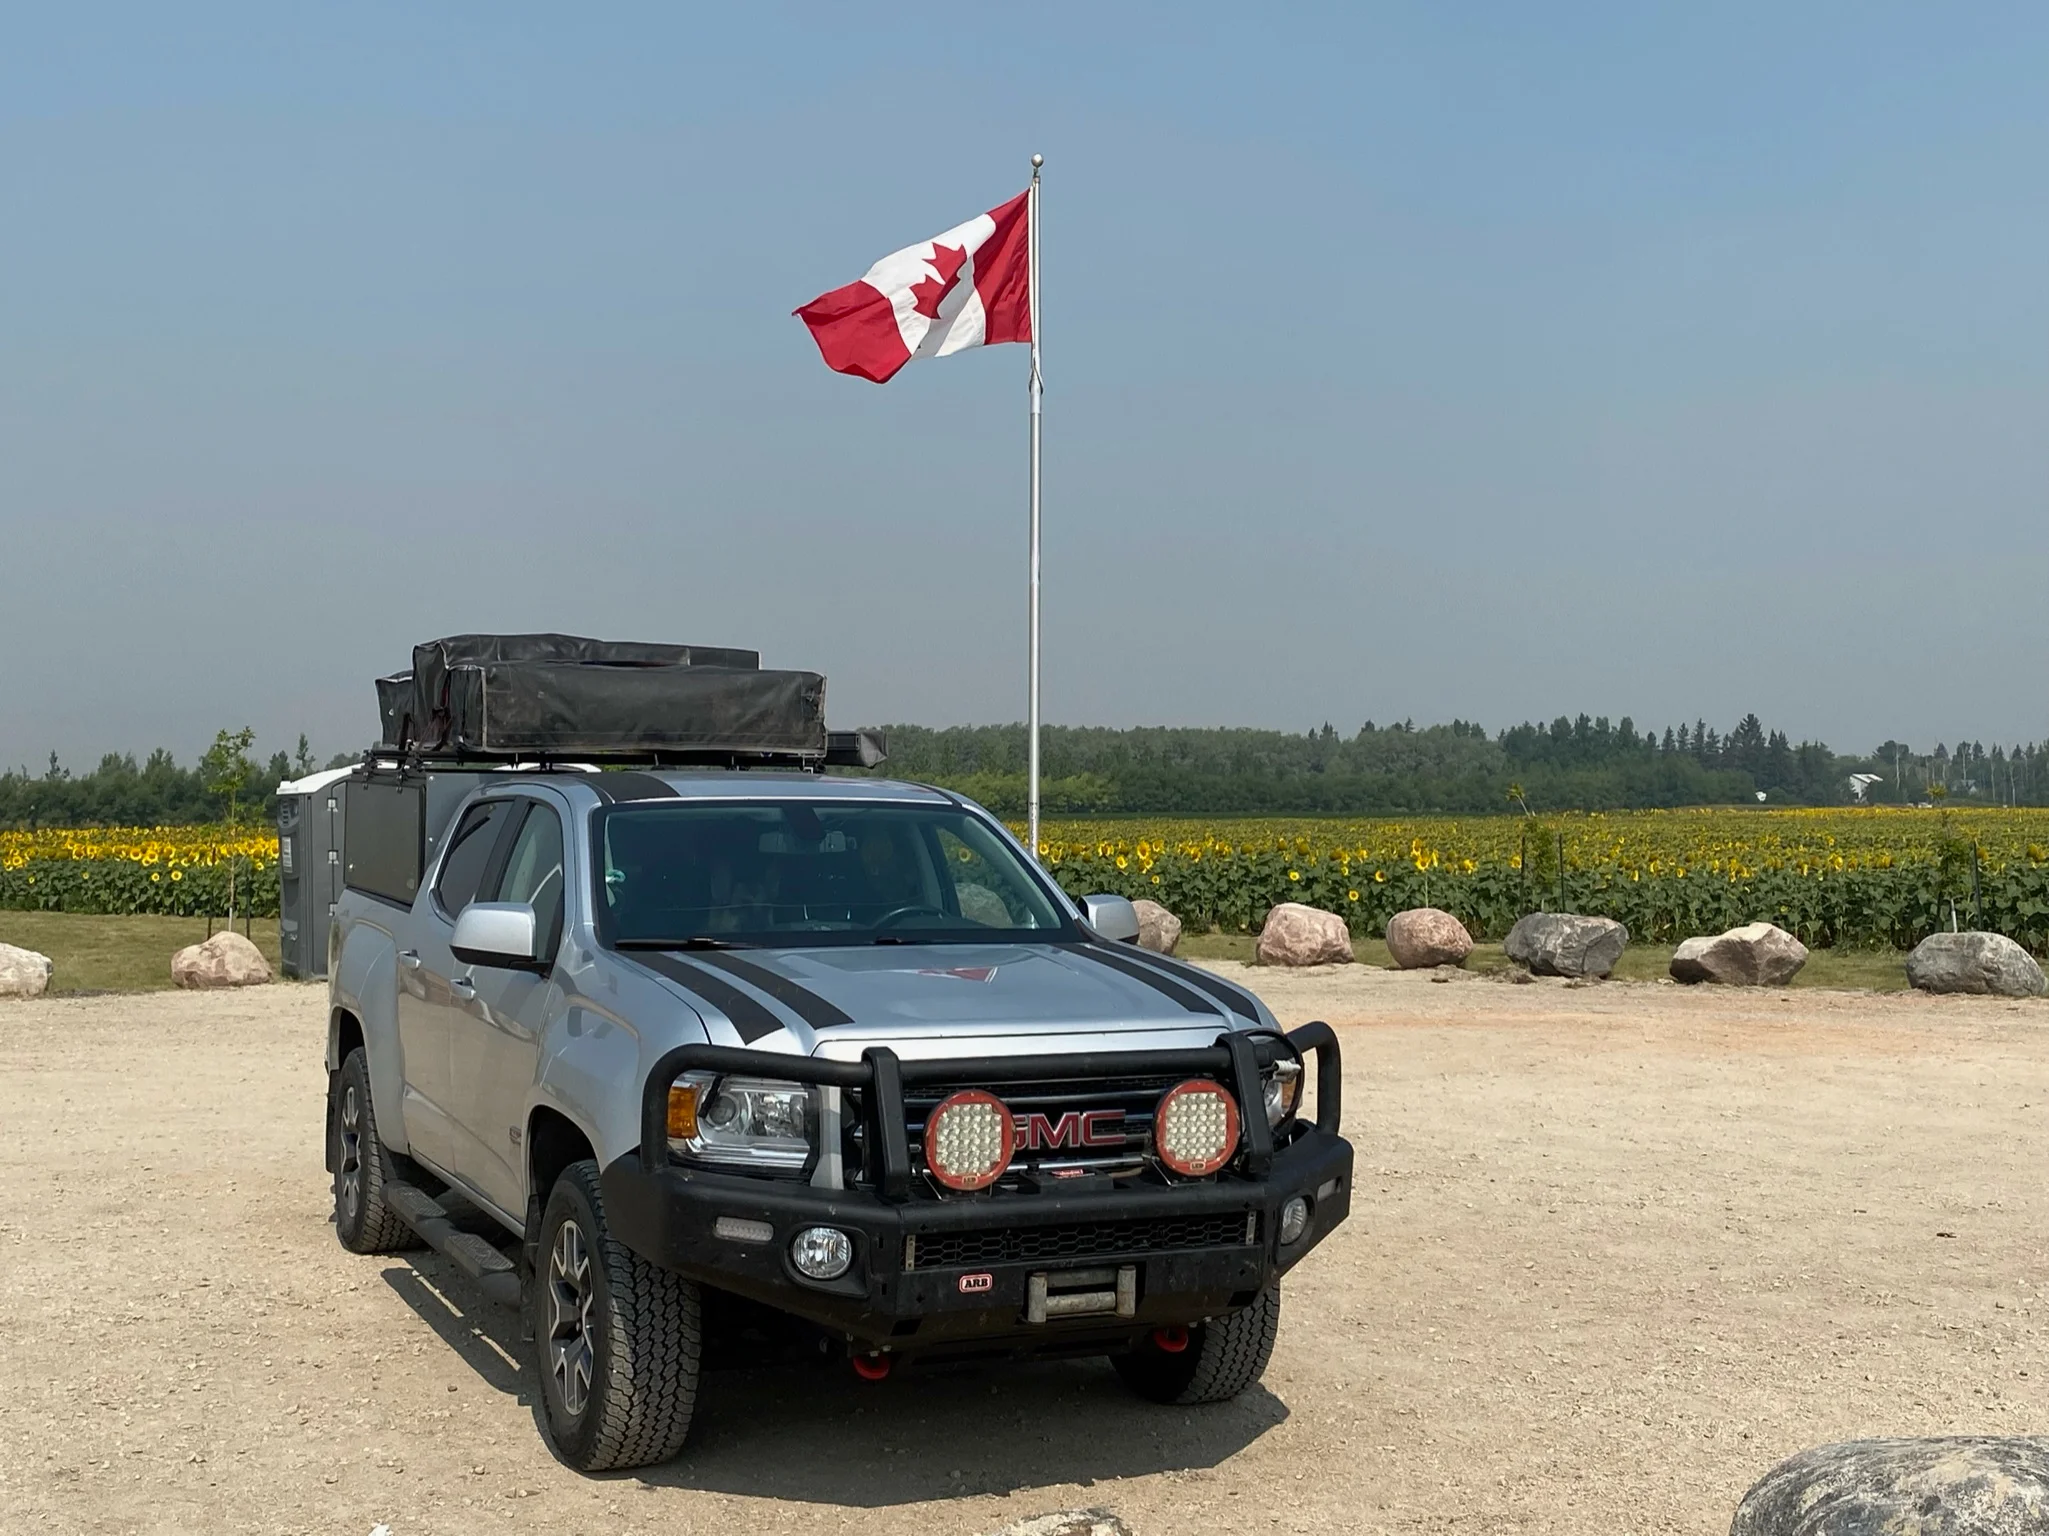
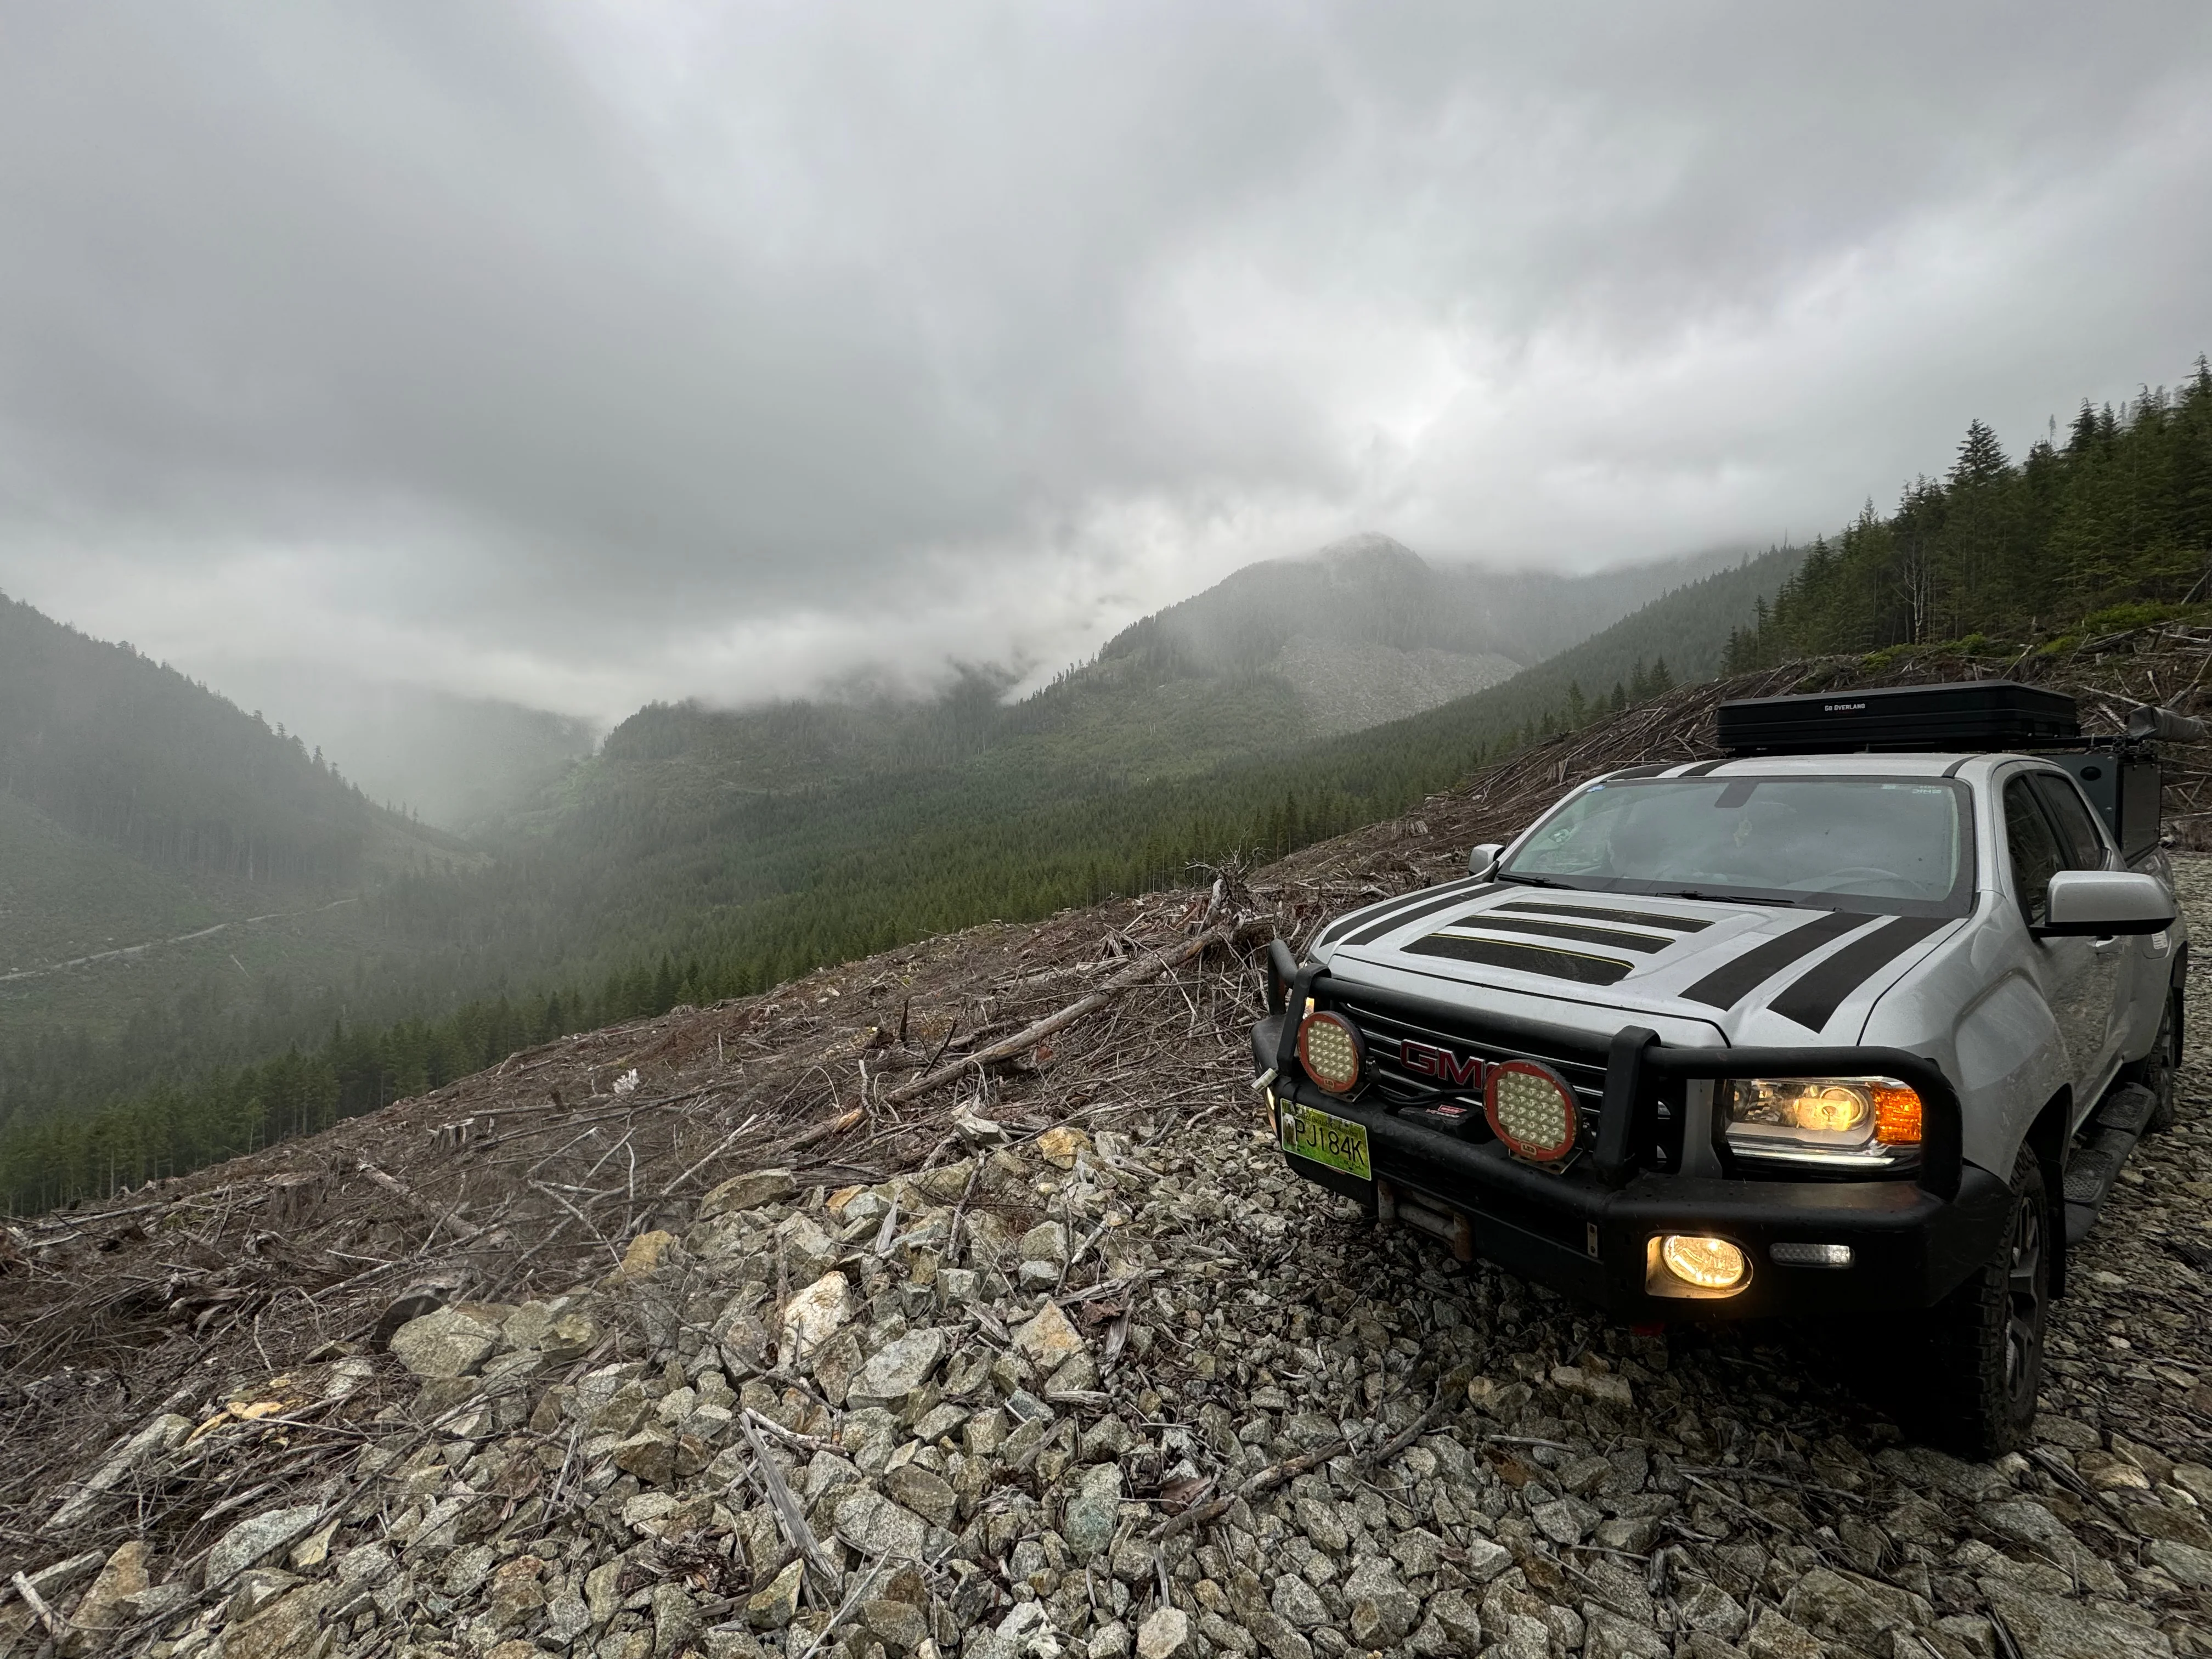
Okay—enough of the technical stuff. I may edit this into a video, but the summary of the trip is that we spent 30 days travelling and clocked just over 9,000 kms. We travelled from Edmonton to Toronto and back, with a lot of stops in between. The truck performed flawlessly, more or less. Here's some "in action" photos of the rig:
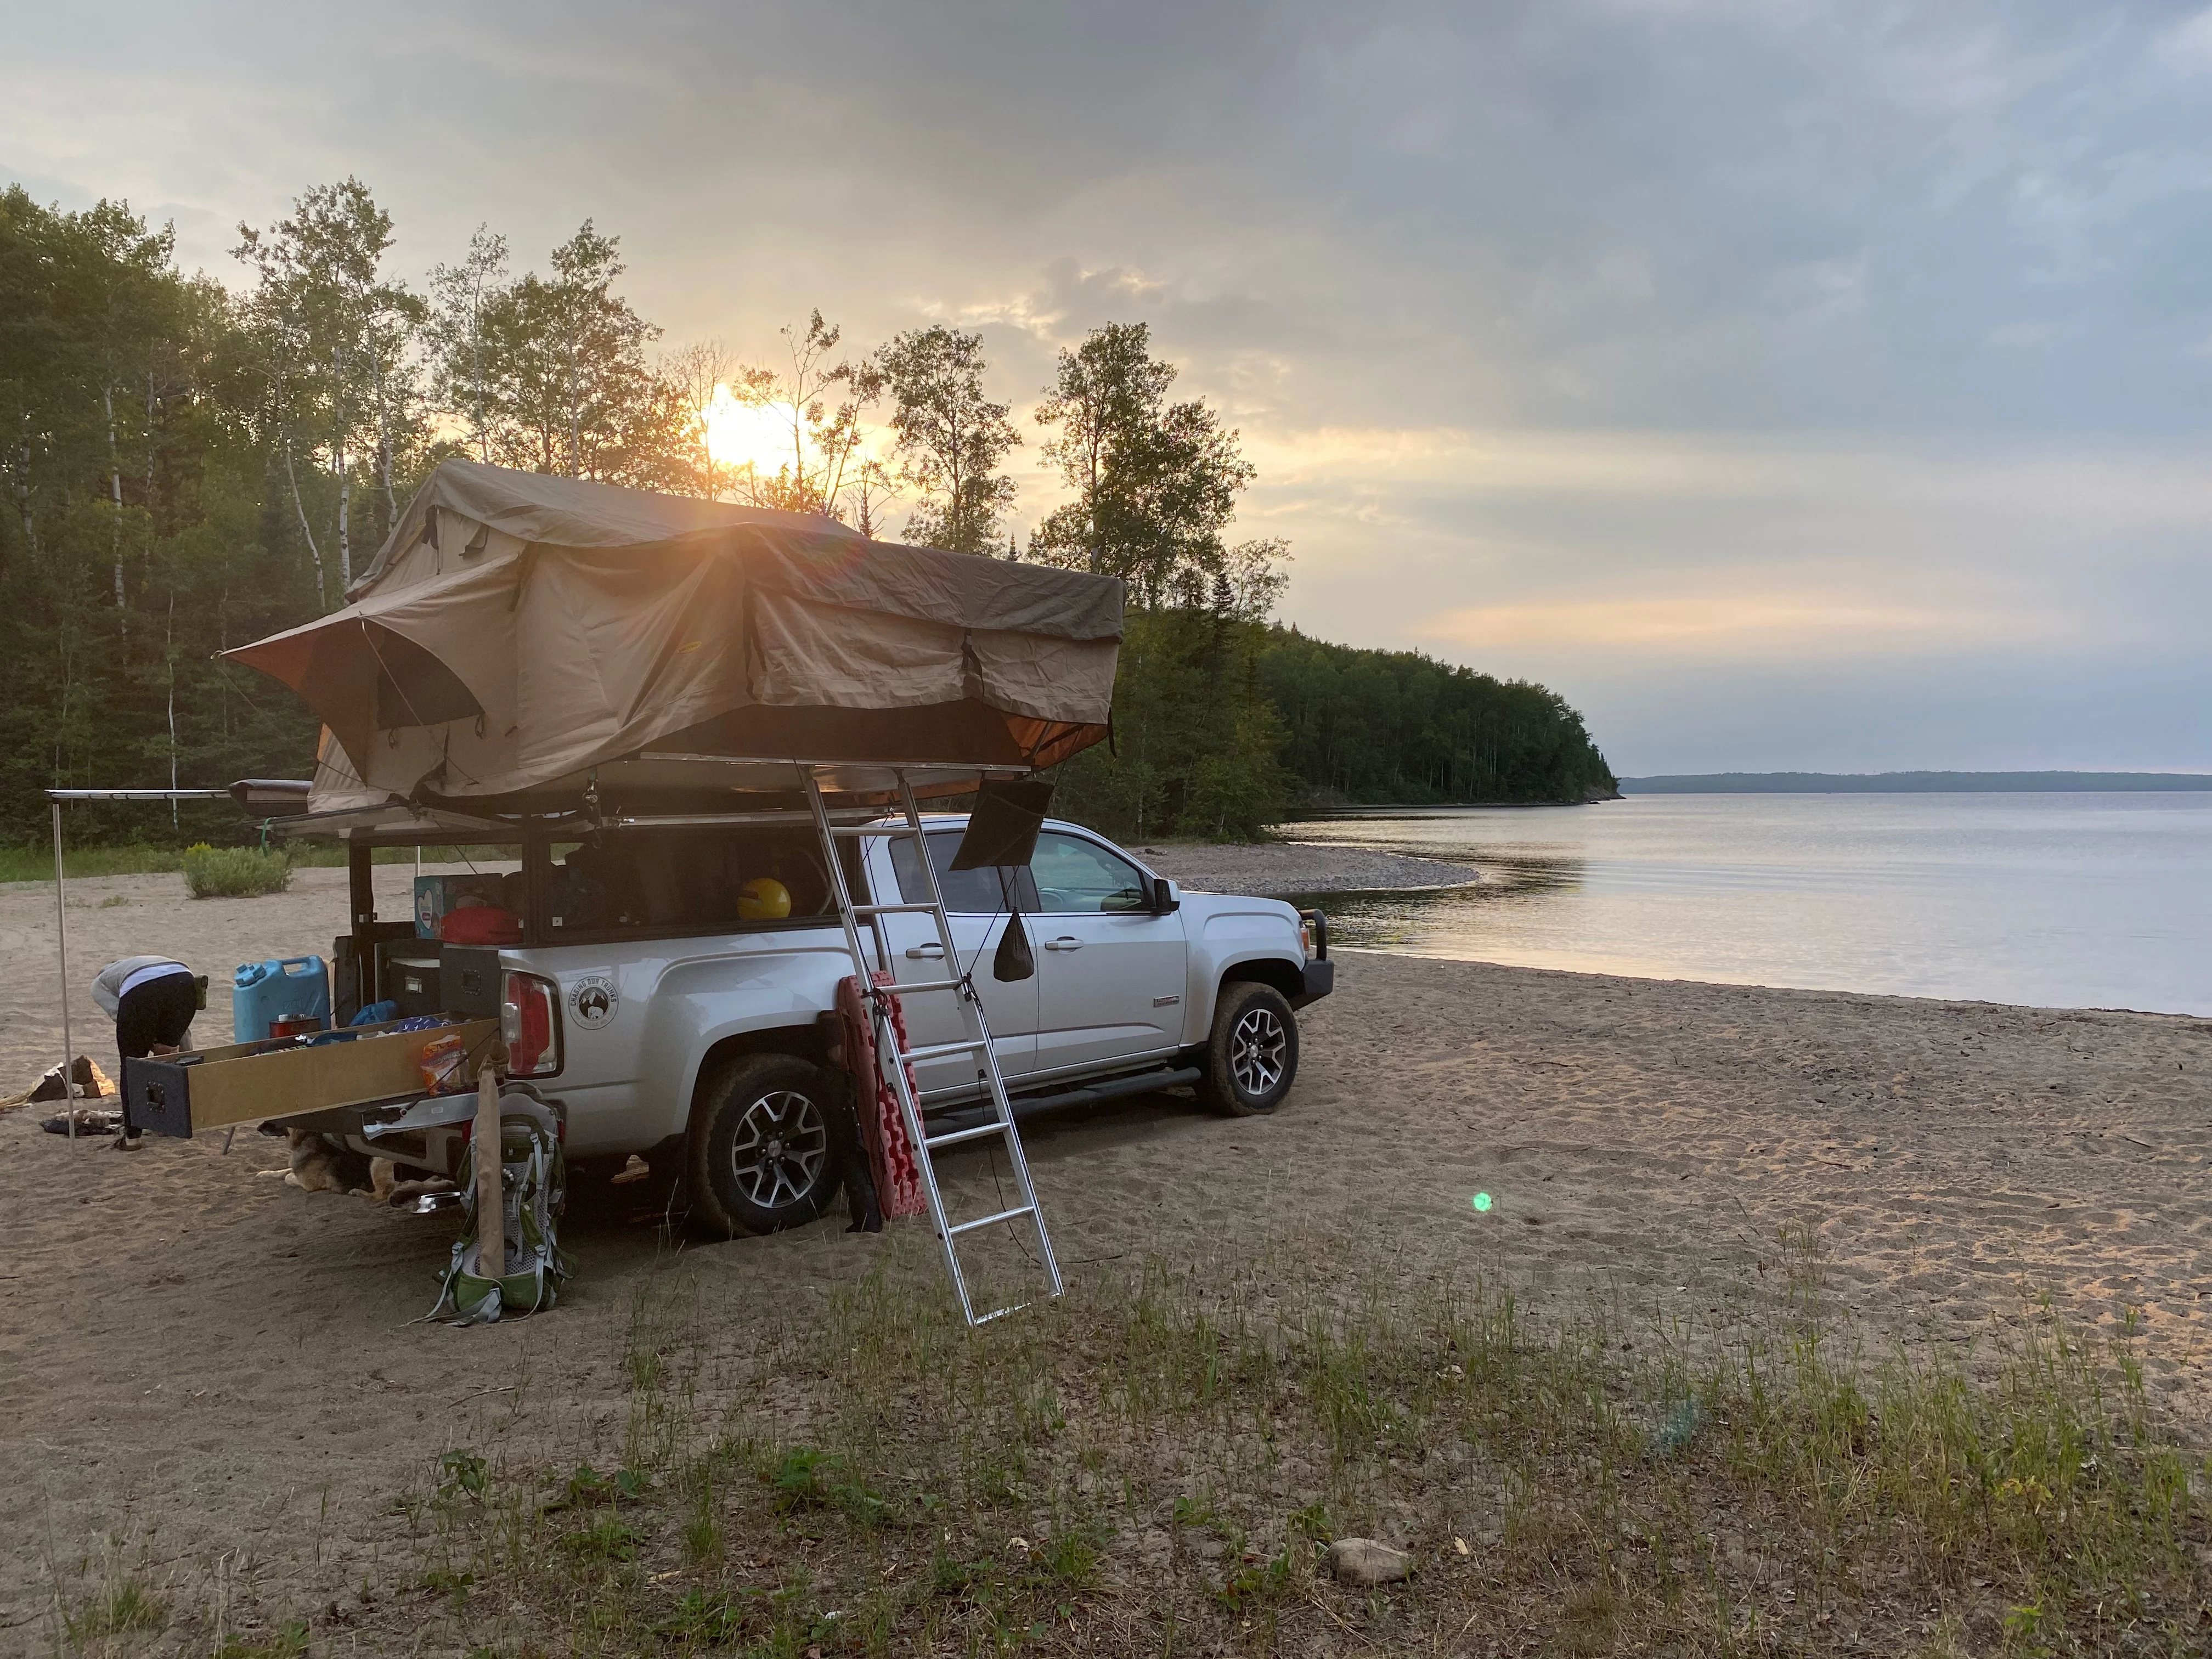

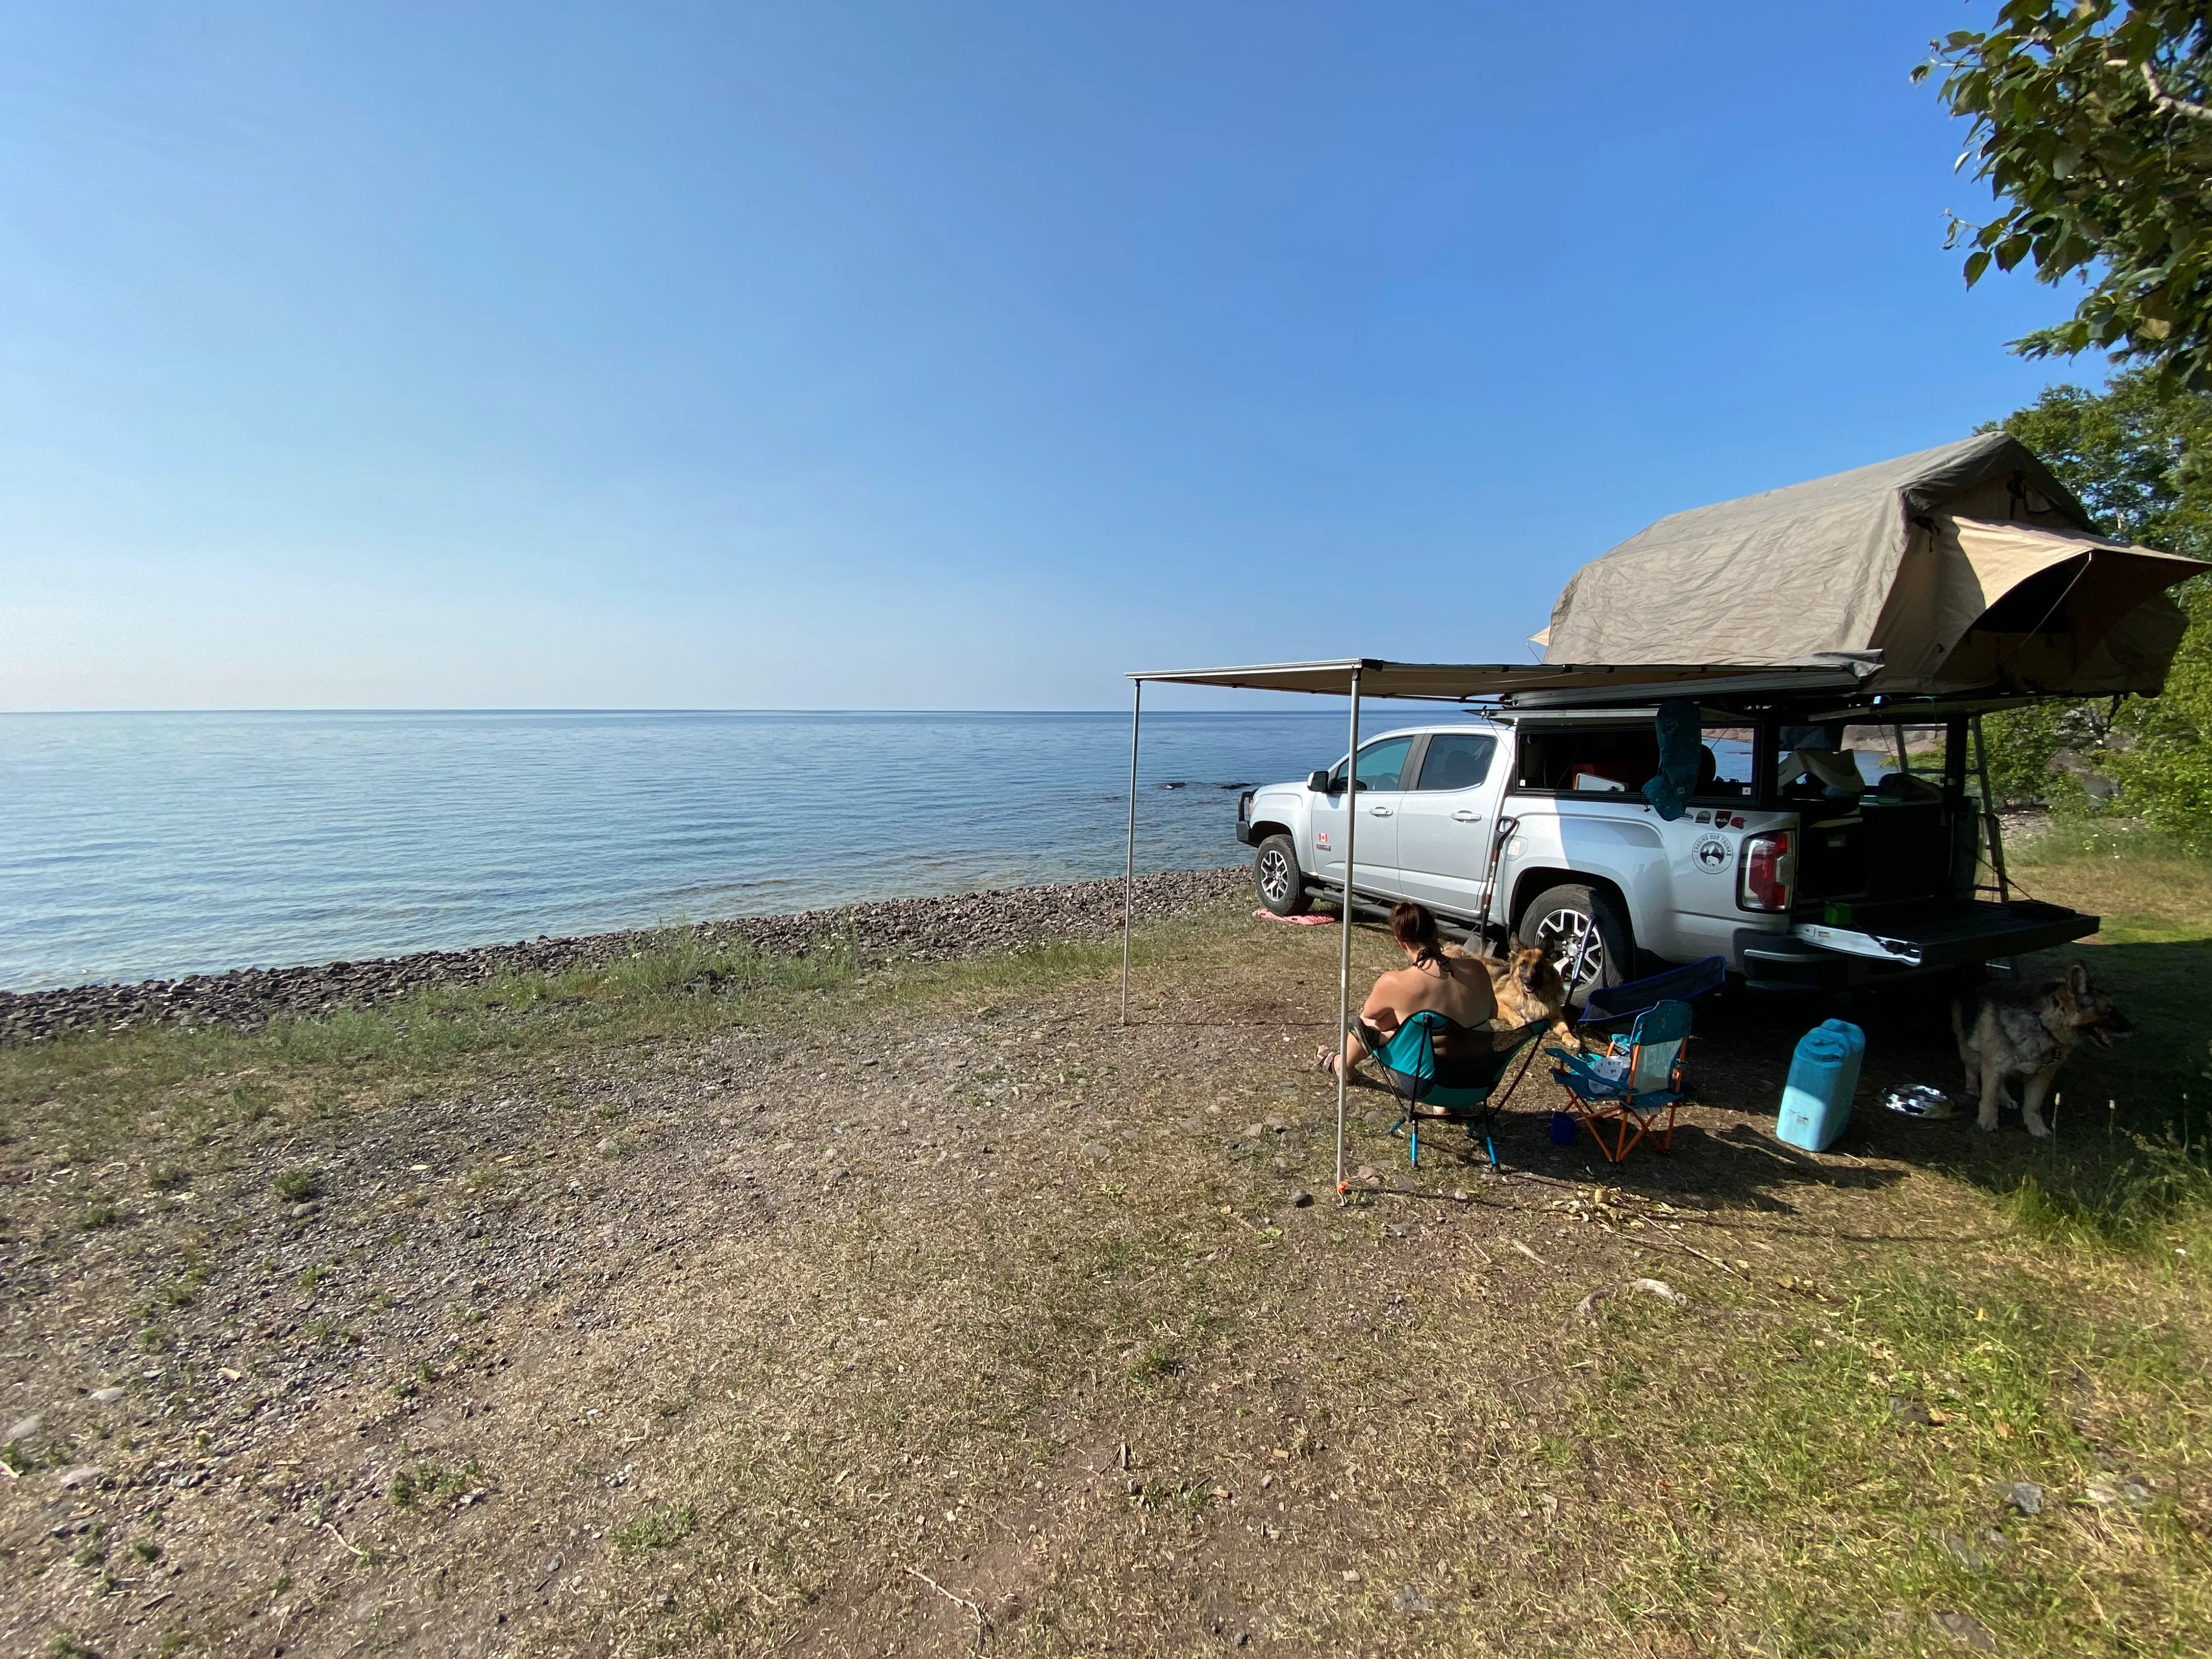
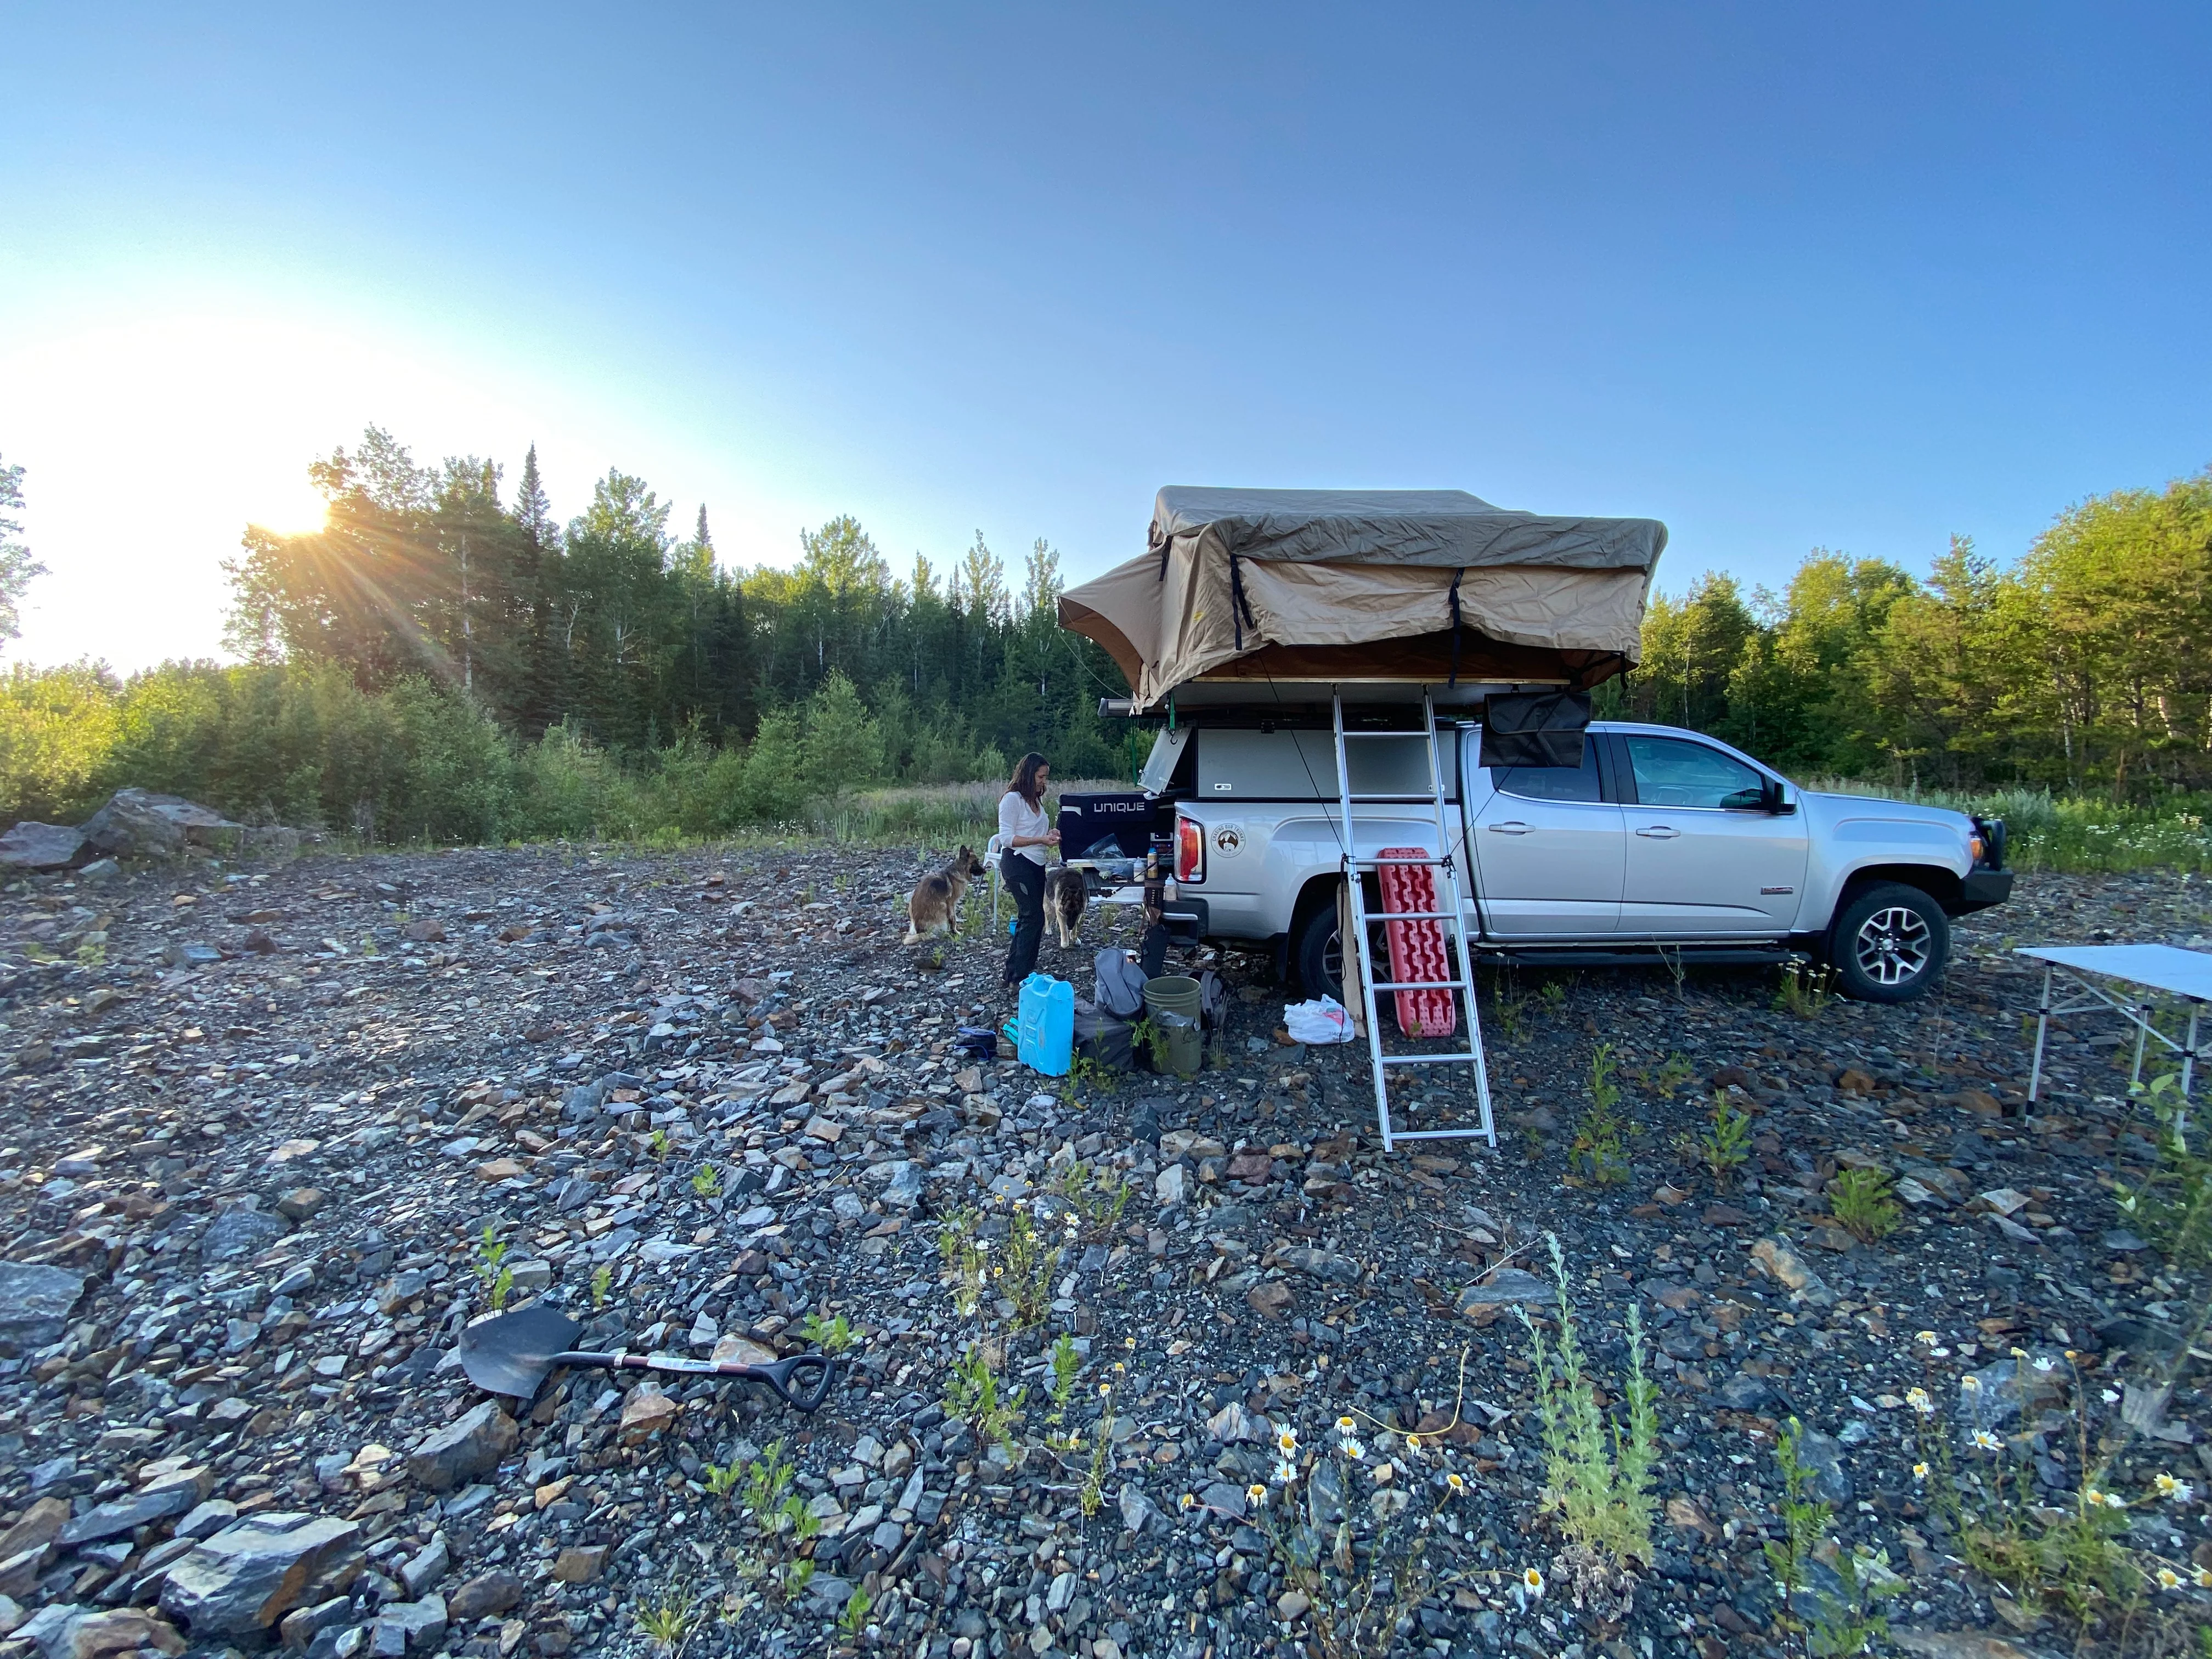
This build continues to evolve, and we're constantly learning what works and what doesn't. The journey of building out Pac has been as rewarding as the adventures we've taken in it.
Current Build Specifications
- Base Vehicle: 2017 GMC Canyon
- Front Protection: ARB Summit Bar (Colorado spec, confirmed fit)
- Winch: Warn VR8000
- Bed Rack: Custom aluminum (approx. 90 lbs)
- Electrical: Dual battery system with Renogy DC-DC charger, 600W pure sine inverter
- Storage: Custom plywood drawer unit with UHMW slides
- Fridge: Slide system with HD lockout rails
- Water System: FloJet pump (planned)
- Power Distribution: Blue Sea 12-circuit fuse box
- Goal Weight: 80% of GVWR with full kit